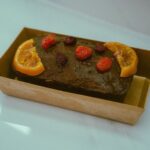
You can make cake pops up to two months ahead of your event. Freeze fully coated pops in an airtight container at 0°F or below, right after the coating hardens for 4–6 hours. You can also freeze uncoated cake balls for two months, then thaw and dip later.
When you’re ready, move frozen pops straight to the refrigerator and let them thaw slowly for two to three days; never on the counter. This keeps the coating smooth and the inside moist.
Thawed cake pops stay fresh for 3–4 days in the fridge, giving you plenty of time before your event. The steps below walk you through each phase so nothing gets missed.
Make Cake Pops Up to 2 Months Ahead: Complete Storage Timeline

You can make cake pops well ahead of your event with the right storage plan. Your complete storage timeline starts with freezing, which is essential for smart ahead planning. Coat your cake pops, let the coating harden completely, and you’re set for up to six weeks of lead time. Need more flexibility. Freeze uncoated cake balls for two full months instead. Dip and decorate them later when you’re ready. After coating, pop them in the fridge for up to one week. Skip pre-chilling your cake or coating before freezing; it’s unnecessary and saves you a step. When retrieval time comes, thaw them slowly in the refrigerator over a few days. Don’t rush it on the counter. This timeline keeps you prepared and ready for the celebration.

High-quality: The cake push pop containers with lids are made of food-grade PET plastic material, healthy and environmentally friendly. The cake push pops are thick enough to ensure not bend or crack. The cake push-up pop shooter is sturdy and durable, which can keep your cake fresh and clean.

Durable Rectangular Design: Perfect for storing and serving cakes, this sturdy container keeps your treats fresh and secure

【Premium Food-Grade Material】Crafted from high-quality PP plastic, these cake push pop containers are BPA-free, non-toxic, and odorless. Designed for durability, they are freezer-safe and sturdy enough to resist bending or cracking, ensuring your desserts stay fresh and clean.
Freeze Cake Pops for Up to 2 Months

You can freeze your cake pops for up to two months if you package them right. Know exactly how long they’ll last, how to wrap them tight, and how to thaw them safely. Start by placing fully coated pops in an airtight container without pre-chilling them in the fridge first. When you’re ready to enjoy them, move the container straight to the refrigerator and let them thaw gradually overnight.

The Staple of Your Kitchen: Whether you want to take your lunch to-go, organize for meal-prep, or send some delicious cookies to your loved ones while making sure the food remains fresh along the way, these plastic storage containers are what you need!

2 Pack - Rectangular plastic food storage containers

PERFECT SIZE FOR CAKES: Measures 12 x 12 inches with a 4.75-inch height – ideal for holding up to 10-inch round cakes without damaging decorations or frosting
Freezing Duration Limits
You’ve got a solid two-month window for freezing duration, which provides ample time for busy seasons.
Once your coating has fully set, place those cake pops into an airtight container. No extra steps needed; just seal them up tight so moisture stays out. When you’re ready to use them, skip the counter. Instead, move them to the refrigerator for thawing, letting them soften gradually over two or three days. This slow thaw keeps your coating smooth and your cake moist.
Check that your chocolate or candy shell completely covers each ball before freezing. After thawing, they’re practically fresh-made. Your customers won’t taste the difference, and you’ll have advance preparation without the stress.
Proper Packaging Methods
How should you wrap cake pops so they stay perfect for two whole months? Start by letting the coating harden completely, keeping them upright in a holder so they keep their shape. Once they’re rock-solid, you’ll want to focus on packaging that locks out air and moisture. Slip each cake pop into a clear poly bag, tie it with a ribbon, then nestle them into an airtight container. This double layer protects against freezer burn and keeps flavors fresh. For cake pops freezing, your storage temperature matters significantly; set your freezer to 0°F or below. Label your container with the date so you know when two months approaches. With smart packaging and steady cold, your treats remain suitable for serving, and your preparation is complete.
Thawing Process Steps
Once your cake pops have spent their time in the freezer, it’s time to bring them back. You’ll start the thawing process by moving them straight from the freezer to refrigeration. This gradual shift takes several days and preserves the perfect texture you worked hard to create.
Don’t leave them on the counter to thaw. Room temperature changes happen too fast and will ruin your cake pops. Keep them in the refrigerator until they’re fully thawed instead.
After refrigeration completes its work, your cake pops emerge ready for final packaging. You’ve protected your treats through every step, and they’re now prepared to delight your customers. This careful thawing process ensures your advance planning results in treats that taste fresh and look beautiful.
Skip the Fridge: Freeze Cake Pops Without Pre-Chilling

Why add an extra step when you don’t need one? You can freeze cake pops right after coating and packaging. Skip the fridge entirely, and you’ll save time while keeping your treats perfect.
To freeze cake pops without pre-chilling:
- Package immediately – Seal your coated cake pops in an airtight container before freezing.
- Protect the texture – Tight sealing stops freezer burn and keeps coatings smooth.
- Plan your thawing – Remember, you’ll move frozen cake pops to the fridge later for gentle thawing.
Freezing preserves quality for up to six weeks. Your cake pops stay fresh, moist, and ready for customers. This method eliminates extra prep steps while maintaining product quality for your schedule.

Package Includes: 100 pieces celllo bags and 100 pieces gold twist ties, the quantity can meet your various needs for wrapping cake pop, lollipop, cookies, candies, snacks, chocolates, marshmallow, etc

Package Including: 100 treat bags with 100 twist ties, for daily use and party supplies, great decorating accessories for your candies, dessert, bakery, cookies, chocolate or party favors

FOOD GRADE SAFE: 100% new Oriented Polypropylene (OPP), non-toxic, odorless, environmentally friendly, clear than PP plastic bags;
Thaw Frozen Cake Pops in the Fridge (Not on the Counter)
When you’re ready to serve those frozen cake pops, patience pays off. Start thawing them in the fridge, not on the counter. Pull your make ahead batch from the freezer and place it directly into the refrigerator. Plan for a slow thaw over two to three days. This gradual process keeps the chocolate coating smooth and snap-worthy, while the inside stays moist and tender. Quick counter thawing creates condensation that ruins your finish and makes coatings crack. Keep the cake pops in the fridge the entire time, letting cold air work evenly. Transfer them from freezer to fridge on your planned schedule, and they’ll taste bakery-fresh when you’re ready to package. Your customers won’t know you didn’t bake them that morning.

SMOOTH & SILKY MELT These milk chocolate melting wafers melt evenly and consistently, creating a glossy, professional finish perfect for dipping, coating, and molding.

SMOOTH & EVEN MELT Crafted for consistent performance, these white melting wafers melt smoothly and evenly, creating a glossy, professional-quality finish perfect for dipping, coating, and molding.

SMOOTH & EVEN MELT Crafted for consistent performance, these white melting wafers melt smoothly and evenly, creating a glossy, professional-quality finish perfect for dipping, coating, and molding.
How Long Do Thawed Cake Pops Last?
So you’ve thawed your cake pops in the fridge, and now you’re wondering how long they’ll stay fresh. After thawing, your cake pops stay good for 3 to 4 days when kept cold. The key is keeping them wrapped tight so air doesn’t dry them out.
Here’s what you need to remember:
- Keep thawing slow – Always thaw in the fridge, not on the counter, so your pops keep their smooth texture.
- Mind your freezer storage – You can freeze coated cake pops for up to 1 month before you need them.
- Stick to refrigeration – Once thawed, stay chilled until you’re ready to package or serve.
Plan your thawing a few days ahead. This gives you control and keeps your treats looking and tasting their best for your customers or your family.

Package include 3 tier push up pop cake stand, comes in 32 pack cake container with lids, the cake push up pop making kit is sufficient for family gathering, bakery shop, candy bar, buffet, any theme party dessert treat event like wedding, birthday, housewarming, Halloween, Christmas, etc.

【Sufficient Quantity】Our set includes 40 clear push pop containers, each plastic push up cake pops comes with a lid and a stick, in quantities to meet your needs for different cakes or desserts.

Leakproof: Set includes 30 pcs push cake up pop containers with lids, base fits snugly with tube to prevent leakage and easy to push up, perfect for making delicious cake push pop dessert.
Refrigerate Cake Pops for Up to 2 Weeks
If you need your cake pops to last longer than a few days, refrigerate them in an airtight container for up to 2 weeks.
Refrigerate cake pops in an airtight container for up to 2 weeks to extend their freshness.
Place your pops upright or lay them flat to maintain their shapes during refrigeration. Ensure the coating fully covers each cake ball, which keeps the inside moist and prevents deterioration. Maintain steady, cool temperatures, since temperature fluctuations can compromise coating stability.
For advance preparation, refrigerate un-dipped cake balls up to 2 days early, then dip them when ready.
Eat your cake pops straight from the fridge for optimal taste and texture.

Sturdy Material: Crafted from high-quality plastic, these sturdy, clear boxes securely showcase your treats, keeping cakes, lollipops, and other sweets safe and fresh in an elegant way

【Unique Pop Lid Design】Our container adopt unique pop up design, Push the button to engage the airtight seal. The button doubles as a handle for the lid. One-handed operation, easy and convenient

SET INCLUDES: Two stackable cake containers designed for convenient storage and transportation of cakes, pies, and other baked goods
Store Cake Pops at Room Temperature for 2 Days
Wondering how long you can keep cake pops on the counter? You’ve got a solid 2-day window for room temperature storage when you package them right. This short shelf life works for quick turnarounds and last-minute party prep.
- Bag them up – Slide each pop into a clear poly bag and tie with a ribbon.
- Seal the deal – Nestle those wrapped pops into an airtight container to lock in freshness.
- Track your time – Mark when they hit the counter so you know exactly when to move them.
After 48 hours, your storage plan needs to shift. Pop them in the fridge or freezer to extend their shelf life. Room temperature storage requires careful timing to prevent spoilage.

Clear treat bag: Flat cake pop bags, 4inch by 6inch; 1.4 mils thick with 300 Pcs; Metallic twist ties: Gold, 2mm*80mm ,300 Pcs

Food Grade Safe Bags: 100% new Oriented Polypropylene (OPP), crystal clear, non-toxic, odorless, environmentally friendly, clear than PP plastic bags;

What You Will Get: totally 100 Pcs cake pop bags are 6.3 x 4 inch on package, come together with 100 twist ties, quantity enough to meet your DIY ice pop making needs throughout the summer; You can share with your friends and families to enjoy a cool summer; Dress up your treats, bakeries, crafts, gift wrapping beautifully, these cake bags and cake packaging will instantly brighten up your parties and events
Bake Cake Up to 2 Days Before Dipping
Because timing matters when you’re prepping ahead, you can bake your cake up to 2 days before you plan to dip. This smart cake pops timing lets flavors settle while you handle other tasks. For best make-ahead results, let your cake cool completely in its pan. Warm cake turns gummy when you crumble it, so allow adequate cooling time. Your cooling and storage routine matters: once fully cooled, wrap the cake tight or seal it in an airtight container. Keep it at room temperature, not the fridge, to maintain moisture. When you’re ready, you’ll crumble and mix with frosting. This two-day window keeps your base fresh without last-minute stress. You’ll dip with confidence, knowing your cake is at peak texture.

Smooth & Easy Melting Wafers – Designed to melt into a smooth consistency that makes it easy to dip, coat, drizzle, mold, and decorate a wide variety of homemade candies, baked goods, and desserts.

Smooth & Easy Melting Wafers – Designed to melt into a smooth consistency that makes dipping, coating, drizzling, molding, and decorating homemade candies, baked goods, and desserts simple and convenient.
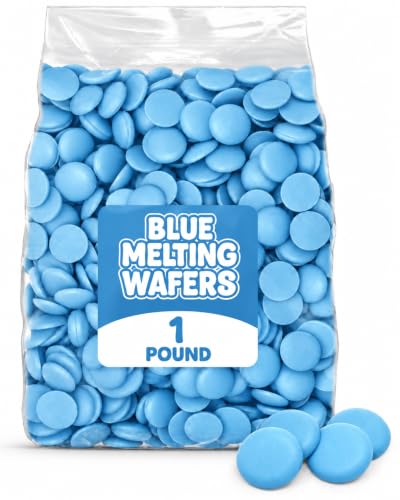
HOLIDAY BAKING ESSENTIAL: Perfect for Christmas and winter desserts. Use these colored candy melts to coat, dip and decorate festive treats such as cookies, cake pops and pretzels.
Mix Cake Pop Balls Up to 2 Days Ahead
You can mix your cake and frosting, roll the balls, and refrigerate them for up to two days before dipping. This timeline keeps your cake pops moist and firm, while a quick chill or freeze session helps the coating stick better during the dipping process. Keep them cold, and you’ll have fresh, ready-to-dip treats when you’re ready to finish.


Reliable Material: the cake pop holder is made of kraft paper, and polyvinyl chloride, both of the 2 materials are safe and reliable to use, not easy to break, no peculiar smells, allowing you to use for a long time,Two purposes can display different cake shapes.

Package includes 12 pcs portable cake pop holders, each boxs can hold up to 18 lollipops. The transparent window allows the delicate and lovely cake pops to be displayed perfectly.
Refrigeration Timeline Benefits
How long can you really get ahead on cake pops without sacrificing quality? You’ve got a solid 48-hour window when you use refrigeration smartly. Chilling your make ahead cake pop balls locks in moisture and keeps that perfect texture intact before you ever touch the candy coating.
Refrigeration works in your favor through these mechanisms:
- You form your balls, pop them in an airtight container, and refrigerate up to 2 days without worry.
- You chill them at least 4 hours so they firm up properly for smooth dipping.
- You preserve that just-baked taste because cold storage prevents drying and crumbling.
This timeline fits real life. You mix, shape, and store on Thursday, then dip and decorate Saturday morning. Your cake pops stay fresh and maintain their texture throughout the process.
Freezing Preparation Advantages
Refrigeration gives you a head start, but freezing offers greater flexibility for your schedule. You can make ahead your cake pops by forming the balls and freezing them for 30 minutes before coating, or keep them frozen longer for busy weeks. Freezing firms up the centers, giving you smooth sides when you dip later. This prevents lumpy coatings.
After shaping, lay your uncoated balls on a lined baking sheet. Freeze until solid, then transfer to an airtight container. They’ll keep until you’re ready to use them. When the time comes, thaw them slowly in the fridge to maintain moisture balance and prevent cracks. Your cake pops will have a freshly made appearance.
Final Assembly Timing
Wondering when to start your cake pop project? You’ve got options that fit your schedule. Mix your cake pop balls up to 2 days ahead, then refrigerate them. This approach allows you to work ahead without rushing.
Follow this timeline for chilling, storage, and assembly:
- Chill mixed dough 2 hours before shaping, then re-roll for smooth sides
- Refrigerate uncoated balls 4+ hours, or freeze 30 minutes, so coating sticks
- Dip and decorate, then store coated pops 1 week refrigerated or 1 month frozen
Bake and cool your cake the day before if you’d like. Crumble, mix with frosting, and form balls the next morning. You can adjust your timeline to match your schedule.
When to Dip and Decorate Cake Pops
Once your coating is melted and silky smooth, you’re ready to dip. You’ve already put in the chill time, so your cake balls hold their shape. Keep that coating temperature just right, not too hot and not too cool.
Work in small batches, and don’t let your cake balls sit out too long. If the coating starts to thicken, warm it up again. Dip each pop quickly, then let it set and dry upright in a stand or Styrofoam block. Keep them apart so they don’t touch, and wait 30 minutes to 1 hour until the coating hardens completely.
This step brings your cake pops together, and you’re ready to share them with friends, family, or customers.

Set includes: 5 POP Containers: (2) 0.4 Qt, (1) 1.1. Qt and (2) 4.4 Qt; 3 POP Accessories: (2) ½ cup Scoops, (1) Brown Sugar Saver Sized to fit baking essentials including 1...
Package Cake Pops for Customers
You’ll want to master storage duration guidelines, packaging presentations, and freezing process steps so your cake pops stay fresh and look professional when customers pick them up. After coating, you can refrigerate pops for up to 1 week or freeze them for 1 month, giving you flexibility for busy weeks. Place finished pops upright in a stand or box to set before sliding them into ribboned poly bags. If you freeze them, use an airtight container and thaw gradually in the fridge for several days to avoid cracks.
Storage Duration Guidelines
How long can you keep cake pops fresh before handing them to customers? Cake pops storage gives you plenty of flexibility to plan ahead.
- Keep un-dipped cake pops on the counter for 2 days, or pop them in the fridge for 2 weeks in an airtight container.
- After dipping and setting, refrigeration keeps finished pops fresh for 1 week.
- Freezing extends life to 1 month, or 6 weeks for long-term cake pops storage.
For freezing, skip the fridge and freeze right after packaging in an airtight container. When you’re ready, thaw gradually in the refrigerator over a few days. Gradual thawing protects texture and taste, ensuring your customers receive cake pops with optimal freshness.
Packaging Presentations
Now that you’ve got your storage plan figured out, let’s talk about how to package your cake pops so they look as good as they taste. Your cake pops packaging starts with clear poly bags tied with a simple ribbon. This keeps each pop clean and pretty. Next, you’ll place them in an airtight container. This step preserves freshness so your treats taste freshly made rather than days old. For refrigerated storage, keep coated pops in that sealed container for up to one week. Make sure the coating fully hardens first, or it will ooze and ruin your work. Stand them upright in a box or stand while they dry. This prevents smudges and keeps your decorations perfect. The attention to detail will be evident to your customers.
Freezing Process Steps
Freezing lets you prep early without losing that perfect texture your buyers love.
- Package them airtight right away. Skip the fridge and freeze your cake pops immediately after packaging to lock in freshness.
- Store up to 2 months. Keep them sealed tight, and they’ll stay good for eight weeks before thawing.
- Thaw slowly in the fridge. Move frozen pops to the refrigerator for a few days; never rush it on the counter.
After coating and decorating, you can freeze cake pops for six weeks. Make sure your coating fully covers each ball, and watch temperatures to prevent cracks during freezing and thawing.
Preserve Fresh-Made Flavor Through Freezing and Thawing
Why let your hard work go stale when you can freeze cake pops for up to six weeks. Freezing locks in that just-made taste you and your customers crave. Once your coating sets, pop them straight into an airtight container. Skip the fridge pre-chill; it does more harm than good.
When you’re ready to serve, thawing happens slowly in the refrigerator over two to three days. This gentle shift keeps your coatings firm and your centers moist, never soggy. They will taste freshly baked rather than weeks old. Move them from freezer to fridge, then package for your customer. Careful freezing and patient thawing preserve the freshness your craft deserves.
Prevent Cracked Cake Pop Coating
How do you keep your cake pops looking smooth instead of covered in frustrating cracks? This is a common challenge, and mastering the technique will improve your baking results.
- Balance your coating temperature with your cake balls. Let the coating cool for 2-3 minutes before dipping so both reach a compatible temperature without shocking each other.
- Perfect your dipping technique by submerging each pop once, steadily, without swirling too much. Over-handling stresses the surface.
- Time your freezing cake pops carefully. Freeze for 15-20 minutes before dipping, but avoid longer storage that creates texture problems.
Rewarm your coating in 30-second bursts if it thickens, keeping it uniform throughout your work.
Scale Your Timeline for Big Events
When you’re prepping for a big party or wedding, timing is critical. Large orders can feel overwhelming, so let’s break this down together. One 9-inch cake layer gives you about 40 cake pops, so you’ll multiply that for your guest count.
You can make ahead uncoated cake balls and keep them in the fridge for two days. For longer storage, freezing buys you two months. Coated and decorated pops store for one week refrigerated or one month frozen. Smart timeline planning prevents last-minute scrambling before the event. Thaw frozen pops gradually in the fridge over a few days. This gentle defrosting protects your hard work and keeps dessert tables looking perfect without rushing to finish close to service time.
Fix Soggy or Dry Cake Pops After Freezing
You’ll want to know your freezer storage limits, since cake pops keep for up to six weeks when sealed airtight right after coating. Your thawing technique matters just as much, so let them defrost slowly in the fridge over a couple of days instead of rushing the process. You can fix texture issues by controlling moisture balance. Add a spoonful of frosting if they’re dry, or stand them upright after thawing so condensation doesn’t pool and make them soggy.
Freezer Storage Limits
Wondering how long you can stash cake pops in the freezer? You’ve got a solid six weeks once that coating seals the deal.
- Freeze right after coating sets. Don’t wait, or you’ll risk freezer burn sneaking in.
- Use airtight containers only; no flimsy bags allowed.
- Skip pre-freezing bare balls. Coating first locks in moisture best.
Uncoated cake balls stretch to two months, but coated pops hit peak quality at six weeks. You’ll want that coating fully wrapped around each ball like a snug jacket. When thawing rolls around, shift them from freezer to fridge over two to three days. Sudden temperature swings cause soggy centers or dry, crumbly bites that compromise texture and taste.
Thawing Technique Matters
Why do some cake pops turn soggy or crumbly after freezing? You’re thawing them too fast, and that ruins the coating. When you rush, moisture gets trapped and turns your hard work mushy.
The right way to save your pops:
| Step | Time | Temperature |
|---|---|---|
| Move to fridge | 1-2 days | 35-40°F |
| Let coating set | 4-6 hours | Cold, not frozen |
| Check texture | Before serving | Even throughout |
Start thawing by moving frozen pops straight from freezer to refrigeration. Never leave them on the counter. The cold air lets moisture spread slowly and evenly. This keeps your coating smooth and crack-free. Proper thawing ensures your cake pops maintain their intended texture and appearance.
Moisture Balance Control
Moisture Balance Control
How do you keep cake pops from turning mushy or bone-dry after freezing. You master moisture balance by controlling every step.
- Start with the right mix. Chill your cake-frosting crumb before shaping, and use just enough frosting for a crumbly, not paste-like, texture. Too much frosting traps excess moisture.
- Seal them completely. Dip your pops fully so coatings create a tight barrier. This locks in moisture balance and protects against freezer burn during freezing and thawing cycles.
- Thaw with patience. Move frozen pops to the fridge for 2-3 days, not the counter. Rapid warming causes surface moisture that softens coatings. If sogginess occurs, re-dip and stand upright until firm.