You can keep cake pops at room temperature for 2–3 days in a cool, dry spot away from sunlight.
Move them to the fridge, and they’ll stay fresh for about one week in an airtight container with a paper towel to catch moisture.
For the longest storage, freeze them properly wrapped for up to two months.
Thaw frozen pops slowly in the fridge for 1–2 days, then let them sit at room temperature for 15–30 minutes before serving.
Proper storage protects their texture and helps you identify spoilage.
How Long Do Cake Pops Last? Room Temp, Fridge, and Freezer Compared
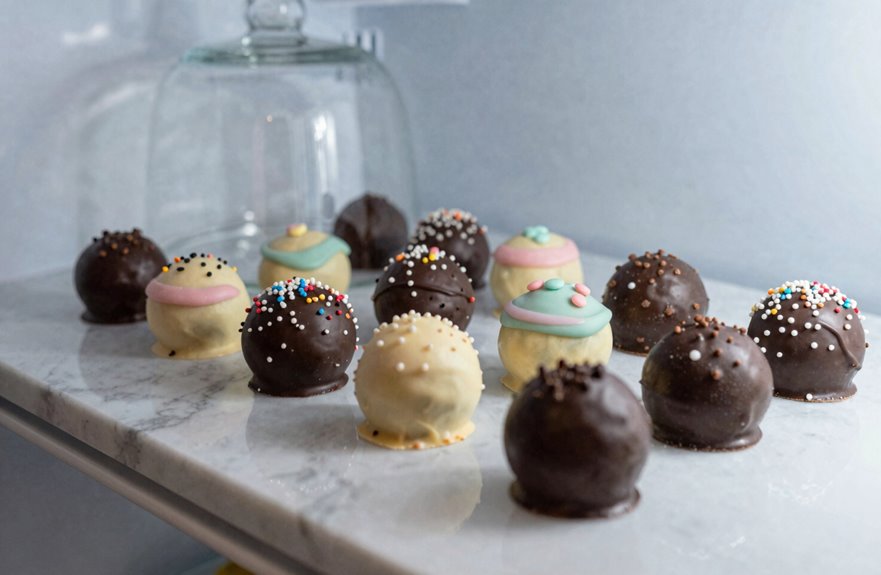
How long can you keep those sweet little treats before they turn stale? You’ll want to know your cake pops storage options so nothing goes to waste.
At room temperature, you can enjoy your cake pops for a few days. Humidity and creamy fillings might shorten this window, so keep them in a cool, dry spot. They’re softest in this condition, with that perfect bite you love.
Your fridge extends life to about one week. Use an airtight container with a paper towel to soak up extra moisture.
For the long haul, freezer storage keeps cake pops fresh up to one month, sometimes longer. Wrap each one snugly, then seal them tight. Thaw them slowly in the fridge for a day or two, and they’ll taste like you just made them.

High-quality: The cake push pop containers with lids are made of food-grade PET plastic material, healthy and environmentally friendly. The cake push pops are thick enough to ensure not bend or crack. The cake push-up pop shooter is sturdy and durable, which can keep your cake fresh and clean.

Package include 3 tier push up pop cake stand, comes in 32 pack cake container with lids, the cake push up pop making kit is sufficient for family gathering, bakery shop, candy bar, buffet, any theme party dessert treat event like wedding, birthday, housewarming, Halloween, Christmas, etc.

Leakproof: Set includes 30 pcs push cake up pop containers with lids, base fits snugly with tube to prevent leakage and easy to push up, perfect for making delicious cake push pop dessert.
Why Freezing Protects Texture Better Than Refrigeration

You might wonder why freezing beats the fridge for keeping your cake pops just right. When you pop them straight into the freezer after wrapping them tight, you lock in moisture before it escapes. The fridge, on the other hand, creates humidity that seeps in and changes how your cake pops feel. You’ll notice they get sticky or soggy after just a few days.
Freezing also stops big ice crystals from forming, which keeps the crumb soft instead of turning it grainy. For texture preservation, you can store your treats up to one month in an airtight container, or even longer if you seal them well.
Thawing them slowly in the fridge for two to three days brings back that fresh-baked bite. Freezing guards your cake pops better because it prevents the moisture absorption that refrigeration causes.

Package Includes: 100 pieces celllo bags and 100 pieces gold twist ties, the quantity can meet your various needs for wrapping cake pop, lollipop, cookies, candies, snacks, chocolates, marshmallow, etc

This poly sealing tape is designed for securely sealing various plastic bags and film bags. It is commonly used in homes, supermarkets, bakeries, convenience stores, and farmers' markets for packaging and sealing fresh produce, vegetables, baked goods, cookies, candy, meat, and gifts. Additionally, this tape is also suitable for organizing and marking industrial parts or other non-food items.

This poly sealing tape is designed for securely sealing various plastic bags and film bags. It is commonly used in homes, supermarkets, bakeries, convenience stores, and farmers' markets for packaging and sealing fresh produce, vegetables, baked goods, cookies, candy, meat, and gifts. Additionally, this tape is also suitable for organizing and marking industrial parts or other non-food items.
How Flavor Choice Affects Your Storage Options
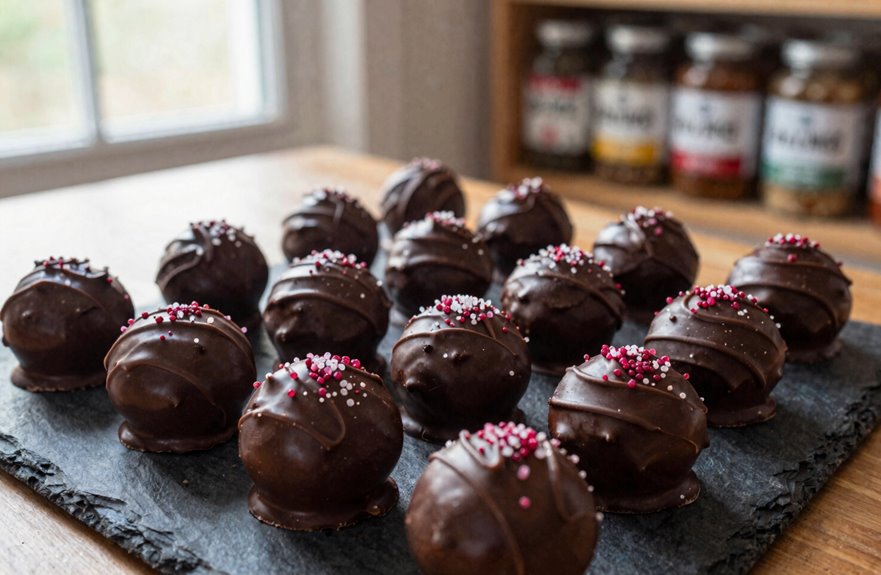
What kind of filling hides inside your cake pop directly shapes your storage decisions, and you’ll want to know which treats need extra care.
Creamy lemon curd or fruit fillings spoil faster, so you can’t leave them on the counter. Pop these into the fridge right away, or your shelf life shrinks to just a day or two. Vanilla and chocolate hold steady at room temperature for two to three days, though the fridge stretches that to a full week.
Rich, dense fillings need slow thawing in the refrigerator before you take a bite. This keeps the coating smooth and the center just right. Your storage method should match your flavor choice to maintain freshness and texture.

SIMPLE STORAGE: Store and dispense standard and jumbo paper towel rolls; Easily mount this holder to a blank wall beside the sink, under cabinets or tucked inside to save countertop space or for more discreet storage; Measure the depth of your mounting surface and use hardware of the correct length; The dispenser makes refilling paper towels easy; Simply remove the empty roll and pop in a new one

SIMPLE STORAGE: Store and dispense standard and jumbo paper towel rolls; Easily mount this holder to a blank wall beside the sink, under cabinets or tucked inside to save countertop space or for more discreet storage; Measure the depth of your mounting surface and use hardware of the correct length; The dispenser makes refilling paper towels easy; Simply remove the empty roll and pop in a new one

Adjustable temperature settings and temperature display: You can melt chocolate quickly and evenly within 15 minutes and keep it warm, while the adjustable temperature can better adapt to the melting needs of different candies
Do Gluten-Free Cake Pops Last Longer or Shorter?
You might wonder if gluten-free cake pops last longer than regular ones, but they actually follow the same timeline: one week in the fridge or one month in the freezer. The real difference lies in how you store them, since gluten-free varieties need careful handling to prevent cross-contamination. Keep them sealed tight, thaw them slowly in the refrigerator, and you’ll get the same fresh taste either way.

A three-tiered pedestal to display, store, and transport up to 37 cake pops or other treats on a stick with ease

Quality Material: crafted from food grade paper, these paper lollipop sticks ensure safety and sturdiness for your sweet treats; The design ensures that the sticks are resistant to wear and tear, making them suitable for cake pops and candies alike; Strong sticks are not easily worn, unraveled, shredded or chipped, and are easy to melt; Portable candy and cookie bag, suitable for storing room temperature food

【APPLICABLE MULTIPLE SCENE】Perfect for wedding parties, birthday parties, christenings, bridal showers, anniversary balls, bake sales, family events, shop window displays, afternoon tea parties, etc.
Shelf Life Comparison
How do gluten-free cake pops stack up against the regular kind regarding staying fresh. You’ll find they’re practically identical when you handle them right. Their shelf life hits about one week in the fridge, just like standard pops. Some gluten-free varieties stretch to a month refrigerated, but that’s the exception, not the rule. Your storage routine is the critical factor. You want airtight containers every time, keeping air and moisture locked out. Freezing extends freshness to four months for both types. Whether you’re using gluten-free or regular cake pops, you’re following identical preservation steps: cool completely, seal tight, thaw slowly. Dietary differences don’t affect preservation methods. You get the same results with the same careful habits.
Storage Method Impact
Where you store your gluten-free cake pops makes all the difference. You get the same storage times whether your treats are gluten-free or not, but you need to watch out for special fillings that spoil faster.
| Storage Spot | How Long They Last | What You Should Know |
|---|---|---|
| Room temperature | Up to 1 week | Keep them dry and cool, away from sunlight |
| Refrigeration | Up to 1 month | Wrap them tight so they don’t pick up fridge smells |
| Freezer storage | Up to 4 months | This is your best bet for keeping them fresh long-term |
When you’re ready to eat frozen pops, move them to the fridge first. Let them thaw slowly overnight. This keeps the texture smooth and prevents cracks. Proper thawing ensures your gluten-free cake pops maintain their intended quality.
Should You Chill Cake Pops Before Freezing?
When you’re ready to freeze your cake pops, skip the fridge step entirely. You want to freeze them right after you package them in an airtight container. This keeps their texture smooth and their flavor fresh.
If you chill them first, you risk condensation forming, which makes them soggy. Instead, you place them straight into the freezer. This simple choice extends their shelf life and protects them from mold.
When you need them later, you thaw them slowly in the fridge over two to three days. Don’t leave them on the counter to warm up. Freezing cake pops immediately without chilling first prevents moisture damage that occurs during the thawing process. You’ll keep them perfect for one to four months, depending on your recipe.

Cookeez Makery will amaze you and your child when they create a surprise plush.
COORDINATING DESIGN - Enhance your baby's teething journey with 3 stylish water-filled teethers. These teethers combine functionality with trendy designs to help your little one keep their cool while teething.

COORDINATING DESIGN - Enhance your baby's teething journey with 3 stylish water-filled teethers. These teethers combine functionality with trendy designs to help your little one keep their cool while teething.
How to Freeze Cake Pops: A 4-Step Method
You’ll freeze your cake pops right after packaging, skipping the fridge entirely. First, place them in an airtight container and label it with today’s date, then place it straight into the freezer for up to one month. When you’re ready to enjoy them, move the container to the fridge for a few days of slow thawing. Never thaw them at room temperature.

【Sufficient Quantity】Our set includes 40 clear push pop containers, each plastic push up cake pops comes with a lid and a stick, in quantities to meet your needs for different cakes or desserts.

【Premium Food-Grade Material】Crafted from high-quality PP plastic, these cake push pop containers are BPA-free, non-toxic, and odorless. Designed for durability, they are freezer-safe and sturdy enough to resist bending or cracking, ensuring your desserts stay fresh and clean.

All-in-One Dessert Kit- Ready to Wow: This set includes 24 BPA-free plastic push up cake pop containers and a sturdy 2-tier 20 slots wooden cake pops stand, perfect for creating eye-catching layered desserts – just fill, stack, and display! No baking expertise needed.
Prep Without Pre-Chilling
Anyone who’s tried freezing cake pops knows the usual advice says chill them first, but you can skip that step entirely. You’re saving time, and your cake pops turn out just as good.
When you freeze cake pops straight away, you lock in their fresh texture right from the start. No fridge time means less handling, less moisture buildup, and fewer chances for something to go wrong. Your storage stays simple this way.
This method keeps your treats ready for longer-term storage without the extra wait. You’ll freeze them directly after you finish dipping and decorating, while they’re still at room temperature. The cold hits them once, not twice, which protects their smooth coating and soft center.
Package Before Freezing
Why rush straight to the freezer without protection? You’ll ruin your hard work, and nobody wants that. Wrap each cake pop individually in its own small bag, then seal it tight with a twist tie. This step keeps your treats safe from freezer burn and odor absorption. Next, slide those wrapped pops into a gallon Ziplock bag for extra security. For the best results, nestle everything into an airtight container as your final freezing layer. This blocks moisture and keeps your cake pops tasting fresh. Don’t forget to label the outside with today’s date. You’ve got one to four months of freezer time before quality drops. When you’re ready, you’ll move them straight to thawing without shortcuts.
Gradual Fridge Thawing
When you’re ready to enjoy your frozen cake pops, move them from the freezer straight into the fridge instead of leaving them on the counter. You’ll want to plan ahead, since fridge thawing takes several days to complete. This slow transition protects your treats from damage.
Don’t rush the process by thawing at room temperature. A gradual fridge thaw keeps your cake pops’ texture smooth and their flavor fresh. The cold air helps with moisture retention, so your cake stays soft inside. It also prevents condensation from forming on the coating, which keeps that shell intact.
Once they’ve thawed in the fridge, let them sit out briefly to reach serving temperature. Then you’re ready to package them for your customers.
How to Package Cake Pops for Maximum Freshness
Proper packaging makes all the difference when you’re trying to keep cake pops fresh for days or even weeks. Focus on three key areas: storage, packaging, and freshness.
Start by wrapping each cake pop individually in poly bags or plastic wrap. This creates a barrier against air and moisture. Then, place your wrapped pops into an airtight container. This double-layer protection keeps your treats safe from mold and preserves their texture.
Do not chill your cake pops before freezing. Instead, package them immediately and freeze directly. This locks in flavor and prevents ice crystals from forming.
For room temperature storage, your airtight container works for up to two days. In the fridge, you’ll get about two weeks. In the freezer, your properly packaged cake pops stay fresh for up to two months.

Go extra fudgey with Pop-Tarts Super Stuffed Molten Lava Cake toaster pastries with 50% more filling compared to Pop-Tarts Frosted Strawberry (48g)

【What You Will Get】200Pcs 4x6 Inches bags (not including any food)

WHAT YOU WILL GET: 100 Pcs 3 x 11 Inch(7.62x27.94cm) Clear Long Flat gift wrap cellophane bags, thickness 1.4 mil, with 6 mix colors ties(3.94 inches (10 cm)100 pcs), great decorative accessory for your snacks, bakery, wedding, gift wrapping, birthday party, lollipops, crafts and more
How to Thaw Cake Pops Without Sogginess
Where should you start when you’re ready to enjoy those frozen cake pops? You’ll want to begin thawing them in the refrigerator, not on the counter. Plan ahead and give your treats one to two days to defrost slowly. This gradual process prevents sogginess by keeping moisture from building up too fast.
Once they’re thawed, let your cake pops sit at room temperature for about 15 to 30 minutes. This step restores the perfect, soft bite. Place them in an airtight container first, and put a paper towel underneath to catch any extra dampness.
Don’t leave them out too long, and never refreeze what you’ve already thawed. These steps keep your cake pops fresh and ready to share.

SIMPLE STORAGE: Store and dispense standard and jumbo paper towel rolls; Easily mount this holder to a blank wall beside the sink, under cabinets or tucked inside to save...
How to Tell If Cake Pops Have Spoiled
Before you take that first bite, check your cake pops for any signs that they’ve gone bad. Look closely at the surface for any fuzzy spots or discoloration, as mold often appears as blue, green, or white patches. You’ll smell an off, sour odor if spoilage has started, even before you see visible changes. If you’ve been storing them through freezing, examine the texture after thawing. Slimy or overly sticky cake pops should be discarded. Thaw your treats slowly in the fridge first, since this method lets you catch problems early. Proper wrapping in sealed bags and airtight containers keeps moisture out, but once mold appears, don’t risk it. When in doubt, throw them out.


Quality Material: crafted from food grade paper, these paper lollipop sticks ensure safety and sturdiness for your sweet treats; The design ensures that the sticks are resistant to wear and tear, making them suitable for cake pops and candies alike; Strong sticks are not easily worn, unraveled, shredded or chipped, and are easy to melt; Portable candy and cookie bag, suitable for storing room temperature food

Quality Material: crafted from food grade paper, these paper lollipop sticks ensure safety and sturdiness for your sweet treats; The design ensures that the sticks are resistant to wear and tear, making them suitable for cake pops and candies alike; Strong sticks are not easily worn, unraveled, shredded or chipped, and are easy to melt; Portable candy and cookie bag, suitable for storing room temperature food
Common Storage Errors That Cause Mold and Texture Loss
Even careful bakers mess up storage sometimes, and those mistakes can ruin your cake pops fast.
Even careful bakers mess up storage sometimes, and those mistakes can ruin your cake pops fast.
- You push mold risk higher when you store cake pops at room temperature or in humid spots for more than two days.
- You skip freezing and rely only on fridge or counter storage, so texture turns mushy and spoilage hits faster.
- You pick the wrong storage temperature, keeping treats between 40°F and 140°F where bacteria love to grow.
- You use loose wrapping or unsealed bags, letting moisture sneak in and create soggy coatings plus fuzzy patches.
- You yank frozen cake pops out and rush the thaw, trapping condensation that feeds mold-promoting dampness weeks later.
Freezing after sealing tight prevents mold growth and keeps texture intact throughout storage.

COORDINATING DESIGN - Enhance your baby's teething journey with 3 stylish water-filled teethers. These teethers combine functionality with trendy designs to help your little one keep their cool while teething.

COORDINATING DESIGN - Enhance your baby's teething journey with 3 stylish water-filled teethers. These teethers combine functionality with trendy designs to help your little one keep their cool while teething.
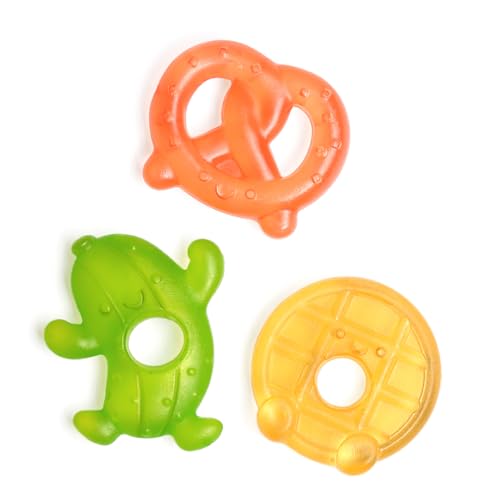
COORDINATING DESIGN - Enhance your baby's teething journey with 3 stylish water-filled teethers. These teethers combine functionality with trendy designs to help your little one keep their cool while teething.
Storing Cake Pops for Parties: Timing Tips
You’ll want to nail your timing when prepping cake pops for parties, since proper planning keeps them fresh and pretty. Freeze your decorated pops up to two months ahead in airtight containers, skipping any pre-chilling step so condensation doesn’t ruin the coating. Pull them out a few days before your event, let them thaw slowly in the fridge, then package them in poly bags with ribbons right before guests arrive.
Optimal Storage Timing
Whether you’re prepping for a birthday bash or a big wedding, timing your cake pop storage right makes all the difference. You’ve got options that keep your treats perfect for the big moment.
- Store at room temperature for up to 2 days if you’re serving soon
- Pop them in the fridge for up to 2 weeks in an airtight container
- Freeze for up to 2 months when you need longer storage
- Thaw frozen pops gradually in the fridge, not on the counter
- Freeze decorated pops in poly bags inside airtight containers
Skip pre-chilling before freezing; just package and freeze directly. For big events, freeze portions and thaw in stages so you’re always ready. Your guests will have freshly stored cake pops ready for serving.
Freezing Before Events
How far ahead can you prep cake pops for a big party? You have more flexibility than you might think. When you’re planning a celebration, you’ll want your cake pops ready without last-minute stress. Your freezer becomes your best friend for party prep.
Freeze your cake pops right after packaging them in an airtight container, skipping the pre-chilling step. This locks in freshness for the long haul. Your cake pops stay at their best for up to 4 months in the freezer, though you’ll get prime texture if you use them within 2 months. Make sure they’re fully decorated first, then slip them into poly bags with ribbons before freezing. They’ll be presentation-ready when you need them.
Thawing Schedule Planning
When should you start thawing your frozen cake pops? Begin a few days before your party for optimal results. Pull them straight from the freezer into the fridge with no countertop shortcuts. This gradual approach keeps your treats tasting fresh-baked.
- Move cake pops from freezer to fridge without stopping at room temperature
- Allow two to three days for complete fridge thaw time
- Check texture daily to ensure even thawing throughout
- Align your thawing schedule with party setup needs
- Package only after fully thawed to lock in that just-made flavor
Your guests will never guess you planned ahead. By controlling thaw time carefully, you create consistent, delicious results with properly textured cake pops ready to serve.
How to Pack Cake Pops for Travel
So you’ve got cake pops to transport, and you want them looking flawless when you arrive. Start by slipping each decorated pop into its own poly bag, twist tie snug at the base. Nestle these bundles into an airtight container, cushioning with tissue so nothing shifts or cracks.
For trips lasting days, freezing will preserve your pops effectively. Freeze your packed pops directly without pre-chilling. Humidity causes deterioration, and freezing extends shelf life to months rather than weeks. When you reach your destination, thaw gradually in the fridge over two to three days. This slow temperature shift keeps your coating smooth and your cake crumb tender. Rapid thawing will compromise texture and taste.
Pro Techniques for 2-Month Freshness
Why settle for a week of freshness when you can lock in two full months. You’re part of a community that refuses to waste a single bite, and freezing is your strategic advantage.
- Slide your wrapped cake pops into an airtight container immediately after packaging, sealing out every bit of air
- Transfer them straight to the freezer without any pre-chilling step, since you’ve already protected them
- Stack containers carefully, leaving a small gap so cold air circulates evenly around your treats
- Move your airtight container to the fridge two to three days before you need them, letting thawing happen slowly
- Resist the urge to rush thawing on the counter, as gradual chilling preserves that perfect cake texture
Follow these steps and you’ll serve cake pops that taste like you made them yesterday.
Humidity and Climate: Adjusting Your Storage Approach
You’ve mastered the freezer method, but your storage plan isn’t complete without considering your local weather. Humidity significantly affects how long your cake pops stay fresh. In sticky, damp climates, your fridge becomes less reliable because moisture sneaks in and shortens shelf life. Freezing becomes your best option in these conditions. This storage method locks out the moisture that causes mold and spoilage. You’ll want airtight containers or sealed bags regardless of climate, but they’re especially critical when humidity climbs. If you skip the freezer and leave cake pops on the counter in muggy weather, they’ll turn soft and spoil faster than expected. When you’re ready to eat them, move frozen pops to the fridge first. Slow thawing prevents condensation from damaging the texture you’ve worked hard to perfect.
Cake Pop Storage FAQ: Quick Answers to Common Questions
When you’re staring at leftover cake pops and wondering what to do next, you’re not alone. Storage questions come up frequently. We’ve gathered the answers you need to keep your treats fresh and ready to share.
- Store cake pops at room temperature for up to 1 week in a cool, dry spot.
- Move them to the fridge for storage up to 1 month in an airtight container.
- Keep them in the freezer for 1–4 months using airtight packaging and paper towels as a moisture barrier.
- Skip pre-chilling before freezing to protect texture and flavor.
- Thaw frozen cake pops slowly in the fridge for a few hours, or up to a couple days, before serving.
Following these steps keeps your cake pops tasty and presentable for every occasion.