Halloween dirt cake cups are individual layered desserts built from instant chocolate pudding and Oreo crumbs, served in clear cups with tombstone cookies and gummy worms.
They are easy to assemble but unforgiving on the clock. The Oreo crumb layer absorbs moisture from the pudding fast enough that a full day of storage turns the "dirt" into soggy paste.
A 24-hour maximum in the refrigerator is the practical ceiling if you want the layers to stay distinct.
Make the Pudding
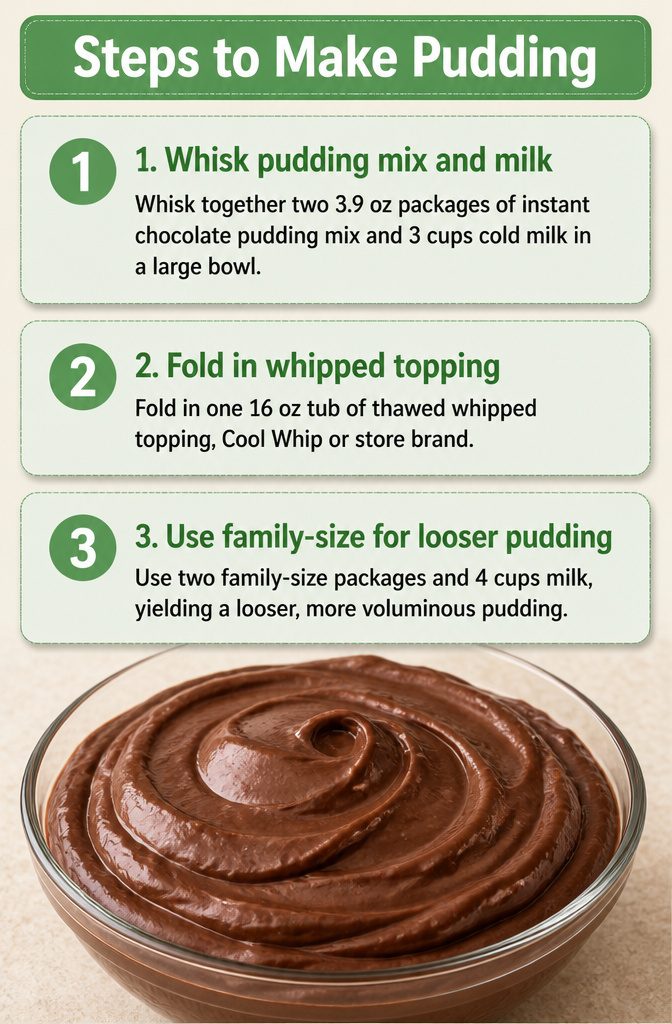
Two package sizes of instant chocolate pudding circulate for halloween dirt cake cups, and the ratio you pick shapes the whole dessert.
- Whisk together two 3.9 oz packages of instant chocolate pudding mix and 3 cups cold milk in a large bowl. After 2–3 minutes of whisking, the mixture thickens enough to hold ridges. Let it stand 5 minutes so the starch fully hydrates.
- Fold in one 16 oz tub of thawed whipped topping, Cool Whip or store brand. Use a spatula and cut through the center, turning the bowl, until no white streaks remain. The finished base should be smooth and mousse-like, thick enough to spoon without running.
- A second variation calls for two family-size packages and 4 cups milk, yielding a looser, more voluminous pudding. I prefer the 3-cup ratio; the stiffer set carries the cookie crumbs and decorations without pooling at the bottom of the cup.

Complete Party Set: This 146 pcs Halloween cupcake toppers supplies kit includes 48 graveyard tombstone cupcake toppers (8 styles, 6 of each), 48 black mini shovel spoons, and 50 clear 5 oz Halloween dessert cups. It provides you with sufficient quantities to meet your needs for throwing any parties!

Halloween-Themed Sets: The disposable muffin tins set includes 40 round aluminum baking cups and 40 clear lids. Add a spooky touch to your desserts with fun and hilarious designs like jack-o'-lanterns, ghosts, bats, spiderwebs, and more.

PACKAGE INCLUDED – Our set includes 5 different styles of cupcake wrappers: spider web, pumpkin, castle, ghost and broom witch, 20 pieces per pattern, total in 100 pieces
Prepare Oreo Dirt

- Two family-size packages (19 oz each) of Oreos make enough fine crumbs for 8–12 cups. I work in two batches so the blades or the bag never gets overloaded.
- A food processor turns the whole cookies, filling and all, into uniform dirt fastest. Pulse to fine crumbs with no visible cookie chunks left; any larger pieces throw off the texture when you layer.
- No processor? A zip-top bag and a rolling pin does the same job. It takes longer, but the process pulls kids in more easily than pushing buttons on a machine.
- Pour the finished crumbs into a bowl and run your fingers through them. Anything that still reads as cookie, not soil, goes back for another pass. Consistency here is what keeps the layers distinct later on.


No hydrogenated fats or high fructose corn syrup allowed in any food

One 5.9 oz box of Jell-O Chocolate Artificially Flavored Instant Pudding & Pie Filling Mix
Layer the Cups
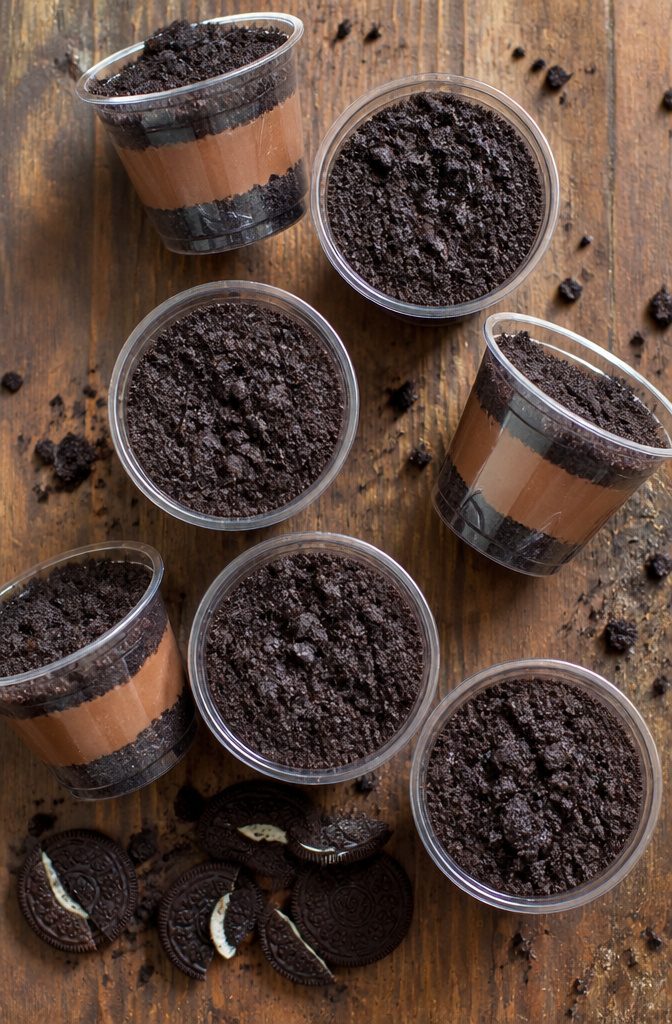
- Clear 9-ounce cups are the right size here: tall enough for distinct layers and small enough that the proportions stay balanced. Start with 2 tablespoons of Oreo crumbs, press them lightly with the back of a spoon, then add 1/4 cup of the pudding mixture.
- Repeat the crumb-and-pudding sequence once more. The light pressing between layers matters more than you might think; it keeps the sides of the cup clean so the stripes stay visible from outside.
- Finish with 1 tablespoon of crumbs on top. This last layer should sit loose and textured, like actual dirt, so skip the pressing here.
- For 8 cups, this draws on roughly half the prepared pudding and crumb batch. That leaves you room to scale up for a classroom party or trim back for a smaller group without reworking the ratios.

Ready-to-use cookie crumbs 0 g trans fat 0 mg cholesterol Contains wheat
Decorate
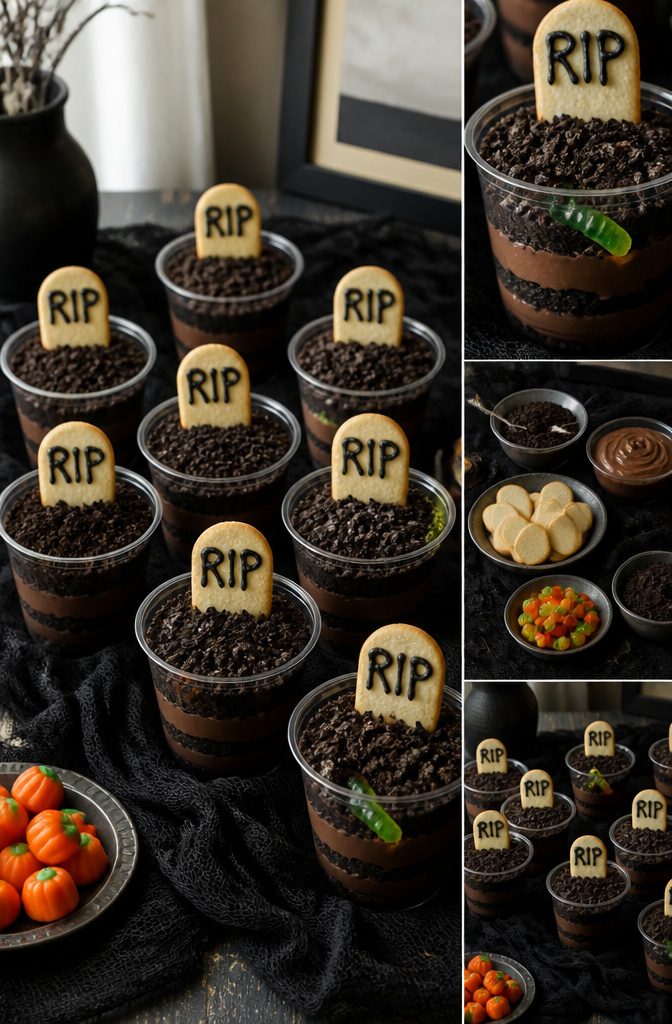
- Pipe black icing onto 8 Milano cookies to spell "RIP," keeping the letters tall and thin so they read cleanly against the chocolate. Let the icing firm up for a minute before handling.
- Press one tombstone cookie into each cup, angled slightly back so it stays upright in the crumb layer without sinking into the pudding.
- Tuck 1 gummy worm into each cup with just the curved middle peeking out, like it’s wriggling through the dirt. One per cup looks cleaner and stays put better.
- Dot 8 candy pumpkins or a pinch of orange and black sprinkles around the base for color contrast. Work fast here: once the pudding sets, the crumb surface hardens and decorations slide rather than stick.

Slip and Leak Safety: These 9 oz disposable parfait cups feature sturdy construction and excellent spill containment. There are no holes on the cup lid, which can keep the food fresh and preven spills

Package includes:There are 50 pack 9 oz clear plastic cups with lids,enough for your party and daily use.

Spill-Proof Protection: The no-hole flat lid creates an airtight, complete seal that locks in freshness and prevents oxidation; ensuring your smoothies, milkshakes, beverages, smooth desserts, salad or items that sit level with cup rim arrive intact and taste great; guaranteed zero leaks, even when upside down
Chill and Serve
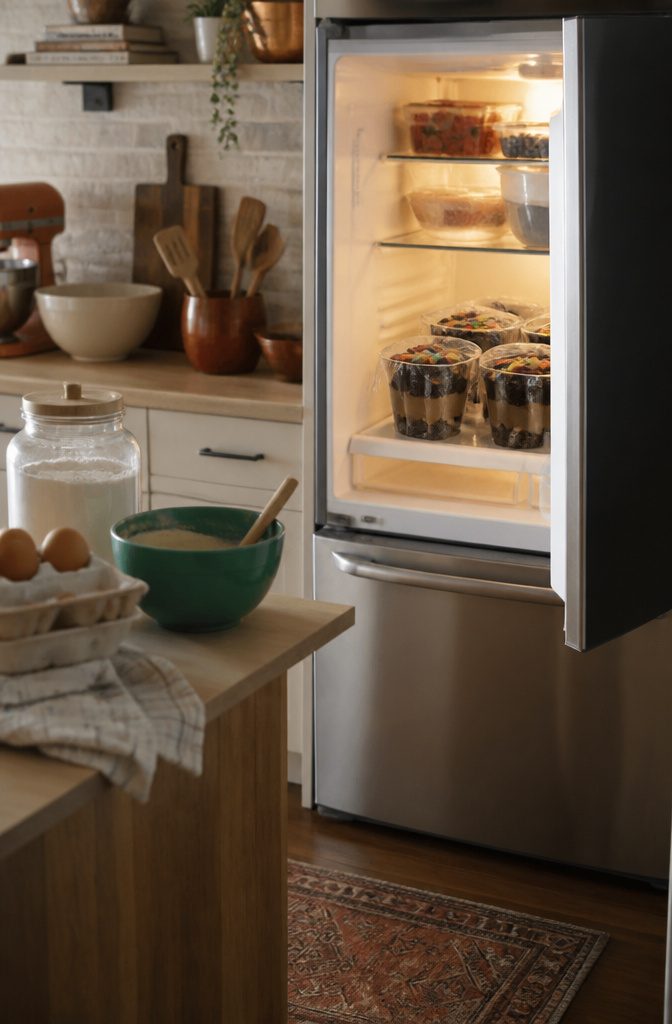
- Refrigerate the assembled cups until serving time, but do not make them more than a day ahead. The Oreo crumb layer holds its crunch for roughly 24 hours in the fridge; after that, it softens into something closer to wet sand.
- Serve them cold, and aim to get them to the table within 2 to 3 hours of assembly for the best texture. Same-day serving is ideal.
- If you must stretch the timeline, the cups can sit in the refrigerator for up to 3 days, though the crumbs will lose their bite and the layers will turn uniformly soggy. A fresh sprinkle of crushed Oreos on top before serving buys back a little crunch.

Widely Application:These edible tombstone cupcake toppers, very suitable for decorating halloween theme, baby party theme party, children's birthday theme party, trick or treat theme party, You can also use it as a decoration for cupcakes, cookies, ice cream, fruitsand desserts

Package included: Includes 45pcs edible cupcake toppers with a box,very lightweight, portable and easy to store and carry.Sufficient quantity can meet your different decoration needs.The size is 1.77inch. It is completely edible but not delicious,so pretty tasteless (Not Sweet)

Tombstone Sprinkles: Each bottle weighs 3.52 oz, 100 g. Our Tombstone Sprinkles are made from safe ingredients, Nut Free.
Store Leftovers
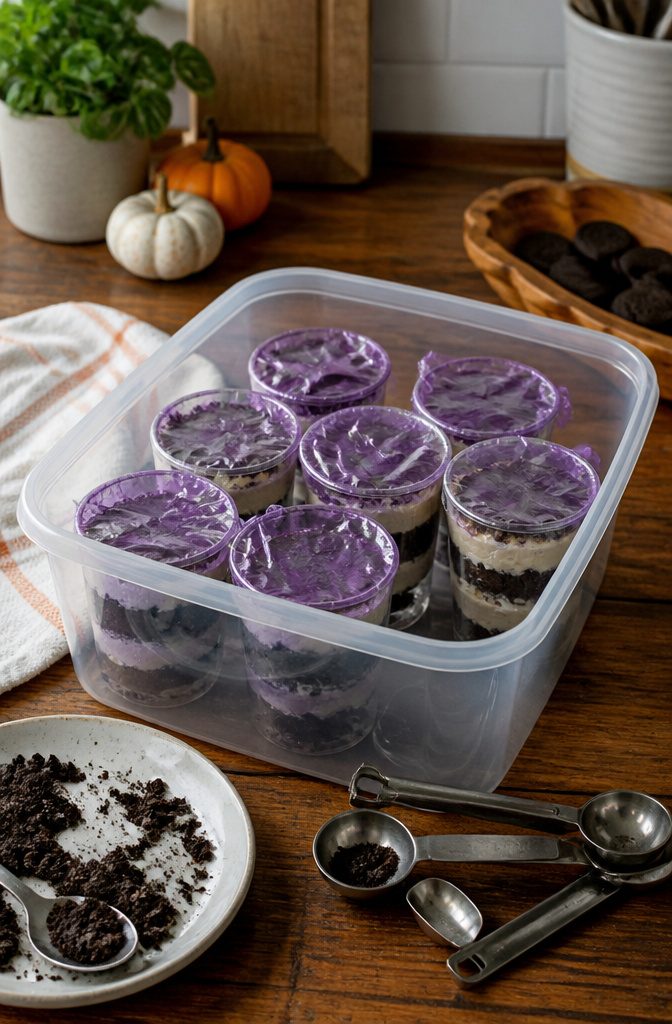
- Cover each cup tightly with plastic wrap, or transfer them to an airtight container if you have the fridge space. The pudding underneath stays stable, but the Oreo crumb layers soften steadily once they meet the moisture.
- Leftovers hold about 3 days, though the texture declines each day. The crumbs lose their crunch and the layers slump together; by day two the cup reads more as chocolate pudding with flecks than as actual dirt cake.
- Add a fresh sprinkle of crushed Oreos right before serving if the original crumbs have gone soft. It does not fully rescue the dessert, but it buys back some of the contrast.
- For a party, I would not plan to store these at all. The 3-day maximum is a safety limit, not a quality recommendation. This is a make-close-to-time dessert, not a make-ahead one; the 1-day advance window is the practical ceiling if you want the layers to still read as separate textures.

Halloween Cake Decoration Set: this Halloween zombie hands cake decorations set includes 24 spooky, gory zombie skeleton hands (approx. 3.15 x 1.77 inches / 8 x 4.5 cm), 24 thickened aluminum foil baking cups with clear plastic lids, and 24 individually wrapped black spatulas; Ideal for easily creating an immersive, spooky dessert scene of zombies crawling out of the grave for big parties

Complete Halloween Baking Serving Kit:Streamline your holiday dessert preparation with our all-in-one 108-piece graveyard dessert set. This comprehensive party pack includes 36 black mini loaf pans with clear lids (200ml / 6.8 oz), 36 edible tombstone cupcake toppers, and 36 individually wrapped mini shovel spoons. Suit for hosting spooky gatherings, school bake sales, or haunted house parties, giving you everything needed to bake decorate

USE DATE: Production Date(PRO) and Expiration Date(EXP) are on the bottom of the bottle. Guaranteed for 18 months. Please use them in 18 months, after open the seal of the bottle, its better to use them in 1 month, store in cool dry place
Ingredients
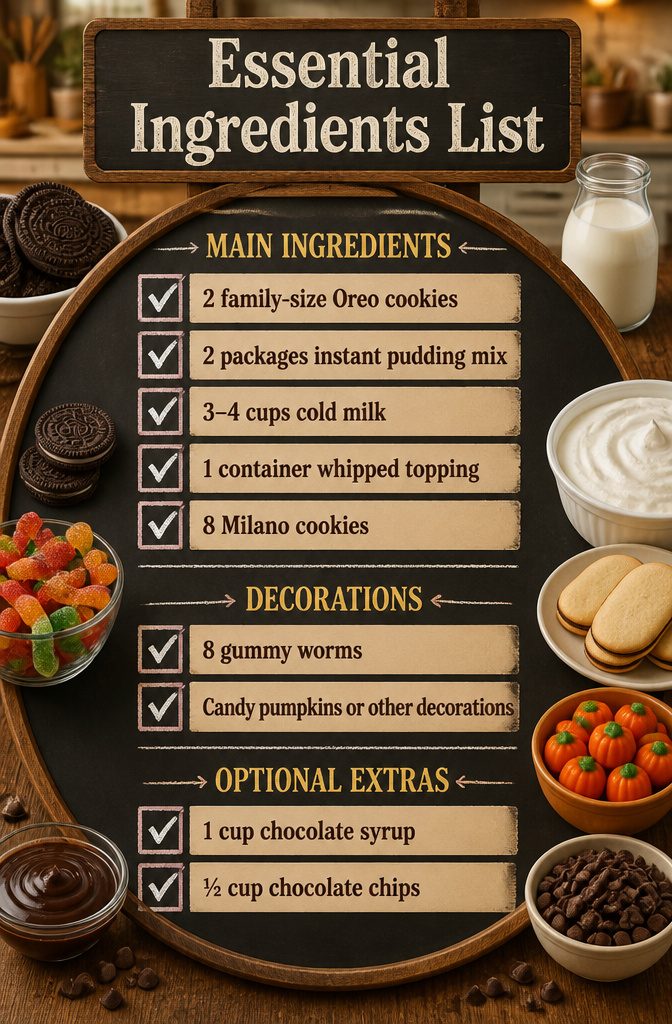
Everything here is a standard grocery-store item; no specialty baking supply run needed. I like that the recipe scales naturally if you want extras for a party tray.
- 2 family-size packages Oreo cookies (19 oz each) for the dirt layers and crumble topping
- 2 packages instant chocolate pudding mix (3.9 oz or 3.4 oz, depending on brand)
- 3–4 cups cold milk (the lower amount sets firmer, which I prefer for layered cups)
- 1 (16 oz) container frozen whipped topping, thawed (Cool Whip or store brand)
- 8 Milano cookies for gravestone toppers
- 8 gummy worms
- Candy pumpkins or other decorations as you like
Optional: 1 cup chocolate syrup for drizzling between layers, ½ cup chocolate chips if you want extra texture in the pudding.
The syrup adds a fudgy streak that looks good against the pale whipped layer, though the cups hold together fine without it.

SIMPLY JELL-O: One 3.9 oz box of Jell-O Simply Chocolate Flavored with Other Natural Flavor Instant Pudding and Pie Filling Mix

One 1.4 oz box of Jell-O Zero Sugar Chocolate Fudge Artificially Flavored Instant Reduced Calorie Pudding Mix & Pie Filling

One four ct sleeve of Jell-O Original Chocolate Ready-to-Eat Pudding Snack Cups
Prep and Timing
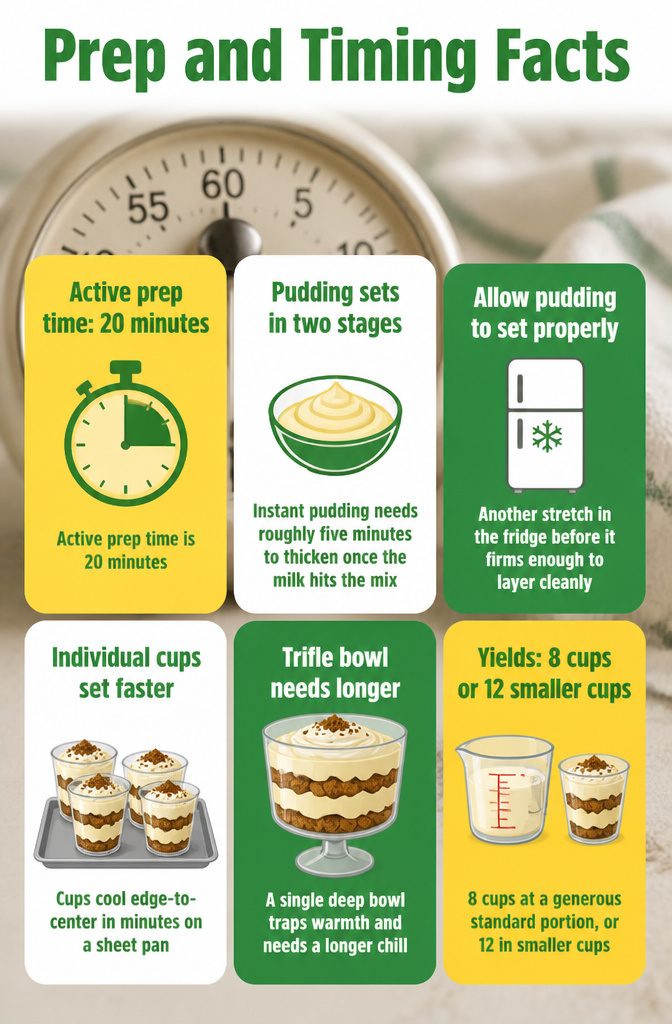
Active prep time is 20 minutes, but the clock keeps running after that.
Instant pudding needs roughly five minutes to thicken once the milk hits the mix, and another stretch in the fridge before it firms enough to layer cleanly. Some cards list total time as 25 minutes; others imply longer.
The gap is real, but it is not active work. The stirring and crushing happen in bursts, then the kitchen waits.
Individual cups set faster than a trifle bowl version, which is the practical reason to build them this way.
A single deep bowl traps warmth in the center and needs a longer chill before it slices or scoops cleanly. The cups, spread across a sheet pan, cool edge-to-center in minutes.
Yield runs 8 cups at a generous standard portion, or 12 if you scale the same batch into smaller clear cups. The latter works better for parties where kids treat dessert as an amuse-bouche between candy hauls.
Oreo Alternatives
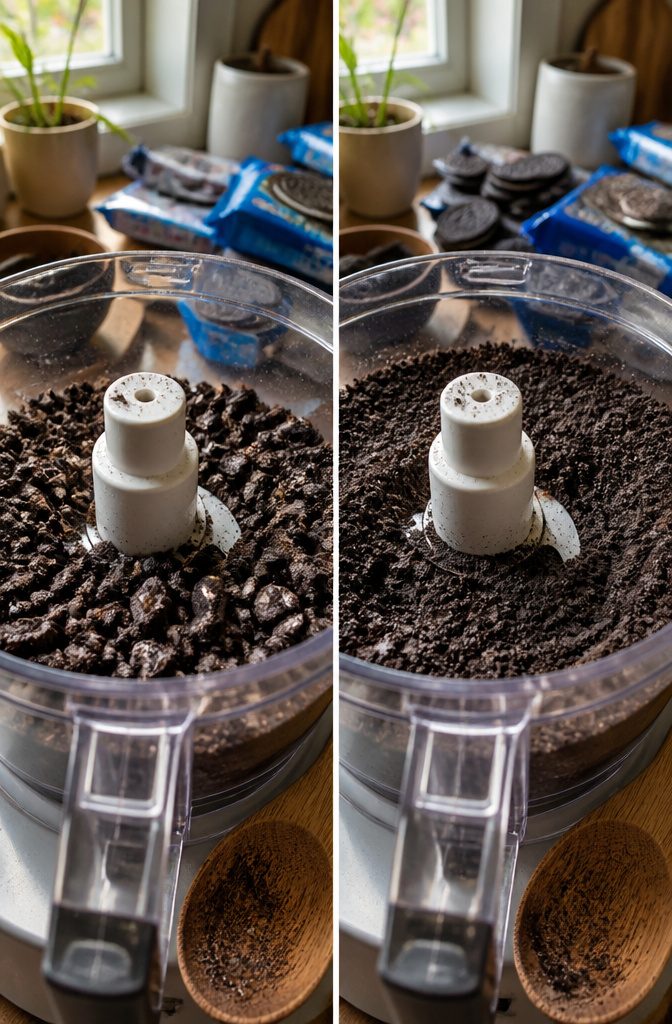
Other chocolate sandwich cookies will work in a pinch, but Oreo’s filling is what makes the crumbs clump like actual dirt.
The cream center binds with the cookie wafer when you pulse it, giving you those uneven, chunky clusters that read as soil rather than dust.
Name-brand versus store-brand is the real decision here. Generic sandwich cookies often skimp on filling, and the result is a fine powder that settles flat in the cup.
I notice the difference most when I open the food processor: enough filling leaves damp, pebbly bits that hold their shape, while the budget batch turns to chocolate sand before I can stop the blade.
If Oreo prices are up, I would rather buy the store brand and add a spoonful of softened cream cheese to the crumbs than settle for powder.
The texture still falls short, but at least you get some body. For a weeknight project, though, the name-brand cookie saves a step and looks closer to the real thing.

Reliable Quality: Our dessert cups with lids are made of food-grade PET plastic, which is BPA free, crystal clear, thick and sturdy, prioritizing your health without compromising durability.

Reliable Quality: Our dessert cups with lids are made of food-grade PET plastic, which is BPA free, crystal clear, thick and sturdy, prioritizing your health without compromising durability

【100 Value Package】: This value package includes 100 pack 9 oz clear plastic cups, perfect for daily use, party and more.
Decoration Ideas
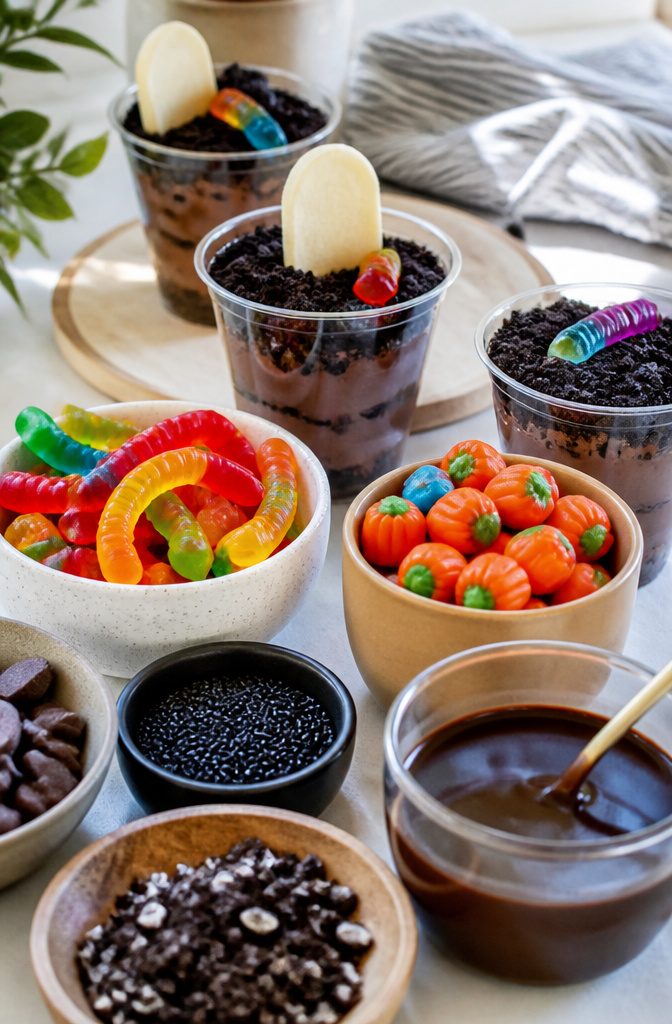
The layers do the work in these cups, not how much you pile on top.
Clear cups matter more than fancy decorations, because the alternating chocolate pudding and Oreo crumb is what reads as "dirt" at a glance. A mason jar works too if you want something reusable, but the transparency is the thing.
That said, a few well-placed extras turn a dessert cup into a miniature graveyard scene:
- Gummy worms are the classic finish, half-buried so they look like they’re crawling out of the dirt
- Milano cookies with black decorator icing make the tombstones; press the bottom half into the cup so they stand upright
- Candy pumpkins add a pop of orange against the dark layers and show up in most versions of this recipe
- Chocolate syrup drizzle lets you draw a quick "RIP" or crack pattern if piping gel feels like too much
- Halloween sprinkles or candy eyes fill empty spots without cluttering the view
Cookie tombstones in shapes beyond the standard rectangle, piped chocolate trees, and frosting "grass" all work, though I tend to skip them.
The layers do the heavy lifting, and extra height can tip a cup over when kids carry it. One Milano, one worm, and a pumpkin or two is my usual limit.
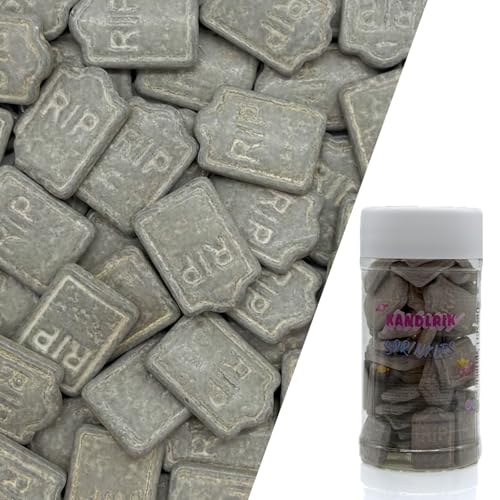
Makes Decorating Fun And Easy - it can be used as a cake decoration during Easter, Christmas, Halloween, Enjoy these sweet sprinkles.


✮ 48pcs Halloween cupcake decorations set, include 24pcs 4 different designs Halloween cupcake toppers and 24pcs black dessert spoon shovels. Halloween cupcake toppers designs include: "WILL B. BACK", "OTTA B. ALIVE", "BARRY A. LIVE", "TED N. BURIED".
Make-Ahead Limits
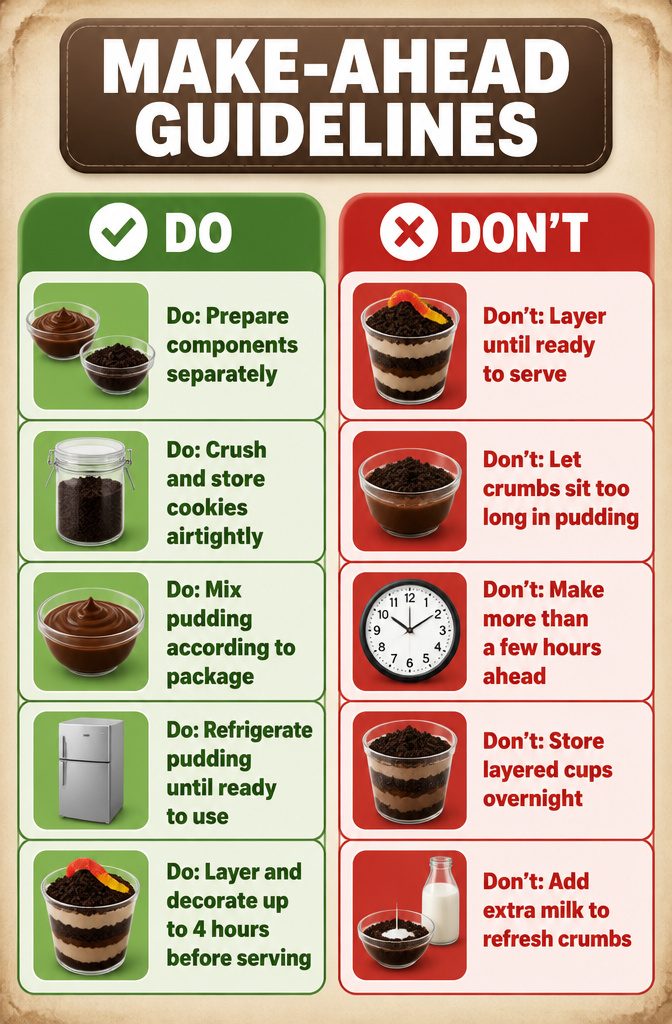
The most common question I get about these dirt cake cups is how far ahead they can be made, and the honest answer is a few hours, not a full day.
Oreo crumbs absorb moisture from the pudding layer faster than you’d expect, and once that happens the texture shifts from crisp "dirt" to soggy paste. That moisture absorption is the hard limit here.
The workaround is prepping components separately.
Crush the cookies to fine crumbs and store them airtight at room temperature. Mix the instant chocolate pudding with whole milk according to package instructions, then cover and refrigerate.
Keep those two elements apart until roughly four hours before you plan to serve, then layer and decorate. The cookies stay fresh, the pudding stays set, and you still get the assembly out of the way before guests arrive.
Frequently Asked Questions
What is dirt pudding made of?
Dirt pudding layers fine Oreo crumbs with a chocolate pudding base mixed with thawed whipped topping.
The Oreo filling helps the crumbs clump like actual soil, and the whole thing gets dressed up with gummy worms, cookie tombstones, or candy pumpkins for a Halloween graveyard look.
Can I make these ahead of time?
You can prep the components separately, but assembled cups are best within 2 to 3 hours and should not be made more than a day ahead.
The Oreo crumbs start absorbing moisture from the pudding almost immediately; after 24 hours in the fridge, they soften into something closer to wet sand than crisp dirt.
How long does dirt pudding last?
Refrigerated dirt cake cups hold for about 3 days maximum, though the texture declines steadily. By day two the layers slump together and the crumbs lose all crunch, so the dessert reads more as chocolate pudding with flecks.
A fresh sprinkle of crushed Oreos before serving buys back a little contrast, but same-day assembly is the only way to keep those layers distinct.