A dirt cup Halloween dessert is a layered pudding cup built to look like edible soil, and the trick that separates a good one from a gray blob is timing.
Layer the Oreo crumbs too early and they soften into mush before the party starts; the recipe below keeps components separate until the final ten minutes so the strata stay distinct.
Fifteen Oreo cookies, two boxes of instant pudding, and a cup of Cool Whip make eight cups with clean, visible bands of chocolate "dirt" that hold up when a spoon goes through.
Chocolate Pudding Base

The chocolate pudding layer needs to set up firm enough to hold the crumbs and candy on top, and the fastest route is two 3.9-ounce boxes of instant chocolate pudding stirred into 4 cups cold milk.
An electric mixer on low, then medium speed, gets you there in about 2 to 3 minutes.
I have tried whisking by hand when the beaters were dirty, and the texture stays grainy longer; the mixer aerates just enough to give you that smooth, spoonable thickness that reads as real dessert rather than snack pack.
Cold milk matters more than the box admits.
Room-temperature milk lets the starch hydrate slowly, so you wait five minutes and still wonder if it is done. Straight from the fridge, the pudding tightens almost as you watch.
Once it thickens, I set it aside while I prep the rest. The cups will get a full half-cup of this base per layer, so the batch needs to stay thick enough not to bleed into the crumbs.

Complete Party Set: This 146 pcs Halloween cupcake toppers supplies kit includes 48 graveyard tombstone cupcake toppers (8 styles, 6 of each), 48 black mini shovel spoons, and 50 clear 5 oz Halloween dessert cups. It provides you with sufficient quantities to meet your needs for throwing any parties!

Great Value Pack: You will receive 50pcs clear plastic cups with dome lids, ample quantity for your party supplies and commercial use.

✅Size Detail: : each Halloween dirt cups set includes 64 clear plastic dessert cups, 64 zombie hand picks, and 64 paper tombstone cake toppers. The 9 oz plastic cups measure approximately 7 x 4 x 6.1 cm/ 2.76 x 1.57 x 2.4 inch, the zombie hand picks measure approximately 12.9 cm/ 5.08 inch in length, and the tombstone toppers measure approximately 5.2 x 3.3 cm/ 2.04 x 1.3 inch. The matching accessories create a fun and eye catching Halloween dessert display
Whipped Topping Fold

A full batch of chocolate pudding is heavy and flat, so reserve one cup and fold in one cup of thawed Cool Whip before you start layering.
That single step changes everything. The whipped topping stretches the pudding into a pale, billowy layer that sits visible between the dark Oreo crumb and the denser chocolate pudding below.
Without it, the cup reads as one muddy brown mass; with it, you get a clear three-tone wall that actually looks like stratified soil.
The folding takes about two minutes with a mixer on medium speed, or a little longer by hand if you prefer to keep the volume.
The mixture goes back into the refrigerator while you crush the cookies, so it firms up just enough to hold a clean edge when you spoon it in.

One 5.9 oz box of Jell-O Chocolate Artificially Flavored Instant Pudding & Pie Filling Mix

SIMPLY JELL-O: One 3.9 oz box of Jell-O Simply Chocolate Flavored with Other Natural Flavor Instant Pudding and Pie Filling Mix

One 1.4 oz box of Jell-O Zero Sugar Chocolate Fudge Artificially Flavored Instant Reduced Calorie Pudding Mix & Pie Filling
Oreo Crumb Dirt

Fifteen Oreo cookies make the dirt, and how you crush them decides whether your layers hold clean lines or slump into a muddy blur.
A food processor turns the wafers and filling into uniform, fine crumbs that pack tight against the cup wall and give you that dense, soil-like look.
A rolling pin and a resealable bag get the job done too, but the pieces stay coarser and the cream filling clumps in streaks.
Those streaks soften faster once they meet the pudding, so the line between dirt and pudding turns fuzzy before the cup even reaches the fridge.
I reach for the processor every time. If I am doing these with kids and want the task to go faster, the rolling pin wins for keeping small hands busy, though I know the texture trade-off going in.
Either way, the cookie count stays at fifteen for the base layer; set them aside once they are crushed and move on to the pudding.

Ready-to-use cookie crumbs

Elevate your creations with the delightful crunch of our cookie crumbs. We've left the pieces bigger for a satisfying texture, ideal for sprinkling over ice cream, folding into cookie dough, or adding a surprising twist to any recipe. Need a finer crumb? A quick trip through the blender is all it takes!
Elevate your creations with the delightful crunch of our cookie crumbs. We've left the pieces bigger for a satisfying texture, ideal for sprinkling over ice cream, folding into cookie dough, or adding a surprising twist to any recipe. Need a finer crumb? A quick trip through the blender is all it takes!
Layering the Cups

Clear cups are non-negotiable here. A dirt cup lives in its strata: the dark band of Oreo crumb against the lighter pudding and the pale whip on top.
Use opaque containers and you might as well call it mud. I reach for disposable 6-ounce or 9-ounce clear plastic cups, though small mason jars work if you already have them.
The yield is 8 cups total, which is enough for a classroom party or a small gathering without leaving you with half a batch of anything.
Assembly runs bottom to top: Oreo dirt first, then pudding, then the whipped topping mixture, then repeat.
Each layer of dirt is about 1 tablespoon, the pudding layer runs roughly ½ cup, and the whip sits at a heaping ¼ cup. A quick tap on the counter between layers levels the surface so the next one spreads clean.
Two passes of each component fills the cup to the rim with room left for your gummy worms and candy eyeballs to perch on top. You want that cross-section to pop, so keep those layers distinct and level.

365 by Whole Foods Market products give you that dance-down-the-aisles feeling, virtual aisles too! Our huge range of choices with premium ingredients at prices you can get down with makes grocery shopping so much more than tossing the basics in your cart.

One 8 oz tub of Cool Whip Original Whipped Topping

One 8 oz tub of Cool Whip Zero Sugar Whipped Topping
Halloween Decorations

Gummy worms belong half-buried in the top layer of Oreo crumb, heads and tails poking out at angles, about three per cup so the surface looks alive without turning crowded.
Candy pumpkins scatter lightly across the dirt like fallen harvest, maybe a dozen across the whole batch, and the small bone candies press upright into the crumb so they read as half-hidden remains.
Gumball eyeballs work the same way, one or two staring up from each cup.
The visual coverage matters more than counts. You want the dark crumb broken by bright spots of orange, white, and red, enough that a kid recognizes Halloween at a glance but not so much the dirt disappears.
Wafer cookies make quick tombstones if you want a graveyard version; a little melted chocolate writes RIP across them.
Sources disagree on whether to bury the worms between layers or leave them on top.
Top placement wins for me: the texture stays intact, and the visual punch is immediate. Buried worms are a surprise for the spoon, but Halloween dirt cups sell themselves first to the eye.
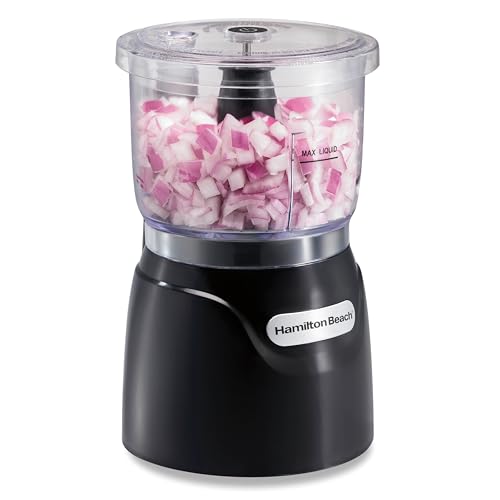
Simply stack and press to chop: The patented stack & press design makes it easy to assemble and use. Simply press the lid to chop and release to stop. Since all you do is stack the lid on top of the bowl, no difficult twist-locking is needed.

SUPERIOR FUNCTION: The Cuisinart Mini-Prep Plus Food Processor offers an efficient 250-watt motor and patented reversible stainless steel blade to quickly chop herbs, dice vegetables, and grind hard cheese

【Patented Button Design】Upgraded Ganiza food processors for effortless use, and easier pressing. The ergonomic design of the Buttons & Appearance reduces hand fatigue and provides good control and stability.
Chill Before Serving

The assembled cups need at least 30 minutes in the refrigerator before you serve them.
That chill time is what turns the pudding from a thick sauce into something that holds its layers when a spoon goes through. Without it, the chocolate and whipped topping slide together and you lose the strata you built.
Prep takes 20 minutes, so the real clock on this dessert is 50 minutes total. That is not make-ahead territory for most weeknights, but it is reasonable for a Saturday afternoon before a party.
Each cup runs about 296 calories, which puts it in line with a slice of frosted cake.
The leftover cups keep for 3 days refrigerated, though the Oreo dirt softens gradually and loses its crunch. I would not make them earlier than the night before if you want that textural contrast to register.

Great Value Pack: You will receive 50pcs clear plastic cups with flat lids, ample quantity for your party supplies and commercial use.

Abundant Quantity: package includes 50 Halloween plastic cups in different patterns, giving you enough small party shot cups for drinks, dessert tastings, snacks, samples, candy, jelly, pudding, and party treats

[60-Piece Dessert Spoon Set] Includes 60 black mini shovel spoons, suitable for serving ice cream, cake, or pudding. Designed with an integrated handle to stay secure during use, these mini dessert spoons combine functionality and style
Flavor and Theme Variations

The same structure works for other holidays and flavor preferences with a few swaps.
- Pumpkin patch dirt cups use vanilla pudding tinted orange with food coloring, or white chocolate pudding if you want a cleaner base. Layer it with chocolate pudding, Oreo crumbs, and gummy worms, then top with pumpkin candies and bone candies. Green frosting piped as vines adds a stem detail that reads more intentional than scattered sprinkles.
- Golden Oreos and vanilla pudding make a vanilla dirt cup that looks lighter and tastes milder. Birthday versions use the golden confetti Oreos with sprinkles and a pressed candle.
- Peanut Butter Oreos and chopped peanut butter cups or Reese’s Pieces turn the cups into a chocolate peanut butter variation.
- For Easter, green-tinted coconut subs for cookie dirt, with Peeps or chocolate bunnies on top.
- Any seasonal candy works for the topping. Candy corn, green sprinkles, or whatever Halloween candy is already in the bowl keeps the assembly low-effort.

No hydrogenated fats or high fructose corn syrup allowed in any food

INDULGENT MILK CHOCOLATE PUDDING: Dove Milk Chocolate Pudding Mix features an irresistibly silky smooth and indulgent taste
The information below is per-pack only
Make-Ahead Timing

The pudding, the whipped topping, and the Oreo crumb dirt each hold fine for a day in the refrigerator if you keep them separate.
What does not hold is the finished cup. Layer only when you are ready to serve, because the cookie crumbs draw moisture from the pudding and the gummy decorations turn rubbery and hard in the cold.
I build the components the night before, store them in lidded containers, and assemble in the ten minutes before the kids come through the door.
Leftovers, once layered, last about three days in the refrigerator, though the texture softens steadily and the gummies become unpleasant. Plan the build so the hands-on work happens at the last minute, not the prep.
Unleash your baking creativity with black cookie crumbs, adding a delightful crunch to all your favorite recipes and treats.


Celebrate Halloween and the entire fall holiday season with these festive Halloween decorated sandwich cookies. An all-time classic!
Serving and Storage

Clear plastic cups, six or nine ounces, are the right call for showing off the layers.
The pudding and crushed Oreo strata read as actual dirt and mud only when the eye can travel through them, so a solid cup or opaque dish hides the whole effect.
Small mason jars work instead if the party skews rustic, though the lid and threaded rim fight the graveyard look a little.
Leftovers hold in the refrigerator for up to 3 days, which is longer than most mousse-style desserts because the Cool Whip stabilizes the pudding rather than weeping into it.
Each finished cup runs 296 calories, a figure that assumes the standard portion of two layers of cookie crumb and the full candy garnish. Skip the gummy worms on top and the count drops, though not by much.

One 16 oz tub of Cool Whip Original Whipped Topping
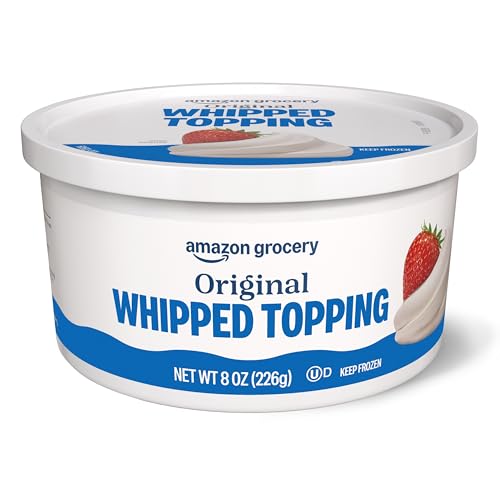
One 8 ounce container of Frozen Original Whipped Topping

Tru Whip Whipped Topping
Frequently Asked Questions

POWERFUL PERFORMANCE: The 1000-peak-watt motor precisely powers through tough ingredients to ensure smooth, consistent results every time.

【Indispensable Kitchen Helper】GANIZA BPA-FREE food processor features 2 sets of blades and paired bowls (8-Cup glass bowl and 8-Cup stainless steel bowl). Easily chop meat, fish, vegetables, nuts, frozen fruit, or make a salad, guacamole, etc, the food chopper is ideal for multiple kitchen tasks!

4-cup work bowl with handle and chop or grind touchpad controls.Voltage: 120 V
Can I make Halloween dirt cups in advance?
Yes, but only up to the component stage. The chocolate pudding, whipped topping mixture, and Oreo crumbs each hold fine for a day refrigerated in separate containers.
Layer them together only when you are ready to serve, because the crumbs draw moisture from the pudding and gummy decorations turn rubbery and hard in the cold.
Once assembled, leftovers keep for up to 3 days, though the dirt softens and loses its crunch.
What can I decorate dirt cup Halloween treats with?
Gummy worms, candy eyeballs, candy pumpkins, and small bone candies are the classic choices.
Press wafer cookies into the top as tombstones and write RIP with melted chocolate for a graveyard version. You want enough bright orange, white, and red to read as Halloween at a glance without burying the dirt completely.
Are Oreo dirt cups gluten-free?
Standard Oreo dirt cups are not gluten-free, since regular Oreo cookies contain wheat. You can make them gluten-free by swapping in a gluten-free chocolate sandwich cookie that matches the Oreo texture, then following the same pudding and topping steps.