Cake decorating for kids can run from a 20-minute weeknight assembly to a two-hour Saturday project, and the only thing that decides which path you take is how much cleanup you are willing to face afterward.
A store-bought base and a few washed toys skip the mixer and the piping bags entirely; the memory still gets made in the frosting.
One parent who once baked from scratch watched her three- and five-year-olds abandon decorating after two minutes to eat buttercream straight from the bowl.
Her verdict for the next birthday: boxed mix, store-bought frosting, and let them press the gummy worms in themselves.
1. Start with a Store-Bought Cake

Several guides for cake decorating for kids open with the same move: start with a store-bought cake.
The logic holds up. A ready-made base shifts the evening’s energy from baking to the part children actually care about, which is pressing gummy worms into frosting and calling it art.
One UK guide puts it plainly: if you are not a strong baker, cheat and spend your effort on decorating instead.
Store-bought chocolate frosting is the common companion here. One parent building a Minecraft-themed cake for her son covered the whole thing in it, then added homemade green buttercream grass on top.
She used 4 boxed mixes for a square 4-layer cake, but the frosting came straight from the grocery shelf.
You save time and skip the stress of a from-scratch bake, but you also lose the bragging rights and the exact shape you wanted.
You lose control over flavor and moisture, and a dry cake with beautiful decorations still disappoints at the table.
Sampling beforehand helps if the bakery allows it. What you gain back is roughly 30 minutes of active time, maybe more depending on the scratch recipe.
For a weeknight birthday prep with a child tugging at your sleeve, that time goes straight into the decorating itself, which is where the memory gets made.
Reddit owners who decorate with toddlers report the same calculus. One parent used boxed mix and canned frosting for a 3-year-old’s Halloween cake and called it "just right for letting her make the choices."
Another, who once made cake and frosting from scratch for a 3- and 5-year-old, watched them abandon decorating after two minutes to eat frosting straight from the bowl. Her verdict: next time, box mix and store-bought.

358 Pcs Cake Decorating Kit: Everything you need to start baking and decorating cakes in one beautiful cake kit! Collapsible mint green decorating kit holds all of your baking accessories, keeping your supplies organized and easy to move. This cake decorating tool set adds 50 happy birthday cake toppers to make cake decorating easier and more fun!

【Multiple Textured Designs】This set includes 6 large acrylic scrapers, each with dual-edge designs, offering a total of 12 unique patterns. Ideal for creating a variety of decorative textures on cakes using buttercream, icing, mousse, or whipped cream.

6-Piece Set for Every Cake Size: This cake arch guide tool includes six different templates (mini, standard, wide, and flat) to help you create uniform arches and drapes on round, square, or irregular cakes. A must‑have among cake decorating tools for bakers of all levels
2. Pick the Right Cake Pan Shape

Wilton’s shaped pans do most of the heavy lifting before frosting even touches the cake.
An airplane pan turns the cake itself into the fuselage; Hello Kitty’s head arrives already formed from the mold. The shape carries the theme so completely that store-bought frosting and a handful of M&M’s can finish the job.
These pans rarely list exact measurements. Buying by visual size and serving count is the practical approach; a pan that looks right for your crowd usually is.
Combining shapes opens more possibilities.
A small bundt stacked on a 6 inch round builds a volcano with natural contours, scraps from leveling packed around the seam to fill out the slope. The pan geometry does the sculpting that would otherwise take knives and patience.
Grease and flour thoroughly, or use a non-stick spray made for baking.
Shaped pans have more surface area to grip, and a stuck wing or ear ruins the whole concept. The pan’s own instruction sheet typically includes decoration suggestions worth reading before you start.

This 1 pound bag of gummy worms candy delivers soft, chewy gummy candy made as dye free candy, giving you colorful fun and fruity flavor without artificial dyes; about 75 pieces

There are Pre-cut 70 pcs, you can use them directly when you receive

Complete Party Decoration Set - Includes a Happy Birthday banner, colorful balloons, cupcake toppers, and hanging decorations to create a bright and festive party setup.
3. Use a Sphere Pan for 3D Cakes

A half-sphere or full-sphere pan is the right tool when the cake itself is the decoration: soccer balls, planets, character heads, anything that reads as a ball first and frosting second.
Wilton makes the 3D Sports Ball Cake Pan set that most home bakers reach for, and it works, but the two halves bake separately and need a chilled crumb coat before you can frost them cleanly.
The center is where this shape fights back.
The rounded mass holds heat longer than flat layers, so the middle often reads done on a toothpick while still too soft to support its own weight. Give it extra time and test deeper than the surface.
Sphere pans also demand a different cooling approach.
You cannot flip them onto a rack the usual way without flattening the curve; most bakers cool them dome-side down on the pan’s own base, then trim the flat rim for a clean seam.
The frosting job is structural as much as decorative: buttercream between the halves acts as glue, and the whole assembly needs a rest in the refrigerator before final details go on.
Store-bought frosting works fine here, and for a planet or golden snitch, a few drops of Wilton icing color in cream cheese frosting covers the surface without the fuss of fondant.

BETTY CROCKER CAKE MIX: French vanilla naturally and artificially flavored cake mix with pudding in the mix, from Betty Crocker; It's America's #1 Cake Mix brand (based on 52 weeks of Nielsen sales data for dry cake mixes ending 4/05/25)

Perfect for making birthday treatsWhip up an easy dessert in no timeSo moist, so delicious, and so much more

Rich Chocolate Fudge Flavor: There's pudding in the mix, giving this cake a rich, decadent flavor and texture in every supremely chocolatey bite
4. Stick with Buttercream
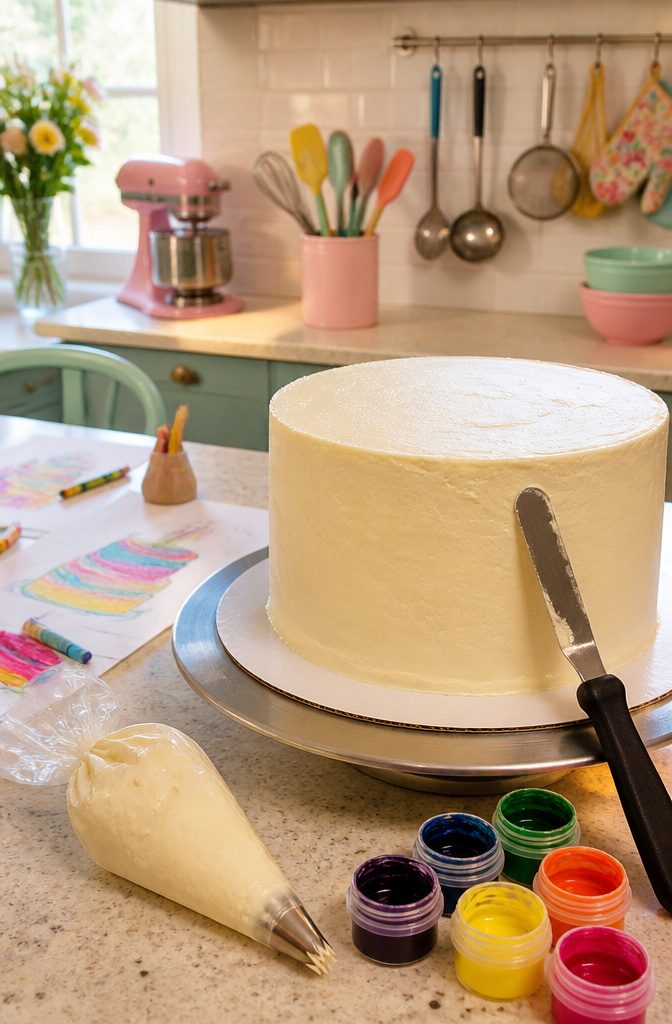
Buttercream wins over fondant for kids’ cakes on three counts: kids actually want to eat it, beginners can fix mistakes, and a bench scraper or even a butter knife gets it smooth enough.
Fondant looks sharp on camera, but the taste lands as pure sweetness with no richness behind it, and every fingerprint or air bubble shows.
For tinting, Wilton gel icing colors beat liquid drops. The gel gives saturated color without watering down the buttercream’s consistency, which matters when you’re already fighting summer kitchen heat.
Piping comes easier with buttercream too.
A simple star tip and a disposable bag turn out borders, rosettes, or a full textured coat that hides the imperfections underneath. Leave it swirled for a homemade look, or smooth it with a scraper held steady against the turntable.
Fondant holds those razor-sharp edges and geometric shapes that buttercream simply won’t; buttercream tastes better and forgives a shaky hand. For a kid’s birthday party, that limitation rarely costs you anything.

Size: 28 x 27 x 5cm/11 x 10 x 2inch

Size: 11“x9.8”x2.36“.Washable,safety, and health

Made of Aluminum alloy, temperature rated to 550F (Farenheit).
5. Add Toys as Toppers

A clean, new toy sitting on frosting beats hours of shaping fondant, and the child keeps it after the candles blow out.
Superhero figures, princess dolls, animal figurines, and space shuttles all work. Wash the toy first, let it dry fully, and pick pieces wide enough that they do not sink into soft buttercream.
A small fondant disc underneath helps, though it is not required. Remove the toy before you cut and serve; the frosting that touched it stays with the toy, not the slice.
If you don’t want to spend hours crafting Lightening McQueen out of red fondant, just use the toy version instead.
— Goodto
This means the decoration is the gift budget line item, and the cake itself stays simple. Plastic plants from the fish-tank aisle do not count as a present, so I stick to things a child actually wants to unwrap.

PROFESSIONAL SILICONE PASTRY BAGS: Compared with others,ELK's piping bags uses the 60HA elastic silicone, which is the perfect material for the piping tips set. The slight elasticity ensures its reusability, allowing the viscous liquids to flow smoothly inside. It won’t blow out even if you knead the thick batter with it. Its high stretchiness means that all of the squeezing efforts you make gets transferred to bulging sides as it stretches out, instead of forcing the frosting out the bottom.

Starter Decorating Kit: Wilton Beginning Buttercream Decorating Set is an easy-to-use buttercream piping kit for beginner cake decorating
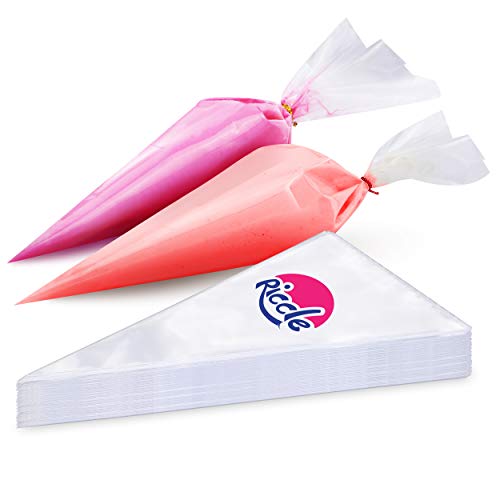
Thick Pastry Bags: Did your previous bags leaked? Are you afraid to squeeze them? Not now! Made of durable, anti-burst, non-slip and food grade plastic that is flexible, strong, reliable and thick enough to bear pressure of squeezing and frosting without any burst or leakage
6. Decorate with Candy

Candy is the fastest way to turn a frosted cake into something a child actually wants to eat.
A bag of store-brand baking chips, a tube of sprinkles, and a handful of chocolate buttons will cover a whole cake in ten minutes, no piping bag required.
I press candies into the side of the cake in rows for a border, or cluster them in one corner for a simple pattern.
Chocolate buttons make fine polka dots. Sprinkles shaken over a stencil of a number or letter give a clean shape with zero artistic skill.
For themed scenes, I arrange green and blue candies into grass and sky, then add a few animal crackers or toy figures the kid already owns.
The UK sources praise Aldi’s chocolate bar at 45p per 100g for melting and drizzling.
In US stores, I reach for the store-brand baking chips in the regular candy aisle instead of the smaller, pricier bags in the baking section. Same product, different shelf, half the cost.
Candy is cheap, colorful, and needs zero piping skill, though you do give up the polished look of hand-piped details.
You cannot fine-tune a sprinkle the way you can a buttercream rosette. What you get is color, texture, and the kind of messy abundance that looks deliberate on a child’s cake.

High Quality Cake Scraper: Teenitor cake smoother is made from high grade PP plastic to guard your healthy and safe life. Very sturdy and easy to use. High-quality plastic that can withstand repeated use and cleaning

This complete tool set is designed for decorating a variety of vinteg cake, from round and square to heart-shaped, offering the flexibility to work on 6"–12" diameters. It helps you create uniform arches and heart patterns for piping or design. Great for decorators of every level,from weekend bakers to pros piping stacked tiered wedding cakes.

Material: metal+ABS,Color:Blue
7. Use Edible Decorations

Edible decorations let kids add color and texture without piping skills, and the grocery store carries most of what you need.
Edible glitter and sugar shapes press right into buttercream or fondant while it is still soft; craft store baking aisles stock the widest variety of shapes, from stars to dinosaurs, and they cost less than custom orders.
Pre-made edible toppers, printed on rice paper or shaped from sugar gum, sit on top of the frosting like stickers, no glue needed.
The real standout for hands-on decorating is the edible marker: once fondant or hardened buttercream sets, kids draw directly on the surface with food-safe ink.
One source used them to turn plain macaroons into message boards on sticks, but the same move works on the cake itself. Buttercream needs a few hours to crust over before the marker won’t drag; fondant is ready immediately.
Skip the markers on soft whipped cream, though. The nib sinks and the line bleeds.

1-pound pack (around 50 pieces) of long Gummy Worms in soft, flexible shapes, perfect for filling jars, layering dessert cups, building themed snack trays, or keeping on hand for everyday sweet moments

1.This listing includes 1 piece of worm silicone chocolate mold.Overall dimension: 7.87x7.48x0.2 inches.

Sufficient Quantity: Our colorful fake candy charms bulk set includes 60 pieces of lovely gummy worm charms in 6 vibrant colors, with 10 pieces per color. A generous supply that keeps you stocked for all your creative needs.
8. Try Modeling Chocolate for Figures

Modeling chocolate is worth pulling out when the party theme is too specific for store-bought toys and you need a custom figure that still feels achievable with kids.
It handles like modeling clay and softens as the warmth from your hands works through it, which makes the material forgiving for small fingers learning to shape.
The practical path is to buy pre-made modeling chocolate rather than making your own.
Knead it until it turns pliable, shape simple figures, and let them firm up before placing them on the cake. Complex figures, like the dragon one source describes, take considerable time and practice to get right.
Stick to basic shapes for a first attempt: balls for heads, coils for bodies, flattened pieces for wings or fins. The method is easy, but the time investment scales fast with detail, so plan the design accordingly.
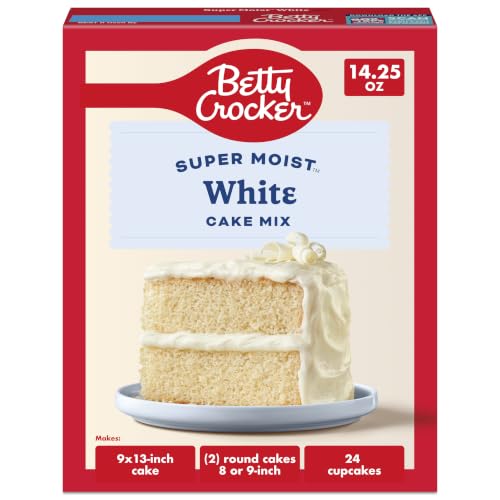
CAKE MIX: Bake a delicious, moist white cake dessert for gatherings, parties, or entertaining family and guests

BETTY CROCKER CAKE MIX: With Betty Crocker, it's easy to bake a lemon artificially flavored cake for dessert, a birthday cake, and more; It's America's #1 Cake Mix brand (based on 52 weeks of Nielsen sales data for dry cake mixes ending 4/05/25)

RICH CHOCOLATE FLAVOR: It's easy to create this indulgent devil's food cake dessert with rich chocolate flavor and moist texture using America's #1 cake mix brand (based on 52 weeks of Nielsen sales data for dry cake mixes ending 1/10/26)
9. Melted Chocolate as Edible Glue

Melted chocolate works better than buttercream for the decorations kids actually want, the ones that slide right off a curved surface or weigh more than frosting can hold.
A small dab on the back of a toy figure or a chocolate finger, held in place for a few seconds, sets into a bond that buttercream never manages.
The chocolate needs to cool enough that it will not melt the frosting beneath it, which means working in short windows and reheating if it thickens.
A small amount cooled on parchment also gives you custom flat shapes, dots or triangles or whatever fills a gap, with no piping bag needed.
Heat the chocolate slowly and at a low temperature, working in 10-second bursts in the microwave with stirring between, so it stays smooth without scorching. Once the piece is set, the fridge finishes the job.

Package Includes: You will receive 25 pieces of airplane cake toppers and cupcake toppers to make your airplane theme party decorations more thematic and attractive

Package Included: 48Pcs airplane cupcake toppers with 50 adhesive dot. These airplane cupcake toppers are very nice and enough quantity for your use, perfect for airplane theme birthday party

Material: Made of high strength food grade aluminum alloy, durable, not easy to deformation. Uniform heating, high heat transfer efficiency, the mold surface has been anodic oxidation resistance treatment. Safe, healthy, clean and light weight.
10. Printable Cake Toppers

Custom-printed cake toppers sit in a sweet spot between store-bought plastic and full fondant work, and only a couple of the pages I found even mention them.
That scarcity is your advantage: cardstock or edible paper toppers cost almost nothing and take fifteen minutes to assemble, but they look deliberate enough that guests assume you planned ahead.
Non-edible versions need a food-safe barrier. Slide the printed cutout onto a cocktail stick, straw, or wooden skewer, then push that into the cake.
The paper never touches frosting directly. If you are laminating at home, wide tape wrapped around the printout works fine.
Edible paper skips the barrier entirely; the whole topper dissolves into a bite. The tradeoff is printer access.
Most home cooks already own a printer, which makes the cardstock route the easier default. Either way, you are designing in whatever characters or colors the birthday kid actually wants, not hoping the supermarket stock matches this year’s obsession.
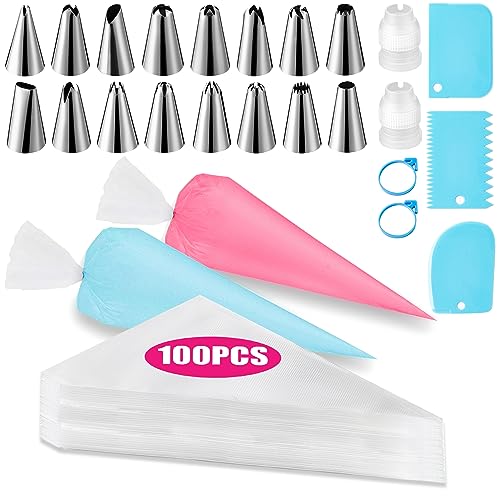
Cake Decorating Supplies: 100 pcs 12-inch large piping bags, 16 pcs stainless steel frosting piping tips set, 2 pcs couplers for piping bags, 2 pcs piping bag ties, 3 x plastic scrapers. You will have all the necessary tools to decorate delectable cakes
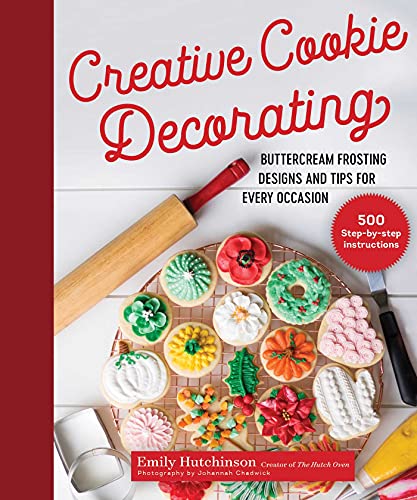

All In One Kit: 12 Russian flower nozzles, two leaf nozzles, two couplers, 30 disposable pastry bags and one reusable silicone bag; supplies and tools for cake, cupcake and cookie projects
Simple Techniques That Cover Mistakes

Texture does the heavy lifting when you do not have time to fuss.
A spatula pulled through frosting in loose swirls, or the back of a fork pressed into buttercream for ridged lines, turns an uneven crumb coat into the look you meant to do all along.
The marks catch light, hide dips, and read as intentional in a way a failed smooth finish never will.
Sprinkles and small candies finish the job in about thirty seconds, which matters when a small child is waiting to "help" and you still need to get dinner on the table.
I keep a jar of rainbow nonpareils and a bag of chocolate buttons in the cabinet for exactly this reason: no piping bags, no fondant, no stencils. Frost, texture, scatter, done.
The result looks festive because it is festive, not because it took two hours. That trade, time for texture, is the one that keeps cake decorating with kids something you actually finish instead of abandon halfway through.
Buttercream vs. Fondant: What Works When

Buttercream forgives.
Fondant does not. When a three-year-old bumps the table or a seven-year-old changes their mind about the theme mid-sprinkle, buttercream lets you scrape and start over; fondant cracks, dents, and sends you back to the rolling pin.
The taste difference matters too—fondant is sweet to the point of blankness, the kind of sweetness kids peel off and leave in a rubbery disk on their plate. Buttercream gets eaten.
| Buttercream | Fondant | |
|---|---|---|
| Taste | Rich, creamy, eaten | Cloying, often peeled off |
| Ease for kids | Forgiving, easy to spread or pipe | Requires skill, cracks, shows every dent |
| Appearance | Soft, textured, homemade | Smooth, sharp edges, bakery-polished |
| Best use | Most kids’ cakes | Specific shapes, smooth figures |
That said, fondant still earns its place.
A volcano cake built from a bundt pan and a 6-inch round needs those smooth sides if you want clean rock strata, and a figure that stands upright without drooping is easier in fondant than in buttercream.
For everything else, the piping bag wins.
What I Buy and What I Skip

The offset spatula is the one tool worth buying.
A steel palette knife glides around the curve of a cake and evens the top flat in seconds, and it cleans easier than a knife. Everything else is negotiable.
- Disposable piping bags work fine for a single birthday; skip the silicone set unless you already own one. Squeeze frosting through a zip-top bag with the corner snipped if you are pressed for time.
- Food coloring gel from the baking aisle beats liquid because it does not thin the buttercream. Three colors cover most themes.
- A turntable is nice for smooth sides but not necessary. A plate set on an upside-down bowl spins almost as well.
- Fondant tools and modeling chocolate add hours of work most kids will not notice. Toys from their room or printable toppers from a download do the same job faster, and the child gets to keep them after.
- Pre-made frosting from the supermarket is the practical choice. A box mix baked ahead and frozen saves the day-of scramble, which matters more than scratch bragging rights when the party starts at two.
Time and Cleanup by Method

The honest breakdown most recipes bury in a footnote is what decides whether a Tuesday evening project actually happens.
A store-bought cake plus a few toys takes about 20 minutes start to finish, with nothing but a knife and a serving plate to rinse afterward.
From-scratch baking with buttercream piping runs closer to 2 hours before you even touch a piping bag, and that assumes the layers have already cooled.
The mixer bowl, the piping bags, the offset knife, the scattered sprinkles across the counter: that cleanup is real, and it happens when the kids are already in bed.
| Method | Time | Dishes | Best for |
|---|---|---|---|
| Store-bought cake + toys | ~20 min | Plate, knife | Weeknight birthdays |
| Scratch cake + buttercream piping | 2+ hrs | Mixer, bowls, piping bags | Free Saturday |
| Scratch cake + candy decorations | 1.5 hrs | Standard baking pans | Middle ground |
I reach for the store-bought shortcut when the birthday falls on a school night and my patience is already thin.
The scratch route wins when I want the act of decorating to be the activity itself, not just the means to cake.
The candy middle ground splits the difference: you still bake, but the decorating is fingers-and-candy rather than pastry bags and couplers, which cuts the cleanup in half.
Frequently Asked Questions
What are some simple cake decorations I can use for my child’s birthday cake?
Colorful sprinkles, candies, chocolate buttons, and edible glitter cover a whole cake in about 10 minutes with no piping bag needed.
Press them into rows for a border, cluster them for patterns, or shake them over a stencil for a clean shape. Small toys the child already owns finish the theme without extra craft work.
I’m not very experienced with baking. What’s the easiest way to decorate a birthday cake?
Start with a store-bought cake and canned frosting, then let your child press candies and sprinkles into the surface.
One parent who made everything from scratch watched her 3- and 5-year-olds abandon decorating after two minutes to eat frosting from the bowl; her next cake used box mix and store-bought frosting instead.
The whole process takes roughly 20 minutes and leaves only a plate and knife to wash.
Can you suggest a theme for my child’s birthday cake that’s easy to decorate?
Superheroes, princesses, animals, and outer space all work well because they match toys and candies you probably already have.
A washed superhero figure or doll sits right on the frosting and becomes a keepsake afterward; candy colors fill in grass, sky, or costume details without piping skill.
Wilton shaped pans in an airplane or Hello Kitty design carry the theme before you even open the frosting.
What’s a quick way to add a special touch to a plain cake?
Press your child’s favorite toys into the frosting after washing and drying them fully, or let them draw on hardened buttercream with an edible marker after it crusts for a few hours.
A printable topper on a skewer takes about 15 minutes to assemble and costs almost nothing, but looks deliberate enough that guests assume you planned ahead.