These go from a sheet of printed card stock to a rotating stand you will use again, with most falling in the handful-of-candies range where the decoration itself costs less than the frosting underneath.
A crumb coat and a bench scraper only matter when the finish stays visible, which is why candy, fruit, and sprinkles are the first 3 ideas I list.
1. Candy Decorations

The candies press right into soft buttercream; no piping bag, no technique, no waiting.
Buy 2 bags so you have enough of the colors you actually want. The second bag also replaces whatever gets eaten while you work.

Complete Party Decoration Set - Includes a Happy Birthday banner, colorful balloons, cupcake toppers, and hanging decorations to create a bright and festive party setup.

Package includes: This set includes 3 individual gummy candy party banners, each featuring a lineup of adorable bears in red, orange, yellow, green, blue, and purple. The bright colors and lifelike design make them perfect sweets bear party supplies for creating a fun, festive look.

Candy Party Decorations: this set includes 24 pieces of pastel gummy candy bear hanging ornaments, featuring 6 soft pastel colors with 4 of each; These gummy candy bear party decorations brighten a space and create a cheerful atmosphere for guests
2. Fresh Flowers

A few stems of grocery-store flowers and a handful of berries make a cake look like it came from a bakery case.
I cut the stems short, wrap the cut ends in floral tape, and press them into the frosting at an angle so they look casual, not arranged.
Faux flowers work the same way and travel better. Either way, keep blooms that are not food-safe clear of where the cake gets sliced.

Permium material :Edible flowers cake decoration are made by glutinous rice paper.It's no flavor (not sweet),Sugar free! Gluten free! Soy free! Trans-fat free! Suitable for vegetarians and vegans

🍰 【Edible Flowers for Cake Decorating & Dessert Toppings】- Perfect edible flowers cake decorations, cupcakes, cookies, cake pops, and plated desserts. Ideal flower cupcake toppers, cake decorations flowers, and edible decorations for treats.

Use these spikes to hold real and silk blooms on your cakes
3. Sprinkles

Sprinkles are the fastest way to hide uneven frosting. I pour them into a shallow bowl and roll the cake’s sides through, then pinch a handful to press along the top edge.
A zip-top bag with the corner snipped pipes a neat border with no coupler needed. The sprinkles do most of the visual work either way.
Sprinkles are a classic for a reason—you really can’t beat ’em when it comes to making a cake feel extra celebratory.
— Delish


One 16 oz can of Duncan Hines Creamy Cream Cheese Frosting

4. Fresh Fruit

Berries over chocolate cake give you color contrast without food coloring. I arrange them in a loose pile rather than a pattern; it looks more expensive and takes less time.
Gold leaf, if you want it, comes in sheets that tear easily with a dry brush. Touch it only with the brush, never your fingers, or it sticks to skin and ruins.

GREAT FOR BAKING: Take your recipes to another level with Bakers Choice cake sprinkles and toppings. Our crunch topping is perfect for all your cake batters, cookie batters or cheesecakes. Give your pastries and dessert crusts the perfect crunchy flavor and decorate your cupcakes, doughnuts, cakes, muffins or pies with our topping.

Enjoy fresh strawberries hand dipped in both white and milk chocolaty confection with a chocolaty drizzle. Adored by chocolate lovers everywhere.

5. Chocolate Ganache Topping
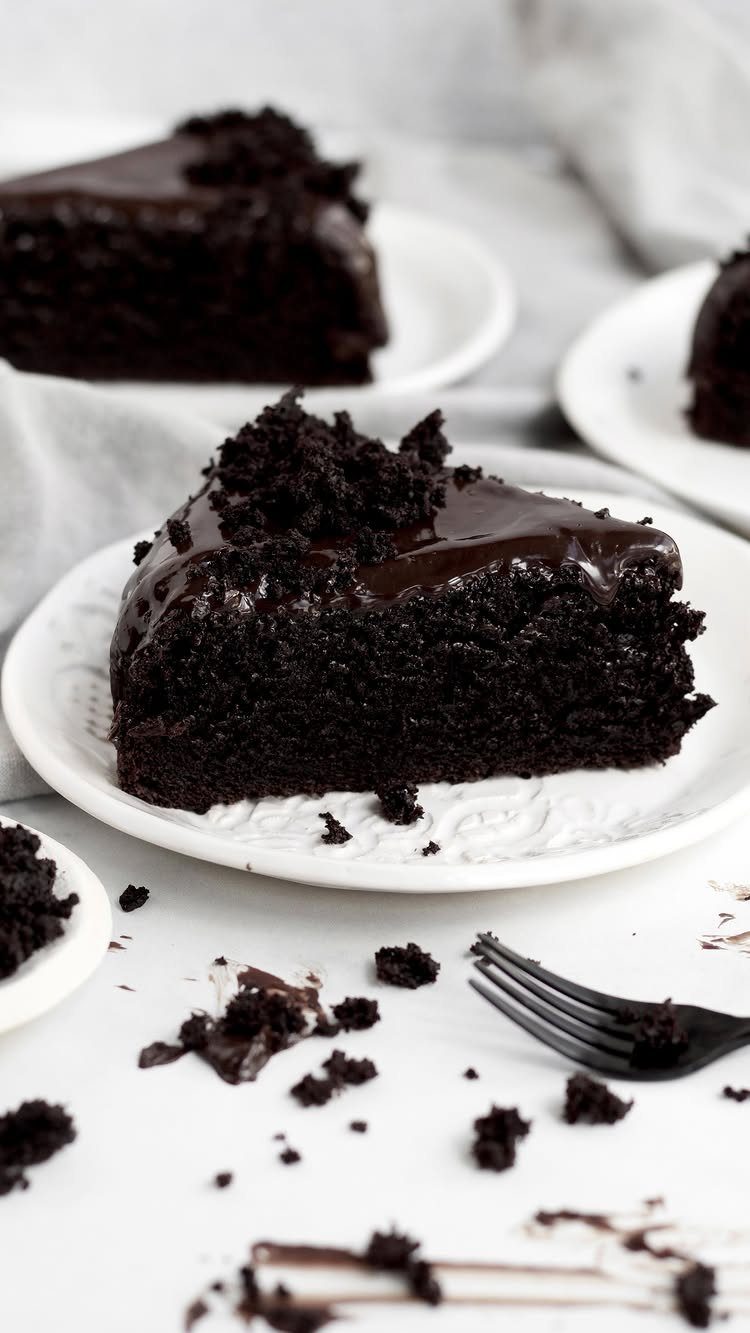
Chocolate ganache is two ingredients, one bowl, and 10 minutes of actual work. I heat heavy cream until it simmers, pour it over chopped chocolate, let it sit so the heat does the work, then stir until glossy.
The pour itself should be slow and from the center so the ganache finds its own edge.
The maker of this cake calls it "super simple decadent," which I read as permission to stop worrying. A cold cake before pouring gives you a thicker coat; room temperature gives you the drips.

Premium Dutch Chocolate Ingredients: Created for craft beverages with Holland's finest dutched cacao ground chocolate and vanilla for rich, authentic flavor


Devilishly Delicious, Thick, Smooth & Premium Chocolate Ganache
6. Toy Figurines

Toy figurines turn any frosted cake into a themed centerpiece in the time it takes to unwrap them.
I press them into the top at slightly different heights; one figure flat on the surface looks dropped, two or three at angles looks composed.
I tell the birthday kid they get to keep them; it distracts from the cake disappearing.

EASTER CAKE DECORATIONS - 24 REALISTIC STRAWBERRY ICING TOPPERS - Welcome spring with these hand-painted strawberry icing decorations perfect for your Easter desserts. Each edible strawberry features delicate pink hues that complement Easter pink cupcakes and spring themed cakes. Ready to use for Easter brunch or spring celebration treats.

Complete & Exciting Package for Creative Play: Unwrap fun with our candy balloons set! It includes 8 cane balloons, 4 ice cream balloons, 10 foil candies balloons, and 8 large inflatable lollipop balloons. This vibrant assortment offers hours of entertainment, perfect for families, classrooms, or party planners looking to bring a festive touch to any event

eFrutti Bakery Shoppe gummi pack. Fun and delicious gummy bakery items.
7. Face Cutouts

A cardboard printout of the birthday person’s face, stuck on a skewer and pressed into the cake, reads as humor rather than craft project. A plain frosted cake gives the face the most impact.
Office supply stores print onto card stock for a dollar or two.
Cut around the shoulders, tape a bamboo skewer to the back, and push it in at a slight tilt so it faces the room. One is enough; more than two and the joke wears thin.

Edible & Tasty Decorations - These white icing flowers are completely edible and made from food-grade materials. They add a delightful touch to your cake decorating projects, making every slice as beautiful as it is tasty.

Use these spikes to hold real and silk blooms on your cakes
8. Edible Image Cake Toppers

Edible images let you reproduce a photo, a logo, or a character in the time it takes to peel a backing sheet.
The image arrives printed on thin icing; you lay it on fresh buttercream and smooth the edges with a dry finger.
I order mine from grocery-store bakeries or online print shops, where the price with shipping stays reasonable.
The image needs a pale frosting base to read true; dark chocolate will mute the colors. Pipe a simple shell border or a few swirls around the edge to frame it, and the cake looks finished without further decoration.

One 16 oz can of Duncan Hines Creamy Vanilla Frosting


Elegant Candy Sprinkles - Top off sweet birthday treats or match a variety of holidays and occasions with these cake sprinkles. Add color and flair to your celebration cakes and desserts with these Blue cake sprinkles.
9. Simple Script Lettering

"Happy Birthday" in flowing script turns a plain white cake into something intentional. I write the words first with a toothpick, then trace over my own marks with a piping bag of tinted buttercream.
A #3 round tip gives enough control without demanding steady hands; a zip-top bag with a tiny corner snipped works in a pinch. Black against white is the most readable contrast, but any dark color on pale frosting succeeds.
Keep the pressure even and pull the tip away cleanly at the end of each stroke. Mistakes scrape off with a small offset spatula and the surface smooths again with a hot knife.

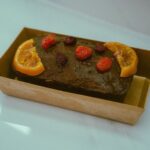
A berry-flavored cake topped with strawberry and blueberry fruits with chocolate drizzles


Contains 12 ounces of double chocolate and red berries granola
Essential Cake Decorating Supplies
An offset spatula is the tool I reach for first on any cake, big or small. It spreads buttercream evenly and smooths the surface far better than a dinner knife.
A rotating cake stand turns the cake while I work so I do not walk around it. The Ateco stand stays sturdy and turns smoothly even with a tall layer cake on top.
A bench scraper is the tool I reach for when the frosting needs that last pass to look finished.
A slightly flexible one, like the GIR model, conforms to the curve of the cake and cleans up the sides in a few passes.
I consider it optional for candy- or fruit-covered cakes where the decoration hides the frosting, but it matters for any design that shows the finish.
No coupler needed.

Pure Ingredients - Our Espresso Chocolate Sauce is made with fresh Montana cream, sweet butter, intense espresso, and cacao.


Tips for Frosting
A crumb coat is a thin layer of frosting that seals the cake surface before the final coat.
I spread it thin enough to see cake through in spots, chill the cake for about an hour, then frost over the hardened base. The cold sets the buttercream firm so crumbs stay trapped underneath.
I always pull frosting from the center of the bowl outward, never dragging my spatula back through the main supply after it has touched cake. This keeps the bowl clean for the final coat.
Frosting a warm cake is a mistake you only make once; I let layers cool to room temperature before I start. A warm cake melts buttercream and slides under its own weight.
Unfrosted cakes freeze well for up to 1 month wrapped tight in plastic. I thaw them in the wrapper so condensation forms on the wrap, not the cake surface.
Frosting Techniques
A thin crumb coat reads as intentional texture when you cover it completely in sprinkles. The decoration does the visual work; the frosting underneath only needs to stick.
Swirls and patterns need buttercream thick enough to hold its shape.
I spread it on generously, then drag a butter knife through in loops or lines. The tool shapes the frosting; the pressure decides how deep the texture runs.
Fruit and candy designs get their appeal from what you pile on top, so the frosting underneath does not have to be perfect. A rustic frosting finish suits them better than glass-smooth sides.
When I want height, I make a second batch and add more layers. The same decorating logic applies; the height only gives more surface to cover.
Frequently Asked Questions
What are some simple toppings for cake?
Fresh fruit, sprinkles, and candies are the fastest options. Fresh berries against dark chocolate frosting give you a color pop that no dye bottle matches, and a handful of sprinkles will distract from any wobbles in your finish.
A few unwrapped candies pressed into soft buttercream look intentional and cheerful, and you never have to touch a piping tip.
How can I make a classic birthday cake?
Bake 2 layers, cool them completely, and sandwich with frosting before coating the outside.
A thin layer of frosting scraped over the whole cake traps the crumbs; let it firm up in the fridge, then spread your final coat over that solid base.
Finish with sprinkles, fruit, or candy for a design that looks intentional without demanding precision.
What is the 4 day cake rule?
I wrap unfrosted layers tight in plastic and freeze them; when I thaw, I leave the wrap on so any condensation collects on the outside, not on the cake.