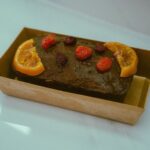

First, freeze your bare cake for one hour until the icing feels hard like cold clay.
Then wrap it tight with three to four layers of plastic wrap, and slide it into an airtight container.
Store it in the back of a deep freezer, away from the door, and avoid opening it or stacking anything on top.
When your anniversary comes, move the cake to your fridge for 24 to 48 hours while it’s still sealed.
Finally, unwrap it and let it sit at room temperature for two to three hours before eating.
Each step below breaks this down with more tips to help your cake taste just like your wedding day.
What a Year in the Freezer Does to Cake

A year in your freezer changes cake more than you might expect. You’re storing that anniversary cake, hoping it’ll taste perfect later, but freezer storage brings real challenges. The dry, moving air in frost-free units slowly pulls moisture from your cake, creating texture change you cannot ignore.
You’ll notice buttercream fondant holds up better than whipped cream fillings. Without proper wrapping, you’re inviting freezer burn, that dry, icy coating that ruins flavor. Custards and fresh fruit will separate and turn mushy, regardless of storage method.
Your deep freezer works harder than the fridge-top model, keeping steady cold that protects structure. For thawing, allow 24 to 48 hours in the refrigerator rather than rushing the process on the counter. Proper freezing and thawing techniques will preserve the cake’s quality for that first bite together.

PRESS'N SEAL PLASTIC FOOD WRAP: With a quick press and glide, this food wrap keeps food fresh with a leak proof, air tight seal making it the ultimate storage solution; packaging may vary

CLING WRAP WITH SLIDE CUTTER-Contains one roll of Reynolds Quick Cut Plastic Wrap with slide cutter, measuring 225 feet long by 12 inches wide (225 square feet)

Plastic Food Wrap: Add our plastic food wrap to your household items to extend food freshness with a tight seal
Freeze the Cake Bare to Harden the Icing

How do you keep that beautiful icing from smearing when you wrap it? Freeze the bare cake first, letting the icing harden before you touch it with plastic wrap. This pre-freeze step takes about one hour and prevents smearing effectively.
Freezing icing firms it up completely. When icing hardens, you can wrap tightly without ruining your beautiful finish. Follow these steps:
- Remove large sugar flowers or decorations before you start
- Place the unwrapped tier flat in your freezer for 60 minutes
- Chill until the surface feels solid, like cold clay
After this quick chill, frosting will remain intact during wrapping. Then add several layers of plastic wrap to create an air-tight container. Skip foil directly on cake, as it causes freezer burn. If you want foil, place it over the plastic wrap only.

Place your freshly baked Bundt cake inside, set the cover on top, and twist to lock the cake safely inside

FOOD-GRADE MATERIAL: We put your health first, and made this cake carrier with food-grade PP material, ensuring you and your food stay healthy, fresh and safe for all your friends and family!

【Package Includes】There comes with 40 pieces of 8 oz plastic jars, they are round with wide mouth which can easily meet the storage needs of a variety of items. Besides, there comes with 45 extra rewritable labels and a pen as gift, they can help you to figure out what items inside the jar and make a quick choice.
Wrap Your Wedding Cake for the Freezer

Once your cake’s icing feels hard like cold clay, you’re ready to wrap it up tight. First, remove any large decorations or sugar flowers so they won’t tear during wrapping. Grab your plastic wrap and wind it around the cake several times, pressing firmly to seal out air and moisture. Don’t let foil touch the cake directly, as it can damage your icing.
| What You Need | Why It Matters | Pro Tip |
|---|---|---|
| Plastic wrap | Blocks freezer burn and odors | Use 3-4 tight layers |
| Airtight container | Extra protection for your anniversary | Label with the date |
| Patience | Proper wrapping ensures easy thawing | Press out all air bubbles |
Slide your wrapped cake into an airtight container, seal it, and write the date on top. You’ll be able to identify the cake easily on your anniversary when you’re ready to thaw it.

HEALTHY - TeamFar cake pan is made of food grade stainless steel, No any other chemical, No worry about coating flaking off into your food, Healthier for daily baking, A good alternative to aluminum or nonstick pans

Versatile Cake Pans – These 3-inch deep cake pans will bring out the best in your baking skills. With these three tall cake pans in three different diameters, you can bake smash cakes, birthday cakes, three-tiered wedding cakes, and more!

Store It Undisturbed for a Full Year
Where exactly should you put your wrapped cake so it stays perfect for twelve months? You’ll want to find a spot in your freezer that stays cold and steady, away from the door where warm air sneaks in every time you grab ice cream.
Your year-long storage depends on getting these details right:
- Place your top tier in a deep freezer or the coldest back corner, avoiding spots near the front
- Add clear labeling with the date and flavor so you don’t forget what’s inside during freezing
- Check that your plastic wrap layers created an airtight seal, then leave it alone for undisturbed storage
Don’t peek, don’t shift it around, and don’t let your kids stack pizza boxes on top. One full year of patience will preserve that perfect anniversary slice.

Bakery-Style Results: Wilton Royal Icing helps you achieve bakery-style results for cake, cupcake, and sugar cookie icing; it also sets in a way that allows cookies to be stacked on top of each other

Consistency Preserved: Keep your cake batter and icing intact with this gel-based color formula. These liquid food coloring won't change textures and alter the consistency of your creations.
Thaw Your Anniversary Cake Properly
After a full year of waiting, you’re finally ready to enjoy that preserved top tier. Freezing your wedding cake was only half the battle. You need to thaw properly to protect every precious bite. Start your gradual thaw by moving the cake from freezer to fridge 24 to 48 hours before your anniversary. Keep it sealed in its airtight container during refrigerator thaw to lock in moisture and block fridge odors. Once thawed, remove all wrapping and let your cake rest at room temperature for 2 to 3 hours. This final step restores the texture and flavor you remember.
| Thawing Stage | Time Needed | What You Do |
|---|---|---|
| Freezer to fridge | 24–48 hours | Keep wrapped, place in airtight container |
| Fridge rest | Full duration | Don’t rush—let gradual thaw work |
| Room temperature | 2–3 hours | Unwrap, then serve and savor |
Skip shortcuts. Proper thawing ensures your cake tastes as it did on your wedding day.