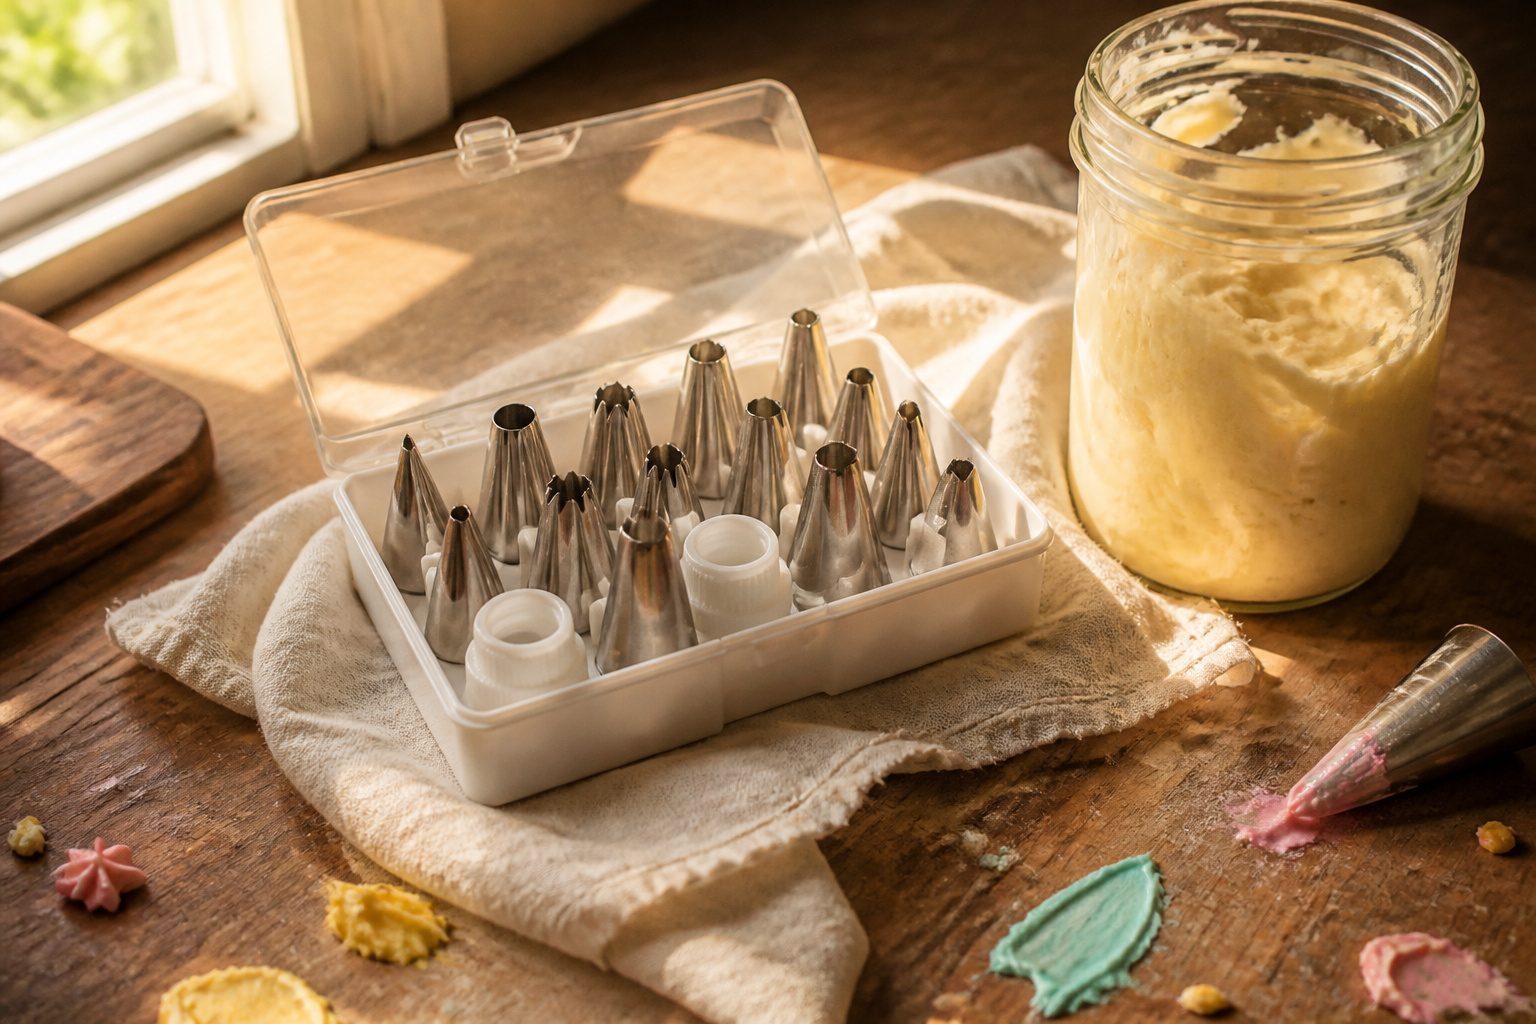
The only icing tip guide you need starts with the coupler, a two-piece plastic fitting that lets you swap metal tips without scraping buttercream into a new bag.
That convenience collapses if the ring cracks or cross-threads; a leaking coupler wastes more time than no coupler at all.
For the fine lines a #2 round tip produces, metal is the only material that keeps the opening from ovaling out under pressure.
Round Piping Tips

Round tips are the ones I reach for when the job is writing, beading, or any small detail that needs a clean edge.
The sizes that matter here are #1, #2, #3, and #5, and the difference between them is straightforward: #1 and #2 give you the finest lines and tiniest beads, while #3 sits in the middle for general detail work and #5 produces bolder, heavier shapes.
For most home bakers, #2, #3, and #5 cover nearly everything.
I keep #1 on hand too, but I use it only when I am doing wedding-cake lacework or cookie details where a #2 would leave the line looking too thick. Even then, a #2 handles the majority of fine work without the frustration.
Metal beats plastic for these small sizes every time. The thinner the opening, the more pressure concentrates at the tip, and plastic warps under that stress where metal holds its shape.
A #1 in plastic will oval out after a few squeezes and your lettering goes wobbly. Metal costs more upfront, but for fine work it is the only material that keeps the edge consistent.

10-Piece plain pastry tip set

【PACKING LIST】You will receive a set of 20 stainless steel piping tips in 5 different sizes, which can be used to pipe different sizes of buttercream
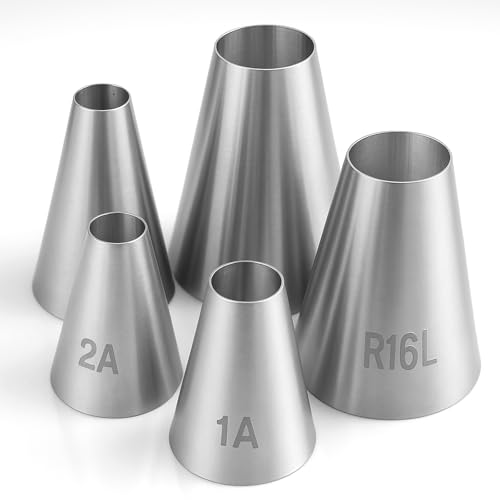
Versatile round piping tips: This large piping tips set includes 5 different sizes, perfect for creating a variety of designs on cakes and cupcakes. From big piping tips for bold decorations to smaller ones for intricate detailing, these pastry bag tips are essential for any baking enthusiast.
Star Piping Tips

Star tips are the workhorses of cake decorating, and three sizes cover most of what a home baker needs.
The Wilton 1M open star is the tip most people picture for cupcake swirls, with deep teeth that grab buttercream and lift it into those tall, ice-cream-scoop ridges.
The teeth don’t curve toward the center, so the swirl stays open and defined rather than tight and ridged.
For borders and smaller details, the #14 and #18 give you more control.
The #14 pipes small shells, ropes, and tiny rosettes that read as finished accents rather than centerpieces. The #18 scales up to standard shell borders and fills in as your all-purpose star tip when the 1M would overwhelm the surface.
Rosettes work across all three sizes. Standard tips drop small floral accents between larger decorations, while the 1M or a 2D closed star builds the statement rosettes that turn a plain cupcake into bakery-case material.
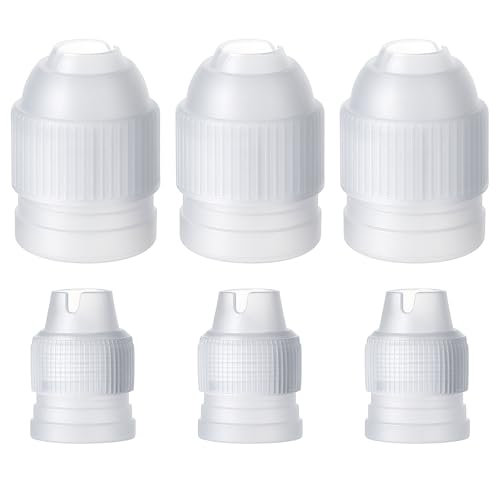
Quality Material: Crafted from PP plastic, these ccouplers for piping bags are tasteless, and reusable. Their robust construction ensures long-lasting performance, making them ideal for both professional bakers and home enthusiasts
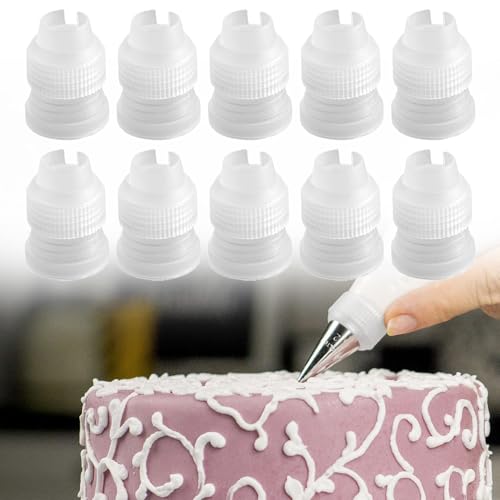
EASY TO USE: Couplers for piping bags by LUTQ allow for quick and easy nozzle changing, making cake decorating more efficient

CREATE MULTICOLOR DESIGNS: Easily decorate cupcakes, cakes and other desserts using two or three icing colors at the same time for colorful swirls and creative designs.
Closed Star Piping Tips

Closed star tips earn their keep when you need a tighter, more defined swirl than an open star will give you.
The teeth curve inward and meet at the center, so the ridges come out deeper and the shape holds its structure better as you pipe.
The Wilton 2D is the workhorse here: large enough for cupcake swirls and rosettes, small enough for whipped cream on a cheesecake. I reach for it when I want that layered, almost-ribbed look that stands up without sagging.
The Ateco 857 is the French-style counterpart, with narrower teeth and a closed center that pipes similarly to the 2D but leaves deeper grooves.
It is also pickier. Any buttercream with cookie crumbs or thick mix-ins will clog those tight spaces, so smooth frosting only.
The Ateco 869 sits in the same family, though its teeth do not curve to the center; sources call it an open-star French tip, which puts it outside this category.
For the neater, more sculpted finish, the closed shape wins. For volume and speed, the open star is the better tool.

#𝟑𝟑𝟔 𝐂𝐥𝐨𝐬𝐞𝐝 𝐒𝐭𝐚𝐫 𝐏𝐢𝐩𝐢𝐧𝐠 𝐓𝐢𝐩𝐬: Nozzle model #336 Swirl Pastry Tube. Measures 4.6 cm (1.8 in) in height, 3 cm (1.2 in) in bottom diameter, and 0.4 mm in thickness. Seamless integrated design ensures full and precise ornamental patterns.

Complete Decorating Set: This comprehensive kit includes three stainless steel 1m piping tip units and ten durable piping bags. Perfect for creating intricate designs on cakes and cupcakes, this set provides everything beginners and professionals need for stunning baked creations.

5 Matching 6B Tips: Five identical medium open star piping tips let you prepare multiple bags for different frosting colors
Drop Flower Piping Tips

Drop flower tips are the fastest way to put a flower on a cupcake without building it petal by petal.
Wilton makes two sizes: the 2C for a standard drop flower and the smaller 109 if you want something more delicate. Either one gives you a full blossom with a single squeeze.
Frosting consistency matters more here than with almost any other tip type. The grooves in a drop flower tip are intricate, so buttercream that is too stiff will clog the details and come out as a blob.
Too soft, and the ridges melt into each other before they set. A medium-stiff buttercream works best: it holds a peak but still flows through the small openings without your hand cramping.
I find the 2C works best when I keep the cupcake still and move only the tip. Pipe a small center mound first, then lower the tip to the surface and squeeze once for each surrounding petal.
The design builds outward in seconds. These tips were made for cupcake bouquets and traybakes where you need volume fast, and they deliver exactly that.

Bend-resistant stainless steel


PACKAGE INCLUDES: You will receive 3 No. 18 piping tips, which can be overlapped when stored. And each No. 18 cake decorating tips has 7 piping tips, which can meet your daily use
Ruffle Piping Tips

The #103 and #104 are officially petal tips, but turn them sideways and they become ruffle tips for decorative edges — a fact that trips up plenty of beginners who buy them expecting one job and getting another.
These two sizes share the same teardrop-shaped opening: the #104 is the larger of the pair, and both work by pressing the wide end against the surface while the narrow end faces outward, then rocking the wrist in a steady wave.
Buttercream roses get most of the attention in tip tutorials, which is where the confusion starts.
Someone watches a video, sees the tip held vertically for a rose, and never realizes the same metal can lie flat against a cake tier to build a ruffled border.
The motion is different too. For ruffles, you keep the tip almost parallel to the surface and let the icing pleat itself as you pull; for roses, you stand it up and wrap petals around a center cone.
Between the two, the #104 sees more use on full-size cakes where a bigger ruffle reads correctly, while the #103 saves the detail work for cupcake toppers and cookie edges.
If you own one petal tip and need it to do both flowers and ruffles, the #104 is the more versatile purchase.
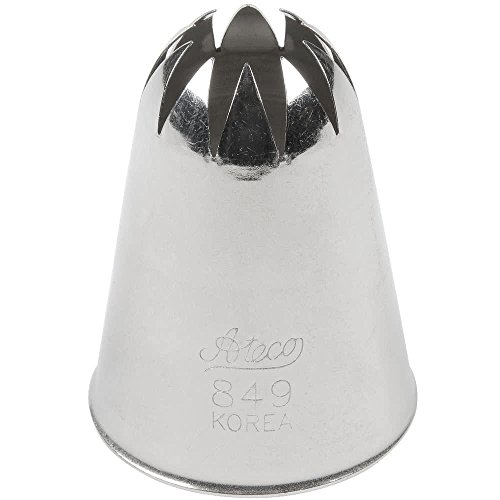
Item Package Dimension 4.5299999953794L x 2.1699999977866W x 1.4599999985108H inches

2D Icing Tip:Ideal for piping star,mashed potatoes,cookies,meringues,nice frilly top on cupcakes,and buttercream roses swirl to makes cute flowers.
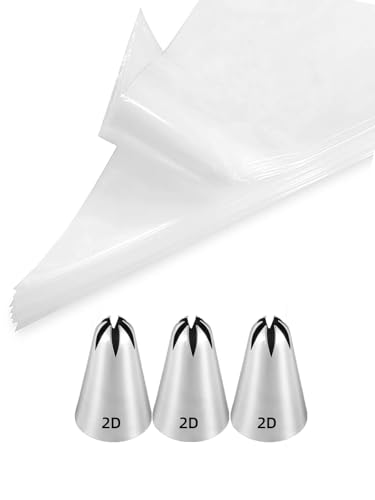
Versatile Piping Set:Build your skills with 2d drop flower tip that will allow you to pipe pretty flowers on cakes and cupcakes quickly. Includes 3pcs 2d icing tips and 20pcs 12-inch disposable decorating bags.
Petal Piping Tips

Petal piping tips give you petals shaped like teardrops, not the straight folds a ruffle tip produces.
The curve comes from holding the tip at a 45-degree angle to the surface, which is steeper than the nearly upright posture ruffle tips prefer.
Medium-sized petal tips handle most buttercream flowers well, though smaller ones work when piping on standard cupcakes where space is tight.
Pressure control matters more here than with open star tips.
Too soft and the petal definition collapses, too firm and the buttercream ridges lose their thin edge. Instant flower tips take a different approach entirely, building whole roses or blossoms in one squeeze rather than petal by petal.
Those need a stiffer buttercream, the kind that holds intricate patterns without sagging. The medium petal tip is my usual starting point for anything petal by petal; it moves between cupcake toppers and cake borders without a switch.

Unique Decorating Piping Tip Set : This Large decorating piping tip set includes a variety of cake decorating piping tips: 1A, 1E, 1M, 1C, 6B, 195,356, 853, and 9FT, providing you with professional-grade cake decoration tools for making cupcakes, cookies, and cakes at home.

1. Eco-Friendly & Extremely Durable Silicone Say goodbye to single-use plastics. Crafted from premium, food-grade silicone, these reusable piping bags are engineered to withstand over 500 heavy-duty squeezes without stretching, tearing, or blowing out. It is a sustainable choice that significantly reduces kitchen waste while providing professional-grade reliability for your thickest doughs and buttercreams.

1. Versatile Design: Our stainless steel piping tips offers unparalleled versatility for your baking endeavors.Each frosting tips is carefully selected to provide a diverse range of decorating options.The piping tips set includes a round plain tip for classic borders and outlines,an open star tip for beautiful swirls and rosettes,a closed star tip for intricate designs and textures,a drop flower tip for delicate floral embellishments,and a french star tip for unique patterns and accents.With these large piping tips, you'll mees all your needs.
Couplers
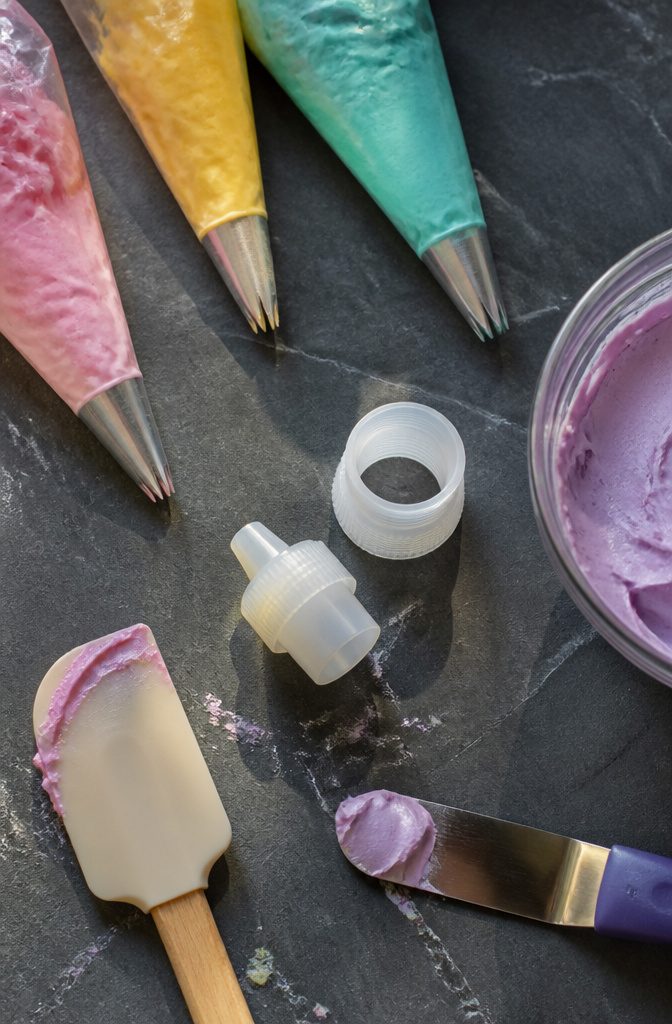
A coupler is the one tool in this icing tip guide that will save more time than any tip upgrade you buy.
It is a two-part fitting: a main tube that sits inside the piping bag, and a threaded ring that secures the metal tip from the outside.
Unscrew the ring, swap the tip, and screw it back on; the frosting stays in the bag. Most are plastic, and they come in sizes, with the medium size handling the majority of standard tips.
Without a coupler, every tip change means scraping frosting into a new bag or washing the one you have.
That is not a minor inconvenience if you are piping a cake border in one shape and roses in another with the same color buttercream. The time lost adds up fast, and the cleanup is worse.
You can also use the coupler base without its ring, called an open coupler, for covering large areas where no shaped tip is needed.
The ring itself should thread on snug; a cracked or cross-threaded ring will leak or let the tip shift mid-pipe.

Riccle Piping Bags and Tips Set, 11.8 Inch 100 Anti Burst Piping Bags, 124 Pcs Cake Decorating Kit with 16 Piping Tips, 1 Reusable Pastry Bags, 3 Cake Scrapers

2-Pack Multi-Size Couplers: This set includes one large and one small nozzle converter, providing versatile couplers for piping bags that fit both standard and specialty decorating tips for cakes, cupcakes, cookies, and pastries.

TIME TO GET CREATIVE - Baketivity Pastry bag adds fun and excitement to kids' baking activity as it lets them get creative in decorating their pastries.
Piping Bag Types

Disposable piping bags are the easiest place to start.
Plastic ones run cheap in bulk, and when you’re done, you toss the whole thing rather than scraping buttercream out of corners. That convenience matters if you decorate once a month and do not want a dedicated cleanup station.
Reusable cloth bags, usually coated inside to repel fat, are the more eco-friendly pick.
You have to wash them. Fabric risks cross-contamination no matter how well you rinse, so I would not use them for someone with an allergy and then switch to a different frosting without absolute confidence in the wash.
Parchment triangles fold into a workable bag for a single drizzle of chocolate or caramel.
They are biodegradable and free if you already keep parchment in the drawer, but they demand practice to seal properly and will not take pressure the way plastic does.
Bag sizes tend to cluster around 12-inch and 16-inch lengths. The 16-inch holds more buttercream at once, which means fewer refills and steadier rhythm when you are covering a layer cake.
The 12-inch is enough for a dozen cupcakes and easier to control if your hands are smaller. Either works; the choice is really about how often you want to stop and reload.
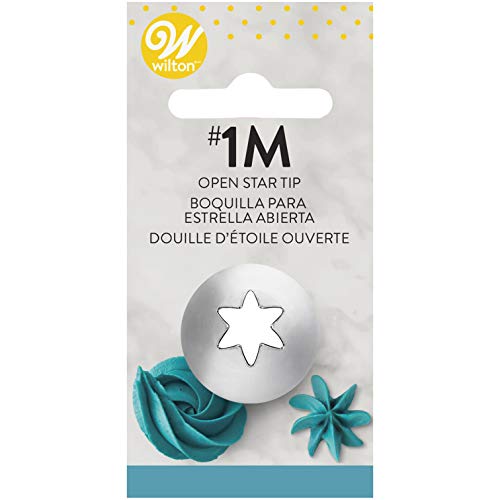
Ideal for perfect swirls, roses and drop flowers
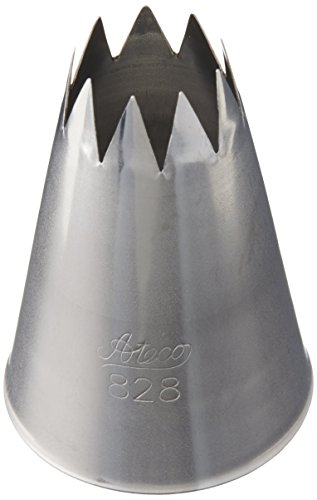
Sold as: Each . Manufacturer #: 828 .

5 Large Piping Tips: Includes 1M, 2D, 2F, 6B and 2A tips for swirls, flowers, stars, rosettes and frosting borders
Frosting Consistency

The right buttercream for a star tip should hold a stiff peak when you lift the beater, while round tips need something softer that will flow through a narrow opening without breaking.
Buttercream that is too stiff will not come out of the bag; buttercream that is too soft will not hold its shape once piped.
I test a batch by pressing a spatula into it and lifting straight up. The frosting should keep the ridge without slumping, but it should not feel dry or crumbly on the spatula.
For intricate roses or other designs where definition matters, you will need to beat in extra powdered sugar until the mixture can practically stand on its own.
Before committing to the full cake, pipe a few tests on the back of a bowl or a spare cupcake liner. The shape should set within a minute and keep clean edges.
If it sags, the buttercream is too soft. If it cracks or the tip clogs, it is too thick.
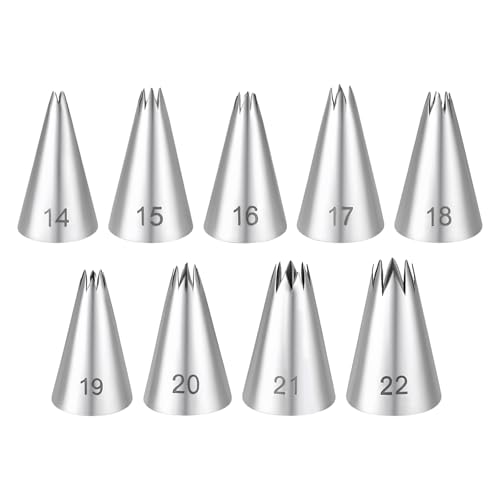
【Durable Material】Crafted from food-grade stainless steel, these pastry decorating tips resist corrosion and maintain hygiene. The dishwasher-safe design simplifies cleaning, while the rust-proof material ensures long-term use for professional bakers and beginners alike.

THE SET INCLUDES: 3 stainless steel piping tips, which can be stacked for storage. There are three star-shaped piping tips in three sizes: 16#, 18#, and 32#, to meet your different daily needs

Flawless Decorating Every Time: Craft your cakes, cupcakes, and cookies with ease using star tip #18
Basic Piping Technique

Even the most expensive tip in the drawer is useless without steady pressure control. Squeeze too hard and the icing shoots out in a peak that spoils the shape; release too slowly and you drag a tail across the finish.
Keep the bag secure, apply a steady flow for the body of the work, then cut the pressure cleanly at the end.
Bag handling matters just as much. A bag stuffed full forces your hands to fight the bulk and tires them out faster.
A smaller load sits flatter in your palm and responds to small adjustments. Practice the motion on parchment before you touch the cake.
The Wilton 2D demonstrates why: its small teeth openings need firm, even pressure to ruffle, but lighter pressure for a rosette. The same tip, two different results, and the only variable is your hand.

【Packing List】 You will receive 3 pieces of 2D star tip cake decorating tips, the thickness is 0.4 mm and the specific length, width and height dimensions are 8 x 6 x 2.5 cm. This size is the first choice for cake lovers and beginners.

Tiny Star Tip for Piping:Frosting Tip #16 can make stars, shells, fleur-de-lis, rosettes and flowers.

2D PIPING TIP SET:Ideal decorating tips for piping beautiful cupcake rose swirl,detail borders,stars, flowers and rosette cake.
Frequently Asked Questions
What are the best piping tips for frosting cupcakes?
The Wilton 1M open star, Wilton 2D closed star, and Ateco 826 are the three tips that cover most cupcake work.
The 1M builds tall, defined swirls with deep ridges; the 2D gives a tighter, more layered ribbed look that holds its shape; and the Ateco 826 pipes wider, softer swirls similar to soft-serve ice cream.
For buttercream with mix-ins like cookie crumbs, the 826’s wider teeth won’t clog.
How do you know if your buttercream is the right consistency for piping?
Press a spatula straight into the buttercream and lift. The frosting should keep the ridge without slumping, but it should not feel dry or crumbly.
Too soft and shapes will sag within a minute; too stiff and the tip will clog or the icing will crack. For intricate roses, beat in extra powdered sugar until the mixture can practically stand on its own.
Can I use a plastic storage bag instead of a piping bag?
Plastic zip-top bags are not recommended.
They are weaker than purpose-built piping bags and tend to burst open from the pressure of squeezing, which wastes frosting and creates a mess. Disposable plastic piping bags are cheap in bulk and designed to handle the stress.
How do you put a decorating tip on an icing bag?
Fit the coupler base inside the bag first, then cut the bag so the coupler tube protrudes.
Slide the metal tip over the coupler tube and screw the ring down to lock it in place. The narrow ends of both bag and tip should face the same direction, with no overlap covering the tip opening.
What type of icing is best for cupcakes?
American buttercream is the standard choice for cupcake piping. It should be thick and fluffy enough to hold its shape, without being so dry that it crumbles or so runny that ridges melt together.
The exact stiffness depends on the tip: star tips need a stiff peak, while round tips need something softer to flow through narrow openings.
Can you reuse piping bags?
Reusable cloth bags coated inside to repel fat are an eco-friendly option, but they require thorough washing.
Fabric risks cross-contamination, so they should not be used for someone with an allergy and then switched to a different frosting without absolute confidence in the wash. Disposable plastic bags eliminate this concern entirely.
What are the available sizes of piping bags?
The two most common lengths are 12-inch and 16-inch. The 16-inch holds more buttercream for fewer refills and a steadier rhythm on layer cakes.
The 12-inch is enough for a dozen cupcakes and easier to control for smaller hands. Either works; the choice depends on how often you want to stop and reload.