The right easy icing cake designs for you depend on what will actually hold up in your kitchen, not what looks flawless in a photo.
A mirror glaze demands a cake chilled hard for hours and a pour temperature of 90–95°F, while a spoon-textured finish forgives uneven frosting and skips the smoothing entirely.
That forgiving quality is what separates the designs you will finish from the ones that sit half-done on your counter.
Most beginners fail at the timing, not the technique. Buttercream crusts faster than you expect, which is why the pressed sprinkle method needs your parchment torn and your sprinkles open before you even frost.
1. Chocolate Ganache Drip
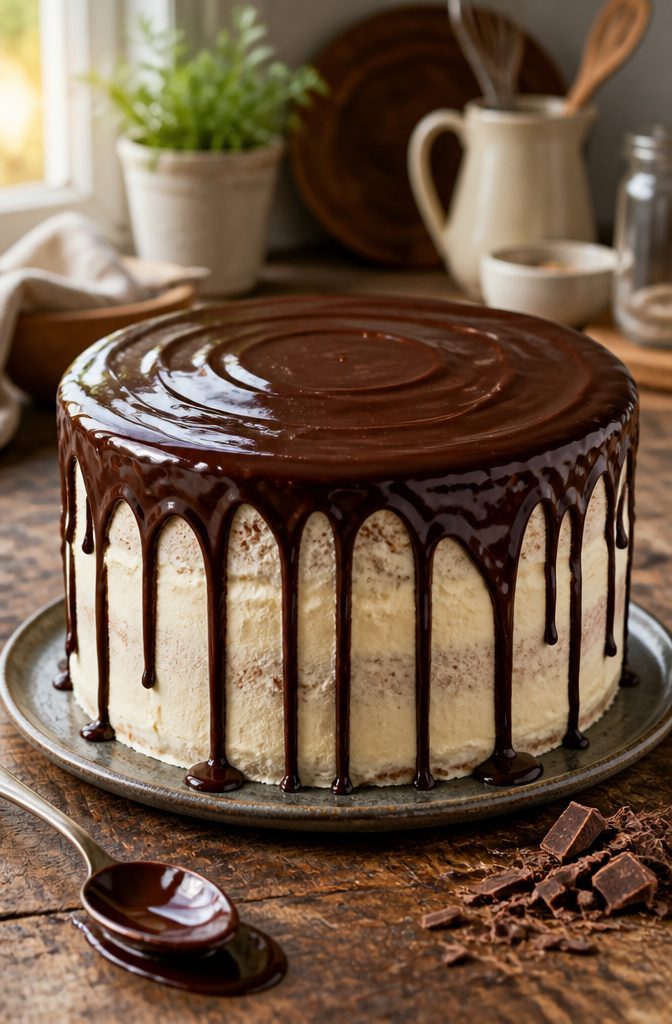
Chocolate ganache behaves differently than buttercream in a way that actually helps beginners.
It sets firmer as it cools, so slight unevenness smooths itself out rather than staying put as a permanent flaw. That forgiving quality makes it ideal for your first drip cake.
The process takes about 2½ hours total, though most of that is hands-off waiting.
Start with a chilled cake and apply a thin crumb coat first, spreading a base layer of frosting to trap loose crumbs before they migrate into your final finish.
Refrigerate that layer for roughly 30 minutes until it firms up, then add your smooth top coat.
For the drip itself, the ganache should be pourable but not runny. Spoon it along the top edge and gently nudge it over with the back of the spoon so it drizzles down the side in controlled streams.
Beginning at the back of the cake lets you practice the rhythm before committing to the front, where eyes land first.
A bakery trick worth borrowing: brush each cooled cake layer with simple syrup before any frosting goes on. It locks moisture in so the cake still tastes fresh on day three.
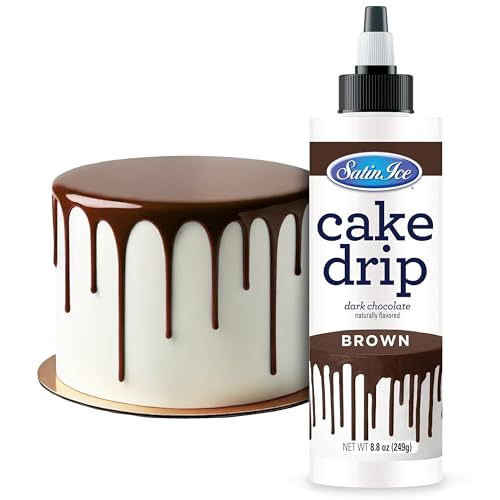
Satin Ice Cake Drip is fun and easy to use! Simply melt in the microwave, shake thoroughly, and you're ready to create stunning drip cakes or drizzle over desserts
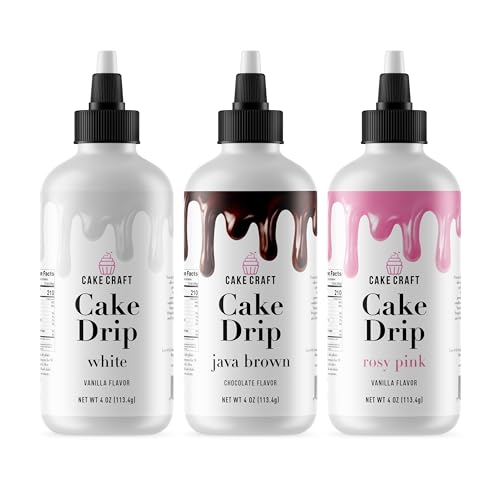

EASY TO MELT & APPLY – Simply heat in the microwave, cool slightly, shake the bottle, and squeeze to create smooth cake drip effects, dessert drizzle, and bakery style decorations. Each bottle can coat the top or drip the sides of one 8 inch cake with a soft, delicious finish.
2. Mirror Glaze Finish
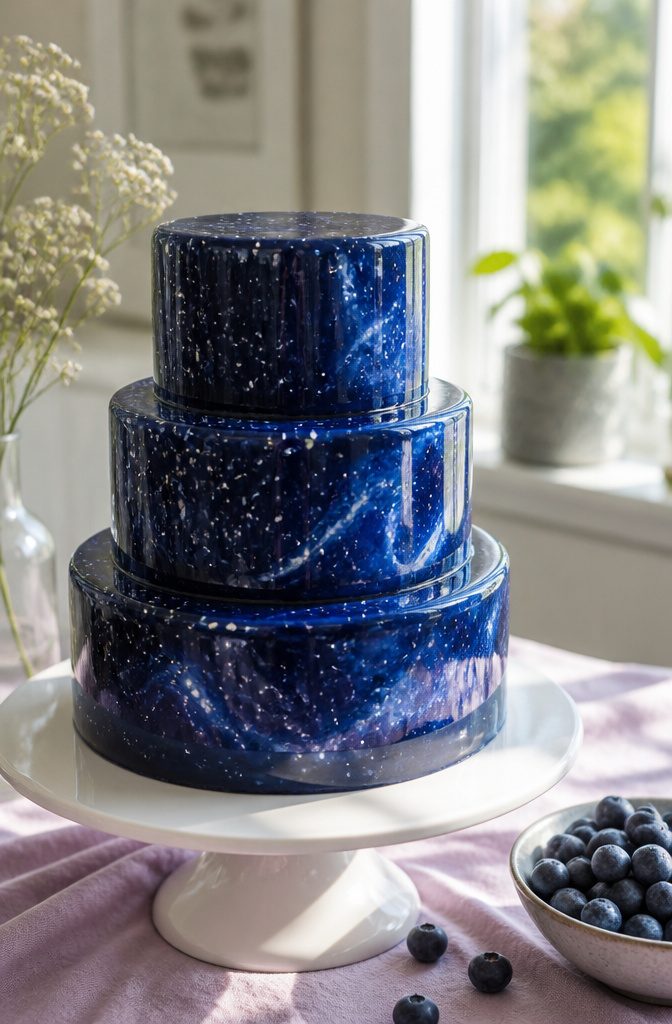
A mirror glaze finish looks like poured glass, but the work happens before you ever mix the glaze. The surface underneath has to be flawless; any bump in your buttercream telegraphs straight through that thin, reflective layer.
I chill the cake hard, at least a couple of hours, so the glaze sets on contact instead of melting its way in.
The glaze itself is straightforward.
Gelatin, sugar, condensed milk, and white chocolate, with food coloring if you want the swirling galaxy effect that shows up everywhere now. You heat it, blend it smooth, then wait.
Pour at 90–95°F and it flows in an even sheet. Too hot and it runs right off the cake; too cool and it thickens into streaks.
This finish works best on cold mousse cakes or firm buttercream, not soft American frosting that might slump.
Cleanup is a sink full of bowls, since you strain the glaze and ideally pour over a wire rack set inside a sheet pan to catch the runoff.
The timing tightens the whole process, but the result justifies the fuss if you want a cake that looks bakery-case professional.

Sturdy and durable to use: our cake scraper is made of stainless steel material, non-toxic and odorless, thick, durable and safe to use, easy to clean, reliable material can serve you for a long term

PREMIUM STAINLESS STEEL CONSTRUCTION – Crafted from high-quality, food-grade stainless steel, these cake scrapers are thick, sturdy, rust-resistant, and built to last. Unlike flimsy plastic alternatives, the durable metal construction ensures they won't bend or warp during use, giving you reliable performance for years of cake decorating.

Sturdy Stainless Steel Construction: Crafted from food-grade stainless steel, these cake scrapers offer reliable strength and resistance to rust. The robust material maintains its shape under pressure, ensuring it remains a dependable tool in your kitchen for all your baking projects
3. Funfetti Cake
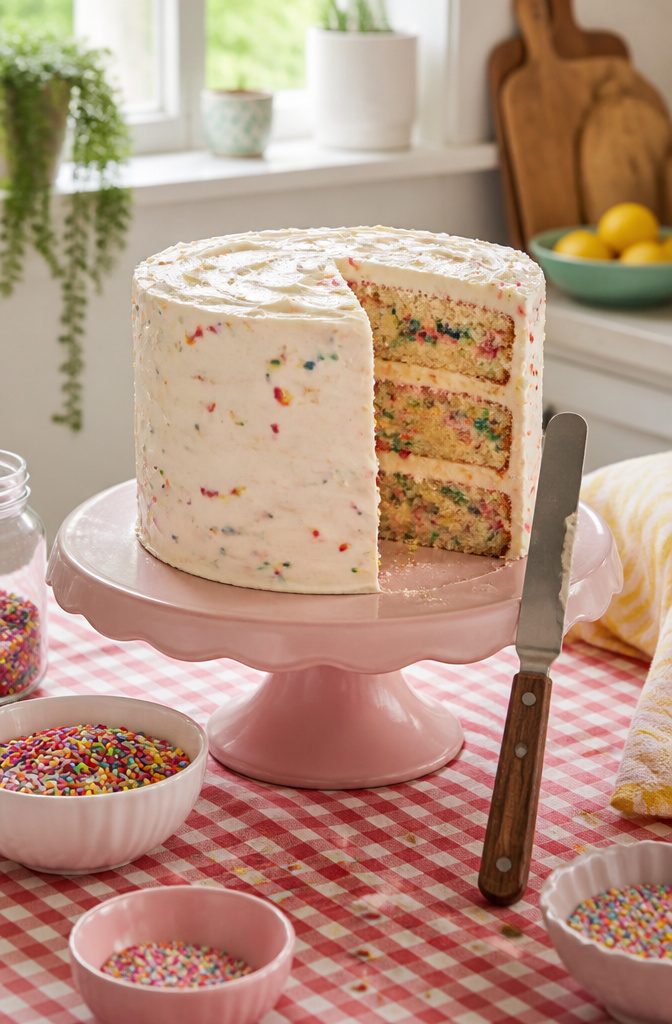
The sprinkles baked into the batter do most of the decorating work on a Funfetti cake, which makes it one of the more forgiving options when your piping skills are still shaky.
A standard buttercream here needs 3 to 4 cups confectioners’ sugar beaten with half a cup of shortening, four to five tablespoons of milk or half-and-half, and a teaspoon of vanilla.
I add the almond extract too, though it is optional; the half teaspoon deepens the flavor without reading as cherry.
The real move is in the batter.
Fold your sprinkles into the final cup of batter gently, and do it at the very end. Stir them in too early or too hard and the colors bleed into a muddy lavender-gray before the cake even hits the oven.
Hold them back until the rest of the mixing is done, then fold just to distribute. The baked cake shows clean, bright confetti spots against white crumb, and the buttercream on top only has to be smooth, not architectural.

COMPREHENSIVE 30-PIECE SET:This set includes 2 sets of food-grade cookie paint brushes, fan brushes for large coverage and precision brushes in various lengths and thicknesses, nice for intricate designs. Ideal for cookies, cakes, pastries, and more
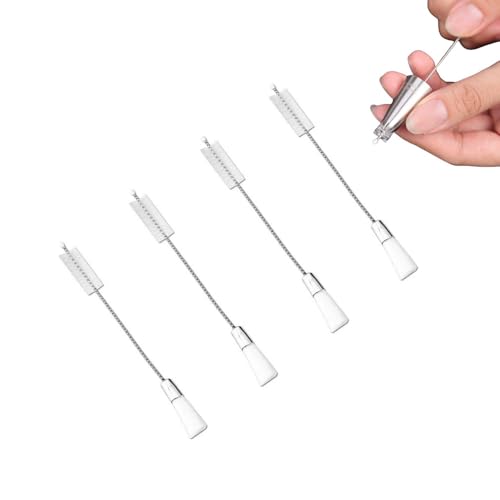
Package Contents: 4 x Double-headed Decorating Nozzle Cleaning Brush

[Versatile Tools] This 9-piece pastry brush set includes cookie decorating brushes and stainless steel tweezers, perfect for creating intricate designs on cakes, cookies, and fondant. A variety of brush sizes and tweezer shapes ensure you can easily tackle any decorating challenge
4. School-Days Sprinkle Sponge
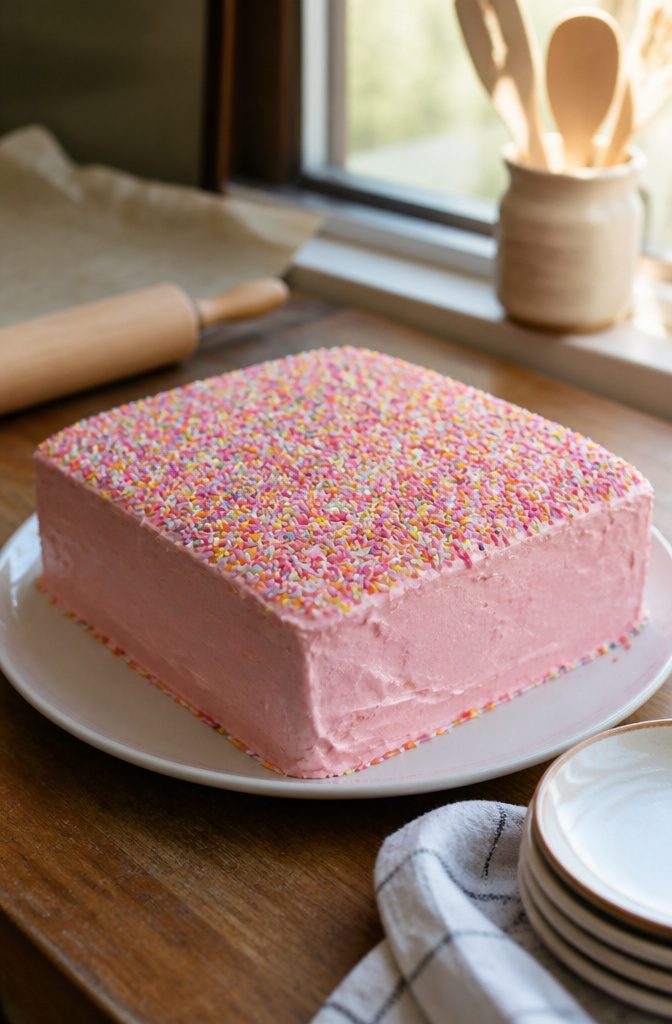
A rectangular sponge cake cut into neat squares practically begs for this treatment. Spread a thin layer of buttercream across the top and sides while it is still fresh and tacky, then scatter hundreds-and-thousands generously over the surface.
Lay a sheet of parchment paper across the frosted cake and press gently but firmly with your palm, working from the center outward.
The paper flattens the sprinkles into the buttercream without leaving fingerprints, and the pressure anchors them so they do not shed onto plates later.
The technique works best on a same-size board you can grip underneath with one hand while pressing with the other. Hold the cake over a rimmed baking sheet to catch what falls; rotate as you go.
No piping bag, no tip to clean, no skill to build. The finish reads as cheerful nostalgia, the kind of cake that shows up in a lunchbox or on a paper napkin at a backyard birthday.
Pressed sprinkles give a more even coat than scattered ones, and they stay put. Speed is the only catch: this needs doing before the buttercream crusts, so have your sprinkles open and the parchment torn before you frost.

MADE EASY: This drizzling scoop is great for getting beautiful lines of tasty candy onto your treats. Designed to work with melted Candy Melts candy, it will help you make fabulous tasting treats (works well also with melted chocolate)

Package contents: you will receive 4 pieces of sugar stir needles, 8 pieces of cake decorating modeling tools, 10 pieces of cookie decoration brushes, 1 pair of elbow tweezers and 1 pair of straight tweezers, sufficient quantity and nice combination can fit your cooking and baking needs

Stainless Steel Material: Chocolate dipping tool is made of stainless steel, this chocolate dipping tool is stable, andreliable, maintaining its shine even after long-term use. It's an ideal tool for home confectionery making, candy making supplies
5. Gravity-Defying Sweetie Cake
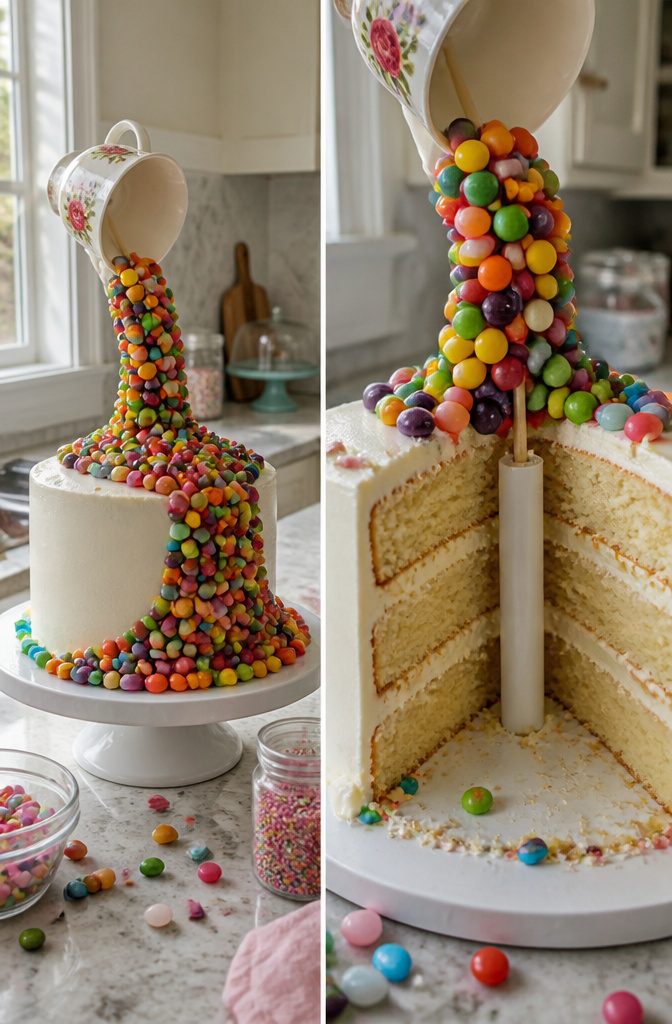
The suspended candy pour works because you build the lie into the cake before the frosting goes on.
A wooden dowel runs from the cake board up through the tier, hidden inside the crumb coat, and a real container, a mug or small box, gets fixed to the top with hot glue or royal icing.
The stream of attached candies, glued in a solid arc, completes the illusion of motion.
You need to decide the angle early. The base coat must fully bury the dowel, or the mechanics show through and the trick collapses.
I prefer to carve a shallow channel into the cake surface with the back of a spoon, press the dowel in, and smooth buttercream over it in two thin layers rather than one thick one.
Two thin sets faster and shrinks less.
The container should look like it belongs in a kitchen, not a craft store. A ceramic espresso cup reads better than plastic.
Weight matters; a heavy cup on a thin dowel torques the whole structure. I use a 1/4 inch dowel minimum, sometimes 3/8 inch for anything taller than six inches.
This design eats time in planning and almost none in execution. The result is wildly out of proportion with the effort, which is why it keeps showing up at children’s parties.
6. Rainbow Cake
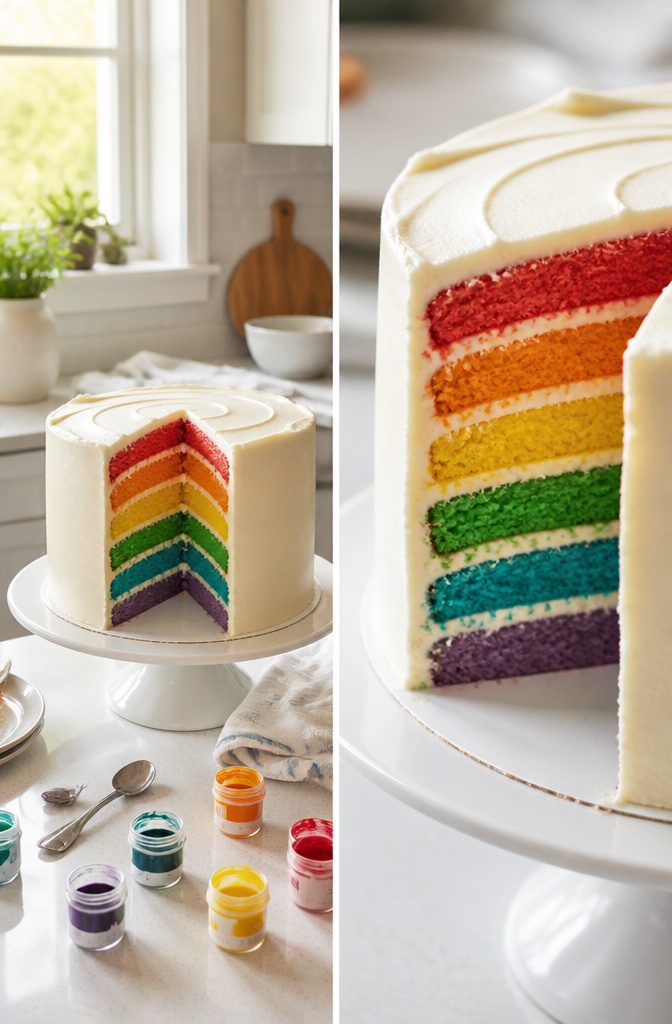
A rainbow cake is one of the most reliable ways to impress without mastering any exterior piping technique.
Six thin layers, each dyed a different color and baked to about an inch tall, do all the visual work from the inside.
The outside only needs a simple white or pale frosting so the sliced cross-section delivers the full effect.
Trimming matters more than decoration here.
Each layer domes as it bakes, and those domed tops will shift the cake off-center if you stack them as-is. I run a serrated knife across the top of every cooled layer until it sits flat, then stack.
The BBC Good Food approach of baking in batches of two keeps the timing manageable for a home oven, and gel food coloring gives the intensity that liquid drops dilute.
Cold layers are your other secret weapon.
A chilled or frozen cake sheds far fewer crumbs into the white frosting than room-temperature layers, which means the simple exterior actually looks clean instead of speckled. Trim the domes before you freeze, wrap tightly, and thaw slightly before assembling.

You Will Get: Contains 15 baking brushes in various sizes with different brush head sizes. You can choose the right cake brush for painting according to the actual situation. Reusable, no additional tools required

Reliable Material : The soft, synthetic bristles is approved to be food grade material, ensuring your family completely safe.

Thanks to this Ateco 1661 decorating tip cleaning brush, cleaning icing and piping gel out of small and large pastry tubes has never been easier
7. Easiest Ever Wedding Cake
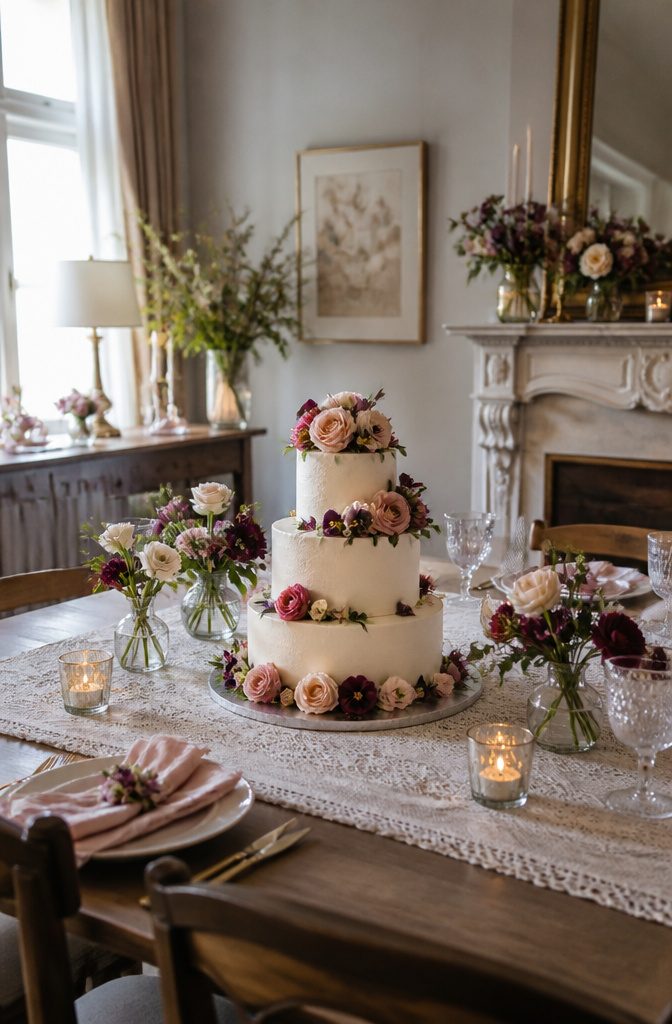
A three-tier wedding cake sounds ambitious until you realize the structure hides in the hardware, not your piping skills. Build it with three supermarket cake mixes and pre-made frosting, baked in identical pans so the sides line up without trimming.
Stacking needs hidden internal supports, and a cardboard round between each tier carries the weight so the cake below doesn’t compress.
I skip the custom cake boards; a foil-wrapped cardboard circle from the pantry works fine if it is perfectly flat.
Fresh flowers finish the look for almost nothing.
Roses and pansies are safe edible choices, provided they have not been sprayed. Wash them in cold water, pat dry, and cut the stalks to about three inches.
Insert a drinking straw into the cake first, then slide the stem inside. The straw blocks the stem from weeping into the frosting and keeps any sap away from the slice your guests actually eat.
For a fuller cluster, band a few stalks together and treat them as one unit in a single straw.
The result reads as bakery work at a tenth of the cost.
Time is the only catch: assembly needs a cool room and a couple of hours for the frosting to crust between tiers, so this is not a last-morning project.

Transform Cakes With Pre-Colored Cake Drip - Turn plain cakes into bright, eye-catching creations with DecoPac Cake Drip. Wide range of superb ready to use colors to choose from.

Free of palm oils

DELICIOUS CAKE DRIZZLE: This mouthwatering vanilla-flavored drizzle wonderfully complements the taste of cakes, cookies, donuts, strawberries, and pastries
8. Chocolate and Caramel Ombre
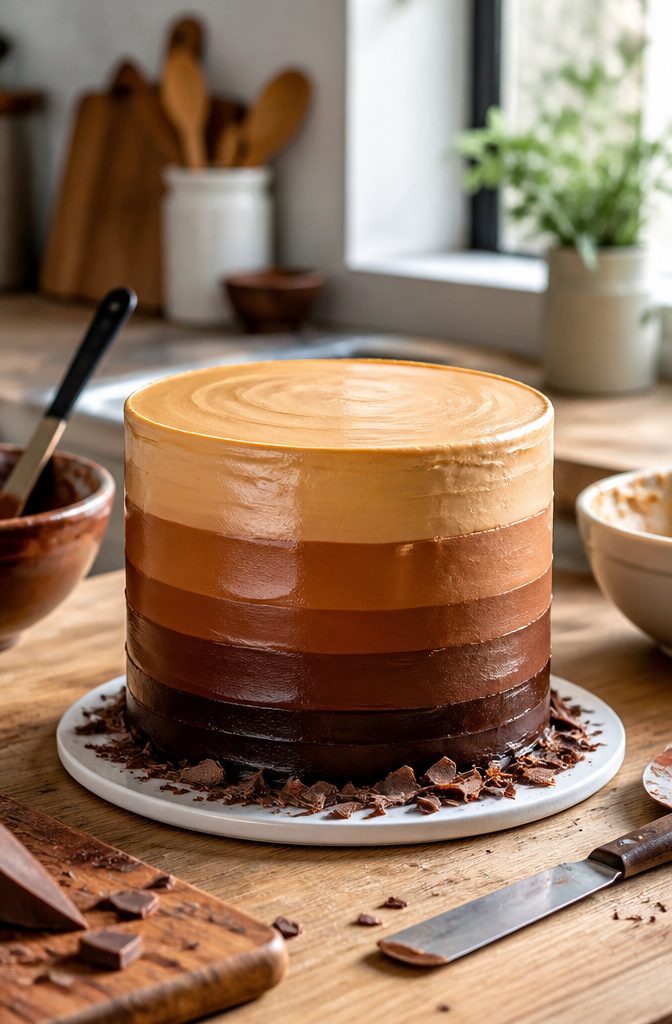
Ombre frosting looks dramatic but comes down to one practical move: divide a single batch of frosting into portions and darken each slightly more than the last. For chocolate ombre, melt chocolate and stir increasing amounts into each bowl.
For caramel, reduce the sugar longer for the dark end or add dulce de leche to the light. You want compatible flavors that blend visually without muddying.
Apply the darkest band at the base, the lightest at the top. Run the back of an offset spatula horizontally where two bands meet while the frosting is still soft, working in short strokes until the transition smooths out.
The pressure matters more than the motion: too light and you get stripes, too heavy and the colors mix into one flat tone.
This same graduated approach works with coffee and vanilla, strawberry and cream, or any pair where the darker flavor carries enough pigment to show the shift.
The limitation is opacity. A pale lemon to buttercream transition reads as subtle; a deep cocoa to white chocolate reads as architecture.
9. Vegan Birthday Cake
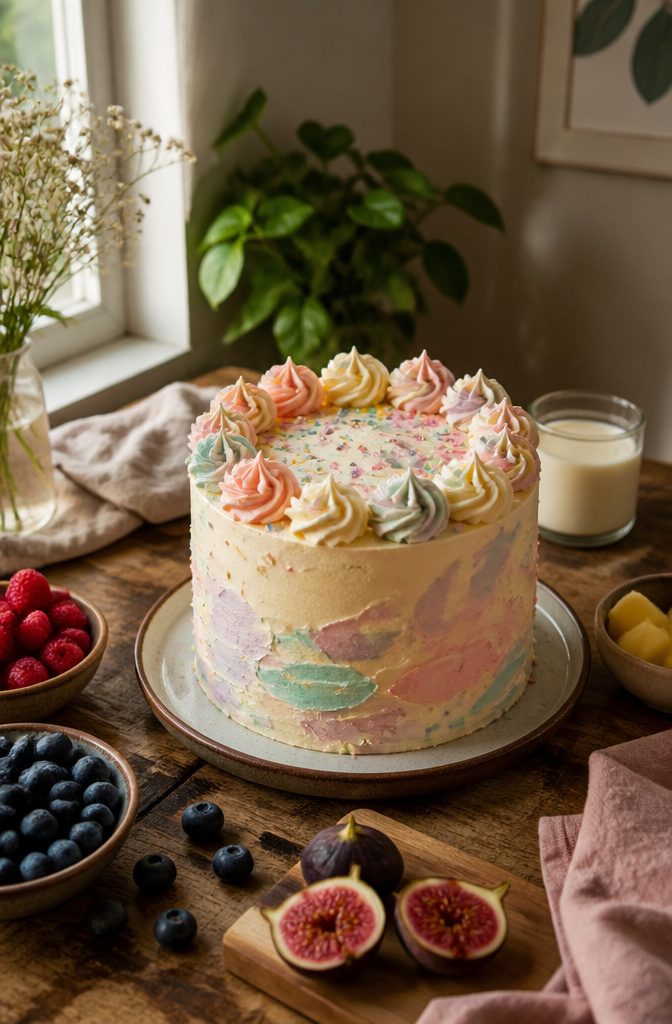
A vegan buttercream pipes and spreads almost exactly like the dairy version, which is why the decorating techniques stay identical.
The swap happens in the base: vegan butter from the stick, not the tub, plus a splash of plant milk to thin, beaten into the same 3 to 4 cups confectioners’ sugar you would use otherwise.
The texture sets up firm enough for rosettes, borders, and even modest lettering if the kitchen is cool.
Whipped coconut cream can stand in for celebrations where the look is rustic and the schedule is short.
It spreads plush and tastes clean, but it softens fast under warm hands and will not hold a sharp peak through detailed work.
For a birthday cake that travels in the car or sits out during present-opening, the vegan butter structure wins on stability alone.

Efficient Cake Decorating Brushes: Spiral design with fine nylon bristles for 360 degree no dead angle cleaning, functions as pip cleaners to remove cream and stains from cake decorating tips effortlessly

【Package Content】The package includes 8 cookie decorating brushes and 2 cooking tweezers, a total of 10 pieces, with various styles and sufficient quantity to meet your DIY cake and cookie decoration needs

Material:Made of nylon bristles and stainless steel handle.
10. Ombre Frosting Bands
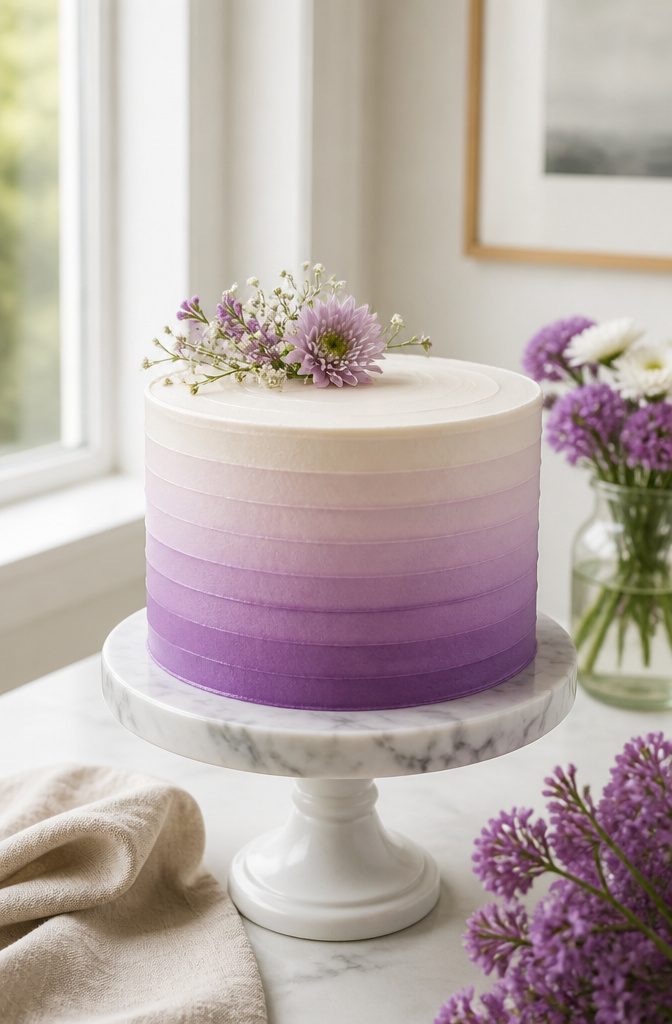
A single color stepped down through white frosting gives you the ombre effect without the hassle of blending two flavors.
Three or four shades are enough; the eye reads the gradient even when the shift is subtle. Mix your base color, then lighten successive batches with straight white buttercream until the last band is barely tinted.
Pipe or spread each shade in a horizontal ring around the cake, working from dark at the bottom to light at the top. The bands do not need to be perfect; the next step hides the edges.
Run your scraper or bench knife vertically up the side, smoothing the bands together so the transition shows on the side wall, not the top edge. One or two passes usually does it; overworking drags the colors muddy.
The technique works with any tinted frosting, though pastels show the gradation more forgivingly than saturated colors. Cleanup is minimal, and the only tool you need beyond a standard offset spatula is a scraper you probably already own.

DELICIOUS CAKE DRIZZLE: This mouthwatering cappuccino coffee-flavored drizzle wonderfully complements the taste of cakes, cookies, donuts, strawberries, and pastries DRIP,...
11. Textured Frosting With a Spoon
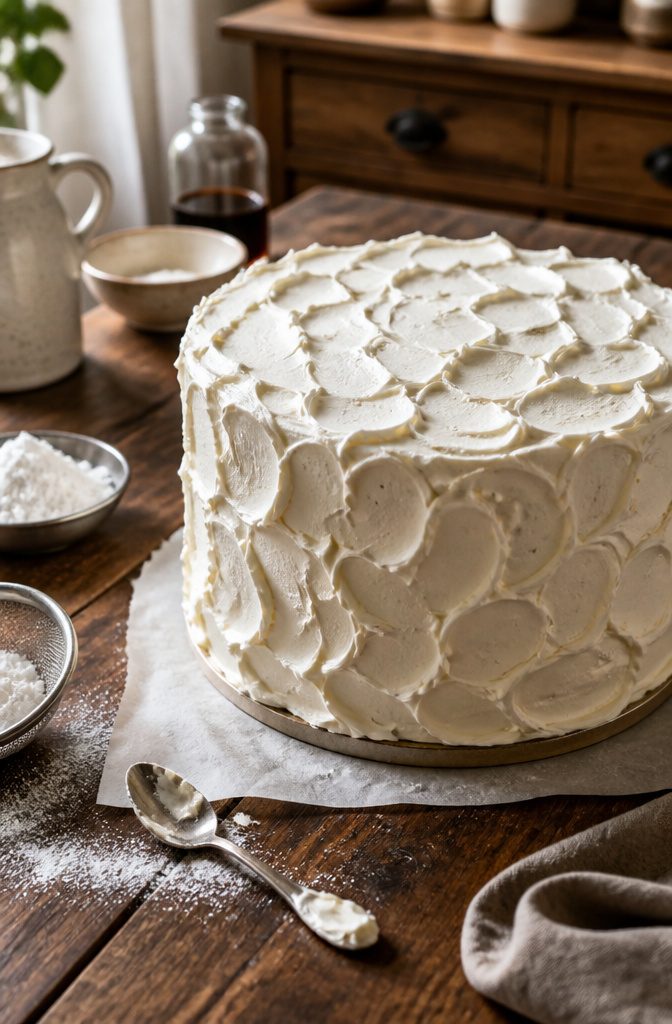
A spoon pressed and lifted through fresh buttercream gives you peaks and valleys that read as intentional, not unfinished.
The motion itself is simple: press the back of a small spoon gently into the frosting, then lift away with a circular swoop. Alternate clockwise and counter-clockwise strokes so the ridges catch light differently across the surface.
Work from the center outward in concentric circles, and stay loose about it. Any wave that looks off can be redone while the buttercream is still soft; once it crusts, the pattern sets and your window closes.
That forgiving quality is what makes this the fastest finish for a layer cake. You skip both the smoothing struggle and the second coat entirely.
For the sides, the same tool gives different effects. Drag the spoon upward from the base for vertical grooves, or arc it in random directions for a more rustic look.
If you have a turntable, hold the spoon sideways and spin the cake slowly while dragging upward—horizontal grooves wrap clean around.
Either way, a crumb coat first is worth the thirty minutes in the fridge. The texture hides the rest.
12. Sprinkle Border
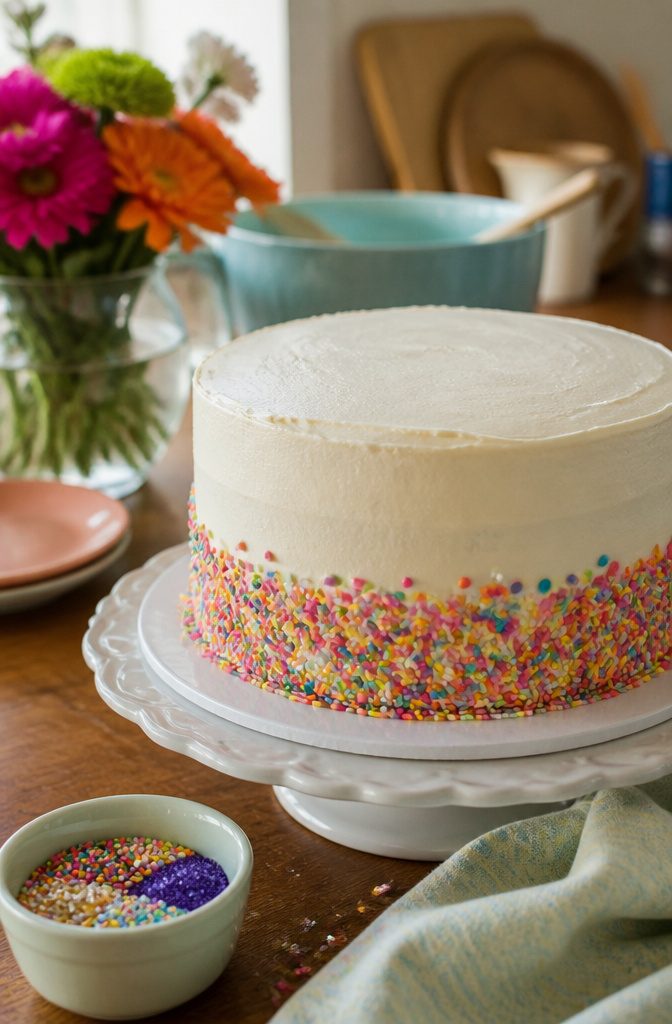
A clean line of sprinkles pressed into fresh frosting covers the mechanics of this border without asking much from the rest of the cake. The plain sides stay plain, so a less-than-perfect crumb coat won’t announce itself.
The technique is simple: frost the cake, then while the buttercream is still tacky, hold a straight-sided tool, something like the back of a spoon or an offset spatula, flat against the edge.
Pour or spoon your sprinkles onto a tray underneath, set the cake on it, and roll the cake so the tool presses sprinkles into the frosting at the base or top rim.
A turntable keeps the line even; trying to rotate the cake by hand tends to wobble the tool and leave gaps.
The tray catches what falls, which matters more than you’d think, a scatter of nonpareils on a kitchen floor has a way of migrating to every room in the house.
Mixing shapes and sizes, rounds with rods or quins, gives the border more depth than a single variety would.
Control is the only catch: the more different sizes in the mix, the harder it is to keep the line uniform. I prefer one dominant size with a smaller accent scattered through, enough variation to catch light without looking chaotic.
13. Homemade Stencils
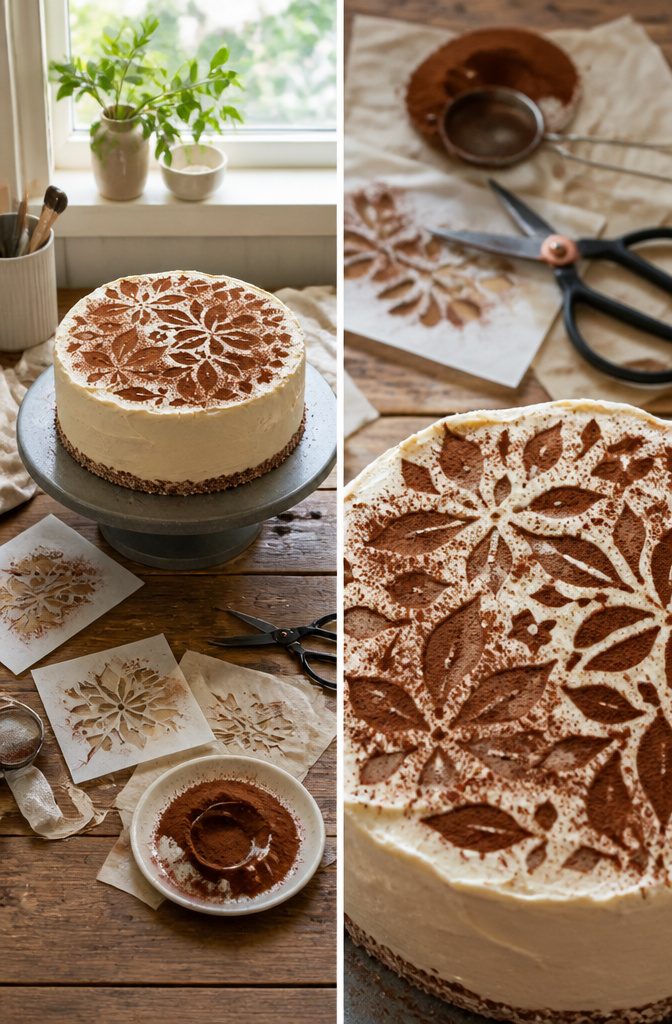
A homemade stencil turns parchment paper and a pencil into a pattern you can shift from cake to cake.
Draw your shape, cut the center out by poking one scissor blade through a starter snip, and leave the surrounding paper intact. That outer ring is what wraps around the frosting.
The timing matters more than the shape. Refrigerate the crumb coat for 20 minutes so the buttercream sets but stays slightly soft, not the hard shell you’d get from a full hour or more.
Lay the stencil flat, dust with cocoa powder or spray with colored mist, and lift straight up.
The pattern holds because the surface is cold enough to not smudge and soft enough to release cleanly. Wait too long and the stencil sticks; rush it and the frosting dents.
For texture instead of color, spread a thin layer of buttercream over the stencil and drag a spoon upward. Peel the paper before the final chill, since cold buttercream is forgiving if you need to scrape away a stray mark.
14. Number Cakes for Birthdays
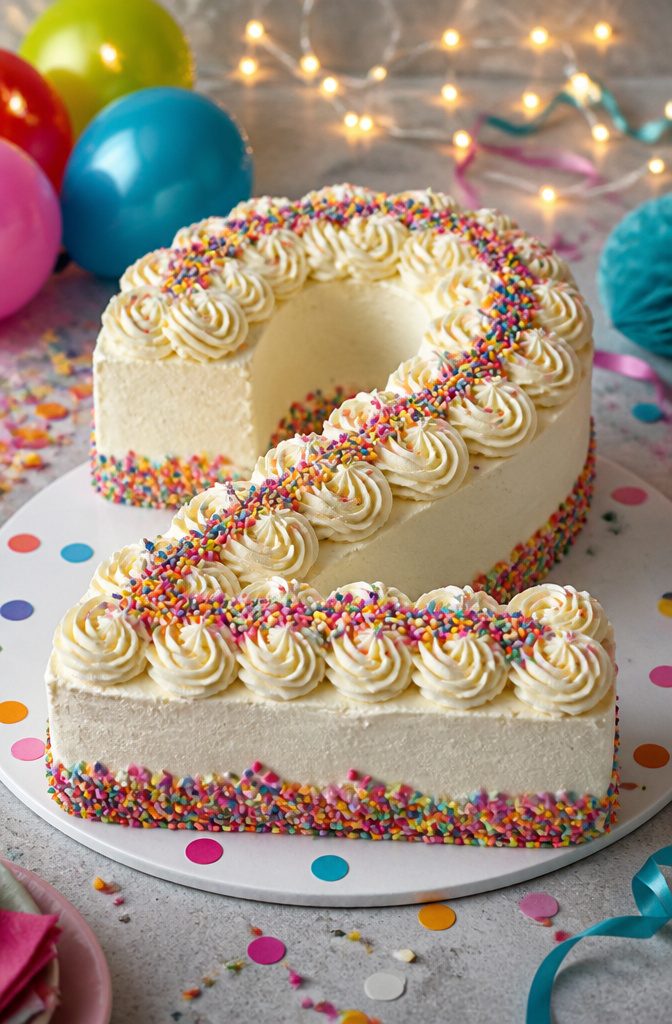
Number cakes work best when you need a clear shape without carving a round cake into something unrecognizable. Bake two matching layers in a shaped pan or cut them from a sheet cake with a paper template.
The exposed edges are crumb-heavy, so spread a thicker layer of frosting on the sides than you normally would to seal them in before you decorate.
Buttercream holds up here better than softer frostings like whipped cream, which will compress under the weight of the top layer.
Pipe with a 1A round tip for clean dots, or switch to a star tip for rosettes or swirls. Plain white looks classic, though tinted buttercream works just as well.
Press candies, small cookies, or fresh fruit into the surface while the frosting is still fresh.
The finish looks polished and intentional with almost no technique required. A cake board the same size as the layer makes the whole thing easier to move and rotate while you work.
15. Cake Decorating With Kids
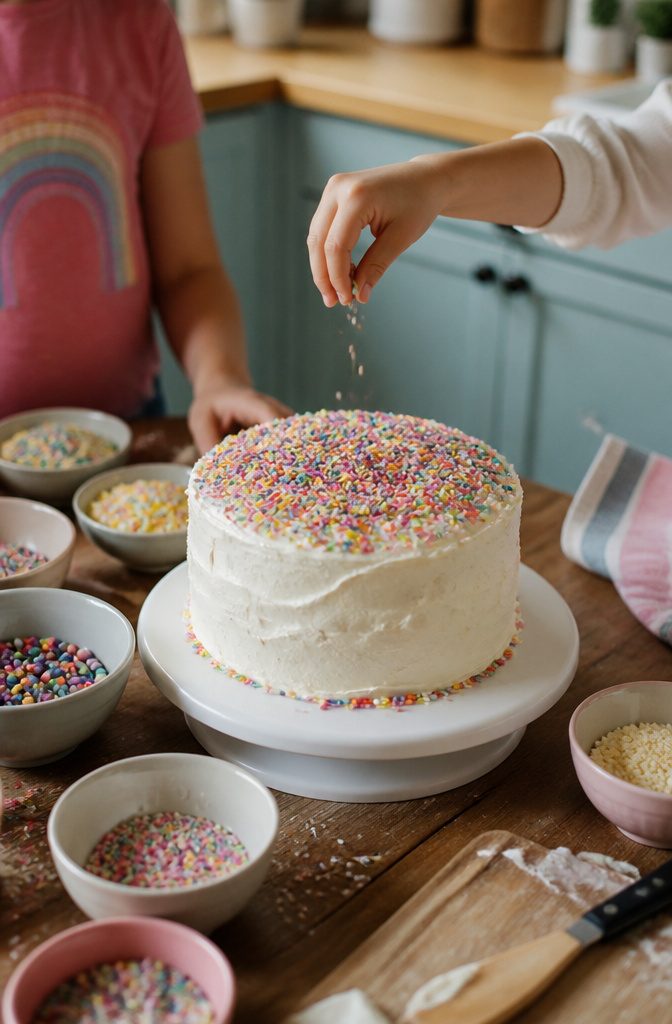
The techniques that actually work with small hands are the ones that forgive a wandering line. Sprinkle application is the clear winner: a child can scatter them thick or thin, and the cake looks finished either way.
Pressing a cookie cutter into freshly set frosting leaves an indent guide they can trace with an edible marker, which covers far more ground than piping ever could with uneven pressure.
I finish the base coat myself, cold. Chilled buttercream is more forgiving than warm if a small finger leaves a dent, and a crumb coat from the refrigerator gives the sprinkles something to grip.
The turntable comes off the counter or gets locked in place; a spinning platform is an accident waiting to happen.
What I hand over is a stable, smooth surface and a narrow task: scatter here, draw inside that outline, press gently.
The activity lasts ten minutes, which is about the horizon of a child’s decorating patience, and the result still looks like a cake you meant to serve.
16. Frosting Transfers
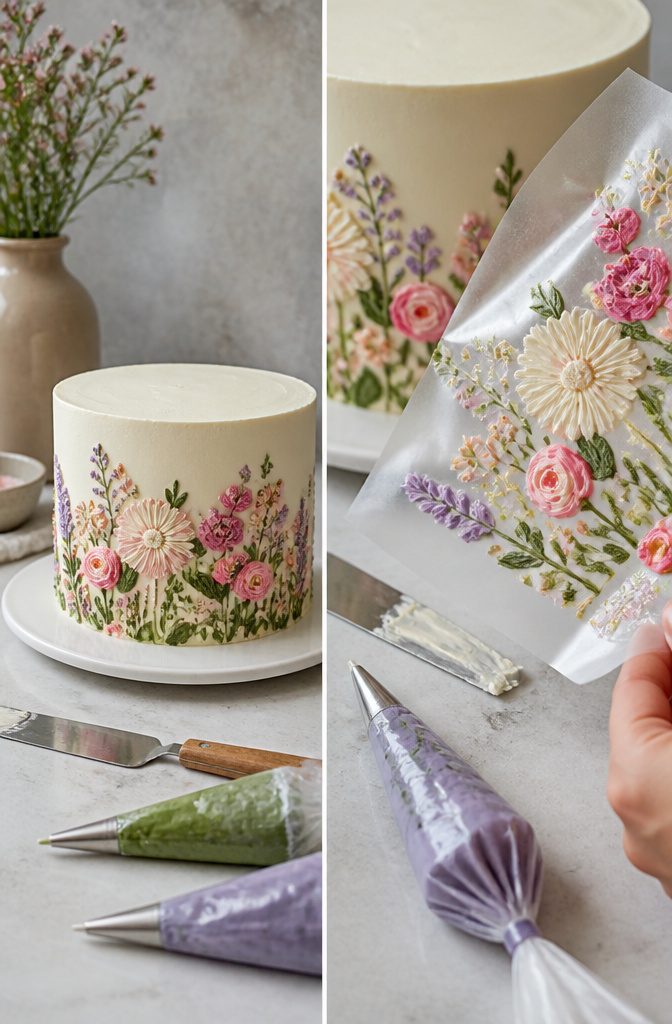
Frosting transfers let you put a printed image on a cake with the precision most freehand piping lacks.
You tape the printout behind a piece of glass from a small picture frame, then tape wax paper on top so you can trace the design with buttercream.
The image ends up reversed on the finished cake, so any words need to be printed as a mirror image; pictures carry over fine either way.
The frosting itself has to be butter-based.
Margarine or shortening won’t set hard enough in the freezer. Mix it on low speed until just evenly combined.
Do not whip it. Air bubbles trapped in the frosting will crack the transfer when you peel it away from the wax paper.
If the consistency is off, thin it with milk a tablespoon at a time or stiffen it with more confectioners’ sugar, but keep that mixer low.
Build the design to about a quarter inch thick so it holds together when frozen. Once solid, you peel the wax paper back and press the transfer directly onto the cake surface.
The bottom layer you traced becomes the top layer that shows, so plan the order of colors in reverse. It takes patience and a flat shelf in your freezer, but the result looks far more polished than most beginners expect.
17. Cookie Crumble Top
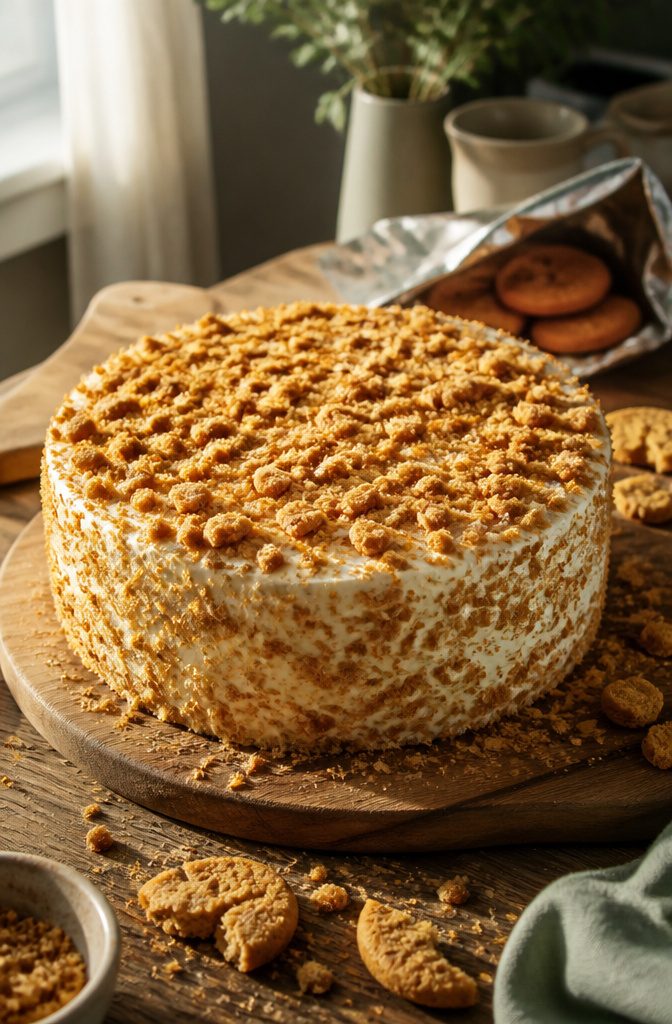
Crushed store-bought cookies pressed into fresh buttercream cover every flaw and take under five minutes. Oreo crumbs give a dark, speckled look that reads bakery-case intentional.
Graham crackers lean nostalgic and pair naturally with vanilla or honey frosting. Ginger snaps add warmth and a faint sheen from their sugar content, though they soften faster and work best if the cake is served that day.
The timing matters: buttercream sets surprisingly fast, so press the crumbs immediately after frosting while the surface is still tacky. Cup the crumbs in your palm and press upward into the top edge, then work down the sides in sections.
A rough spatula finish beneath the crumbs disappears completely, which makes this the design I reach for when a layer has cracked or domed more than I planned.
No extra tools, no smoothing marathon, and the crumbs travel well without smudging.
18. Fresh Fruits
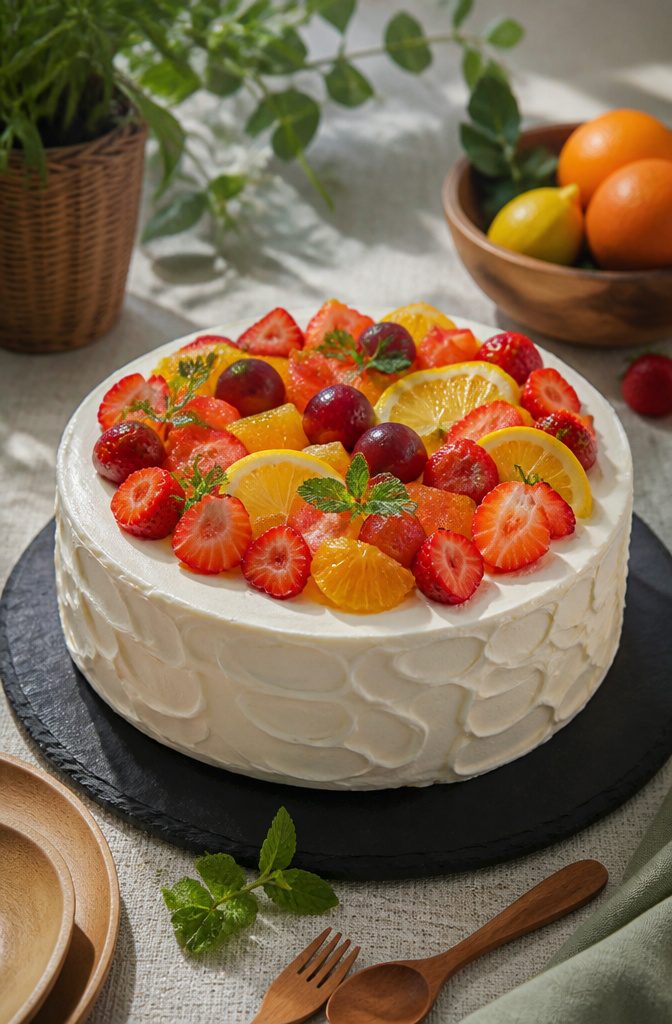
Fresh fruit makes a cake look finished in about five minutes, which is why I reach for it when time is short and the gathering is casual.
Berries, citrus wheels, or halved figs arranged on a swirled buttercream base read as intentional without requiring a piping bag or a steady hand.
Moisture is the problem. Fruit juices bleed into frosting within an hour, softening the finish and leaving dark streaks on pale buttercream.
A thin layer of apricot glaze brushed over the fruit acts as a seal, or you can pipe a thick buttercream dam around the cake’s edge and fill the center with fruit so the juices stay contained.
Either approach buys you the afternoon.
Wash the fruit and dry it thoroughly; even a few drops of clinging water will make berries slide off a vertical surface.
I have seen a carefully placed raspberry roll halfway down a cake side because someone skipped the paper towel step.
This is a same-day move.
Fruit looks brightest at room temperature, and refrigeration dulls the sheen and firms the flesh into something less pleasant to bite. For a Saturday evening dinner, assemble it Saturday afternoon.
19. Edible Markers
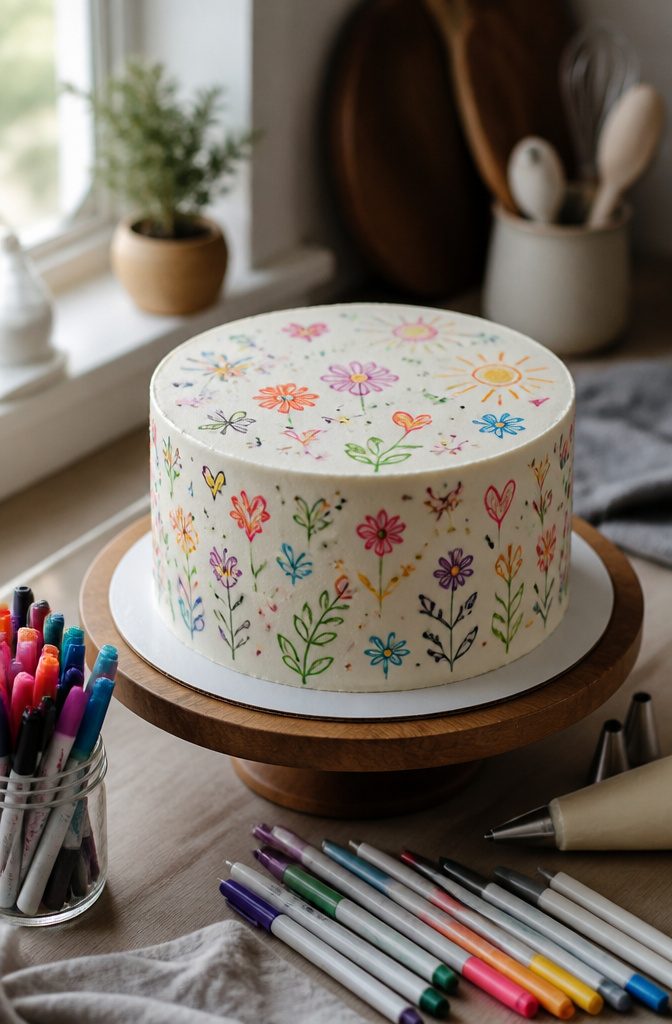
Edible markers are the fastest way to add a name or a small detail without loading a piping bag.
The surface has to be dry; fresh buttercream drinks the ink and feathers the line into a bruise-gray smear. Fondant that has set for an hour, or a crusted Swiss meringue, gives the clean stroke you are after.
I keep a black and a brown marker in my kit for last-minute fixes.
A crooked scroll pattern, a dot that landed off-center, a thumbprint in the wrong place, a marker covers it in seconds where re-piping would mean starting the whole element over.
The color range is narrower than gel pastes, so I do not reach for them when the design needs to match a specific party palette.
For writing "Happy 8th" or drawing a simple eyelash on a fondant animal, they win on speed alone.
The nib wears down with pressure, so I let the ink flow rather than pressing like a ballpoint. Replace the cap immediately; these dry out faster than supermarket markers and cost more per pen.
20. Chocolate Decorations
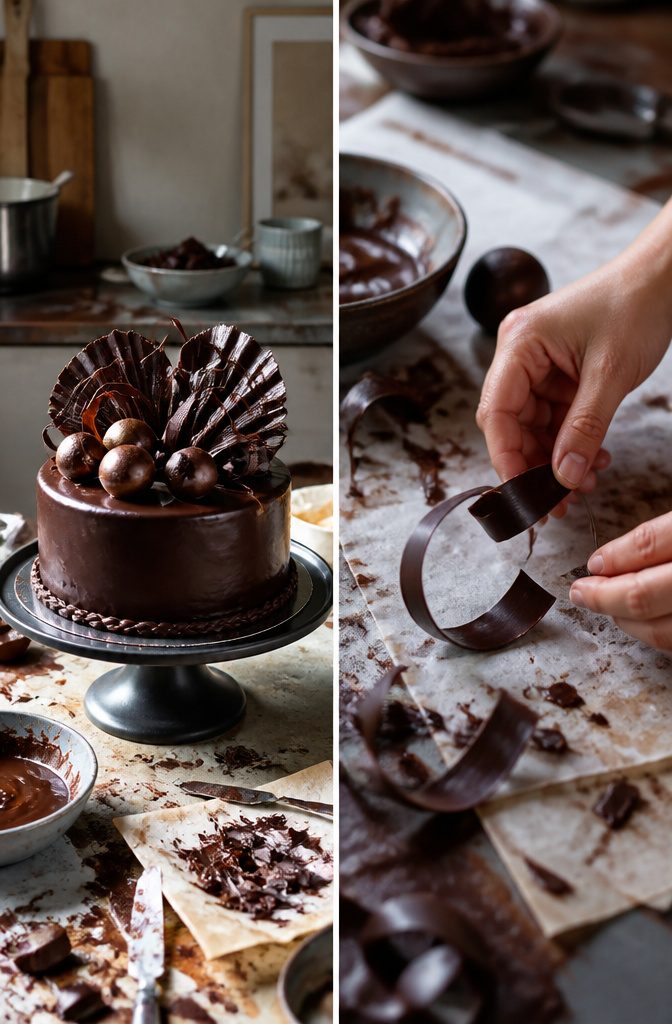
Melted chocolate piped or spread on parchment in shapes, then peeled when set, gives you make extra; they break easily.
That snap and gloss comes from tempering, but simply melting and cooling works fine for home use. I go the simpler route unless I am serving the cake to someone who knows chocolate work.
Stand them upright in a thick buttercream or lay flat on top.
For upright pieces, the frosting needs to be fresh and soft enough to grip, then set firm enough to hold. Flat pieces are more forgiving; you can place them just before serving.
Parchment paper is the surface you want, not wax paper.
Chocolate releases clean once it contracts slightly as it cools. If the room is warm, a few minutes in the refrigerator firms them fast without blooming.
Frequently Asked Questions
How do you frost a cake smoothly?
Apply a thin crumb coat first and refrigerate until firm, roughly 30 minutes. Cold cake sheds far fewer crumbs, so the final layer goes on cleaner.
Smooth the top with an offset spatula held at a shallow angle, and smooth the sides with a bench scraper or offset spatula while rotating the cake on a turntable.
Can you use whipped cream instead of buttercream?
Whipped cream works for a rustic look and short schedule, but it softens fast under warm hands and will not hold a sharp peak through detailed work.
For a cake that travels or sits out, vegan buttercream or standard buttercream wins on stability alone. Italian meringue is another light alternative that pipes better than whipped cream.
How do you decorate a cake with fresh flowers?
Use safe edible choices like roses and pansies that have not been sprayed.
Wash them in cold water, pat dry, and cut stalks to about three inches. Insert a drinking straw into the cake first, then slide the stem inside; the straw blocks the stem from weeping into the frosting.
For a fuller cluster, band a few stalks together and treat them as one unit in a single straw.